


Chapter Two : Installing Your MegaRAC G2 Card
11
Step 8 Install the American Megatrends MegaRAC G2 Windows Host
Components
American Megatrends
MegaRAC G2
Windows Host Components
is a collection of four
MegaRAC G2 host-side components. These programs are briefly explained in the
following table:
Program
Description
G2 Mouse Booster
The G2 Mouse Booster program allows you to speedup the cursor on the host system when
you use mouse redirection during
Console Redirection
.
G2ConfigApp
The
G2ConfigApp
program allows you to configure the MegaRAC G2 card from the host
system or from a client system.
WinCuri
The
WinCuri
program is a command prompt-based program that you can use to configure the
MegaRAC G2 card. It allows you all the functionality of both the Internet browser-based
Remote Access Companion for MegaRAC G2
and the
G2ConfigApp
program.
MegaRAC G2
Server Heartbeat
The MegaRAC G2
Server Heartbeat
is installed as a service in Windows. It is used to tell
whether the operating system on the host system is operating or not. It can also detect whether
the operating system was shutdown normally or abruptly.
Follow the steps outlined in the following table to install the American Megatrends
MegaRAC G2
Windows Host Components
:
Step
Description
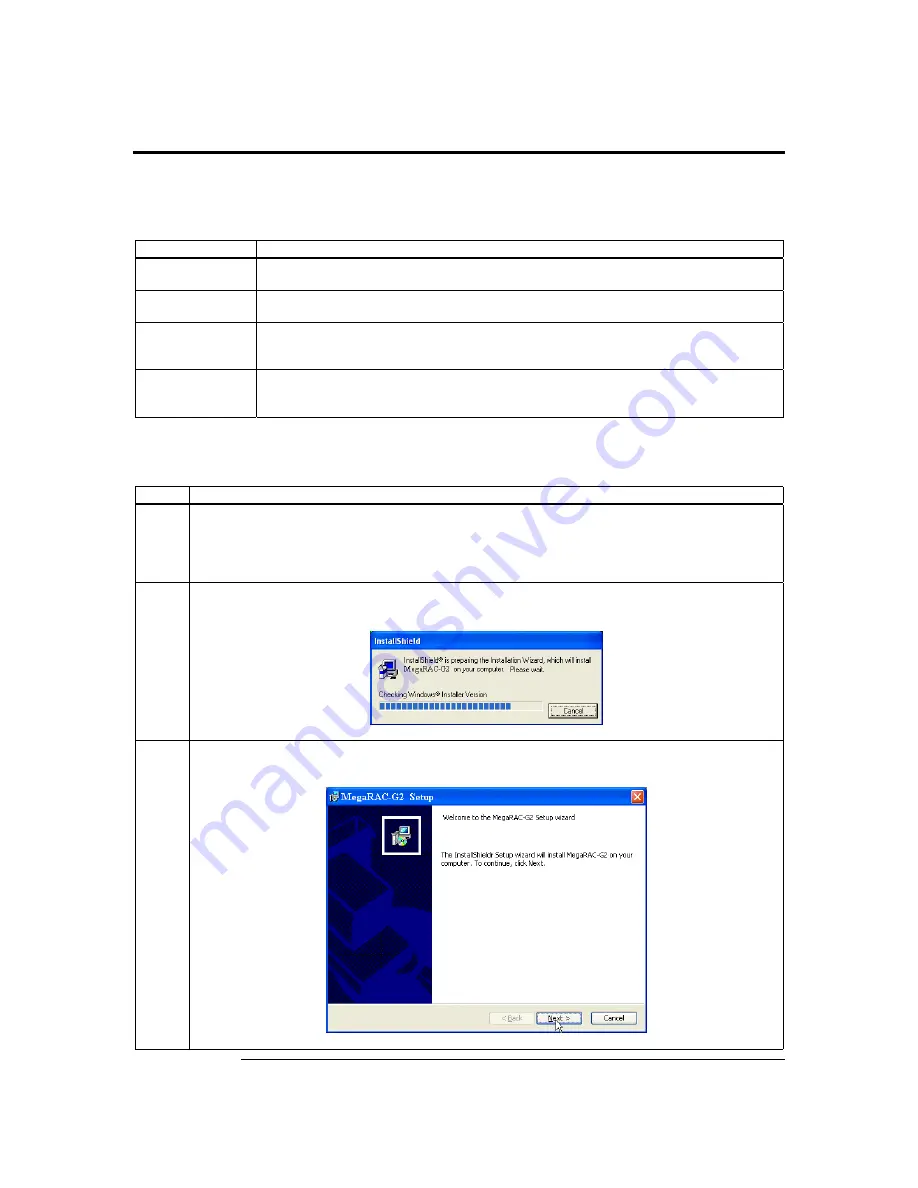
1
Insert
your MegaRAC G2 CD
into the host system. The host system is the system that has the MegaRAC
G2 card installed into it. Browse to the following folder and file:
CDROM\HostSide\Win32\Setup.exe
2
Double left click the
Setup.exe
icon to begin the installation of the American Megatrends MegaRAC
G2
Windows Host Component
.
3
The American Megatrends MegaRAC G2
Windows Host Component
setup window opens. Left click the
Next
button.
Cont’d
Summary of Contents for MegaRAC G2
Page 1: ...MegaRAC G2 User s Guide MAN 827 03 03 03 ...
Page 10: ...MegaRAC G2 User s Guide x ...
Page 36: ...MegaRAC G2 User s Guide 26 ...
Page 44: ...MegaRAC G2 User s Guide 34 ...
Page 120: ...MegaRAC G2 User s Guide 110 ...
Page 134: ...MegaRAC G2 User s Guide 124 ...
Page 136: ...MegaRAC G2 User s Guide 126 ...
Page 150: ...MegaRAC G2 User s Guide 140 ...
Page 160: ...MegaRAC G2 User s Guide 150 ...
Page 162: ...MegaRAC G2 User s Guide 152 Notes ...
Page 166: ...MegaRAC G2 User s Guide 156 ...


