


Chapter 6. Windows Client Port Operation
69
Before you Begin
Discussion of the Windows Client OSD begins on page 72, but the first time
you run the program, you may want to make some display configuration
changes. To do so, Click the curved Arrow icon on the Control Panel at the
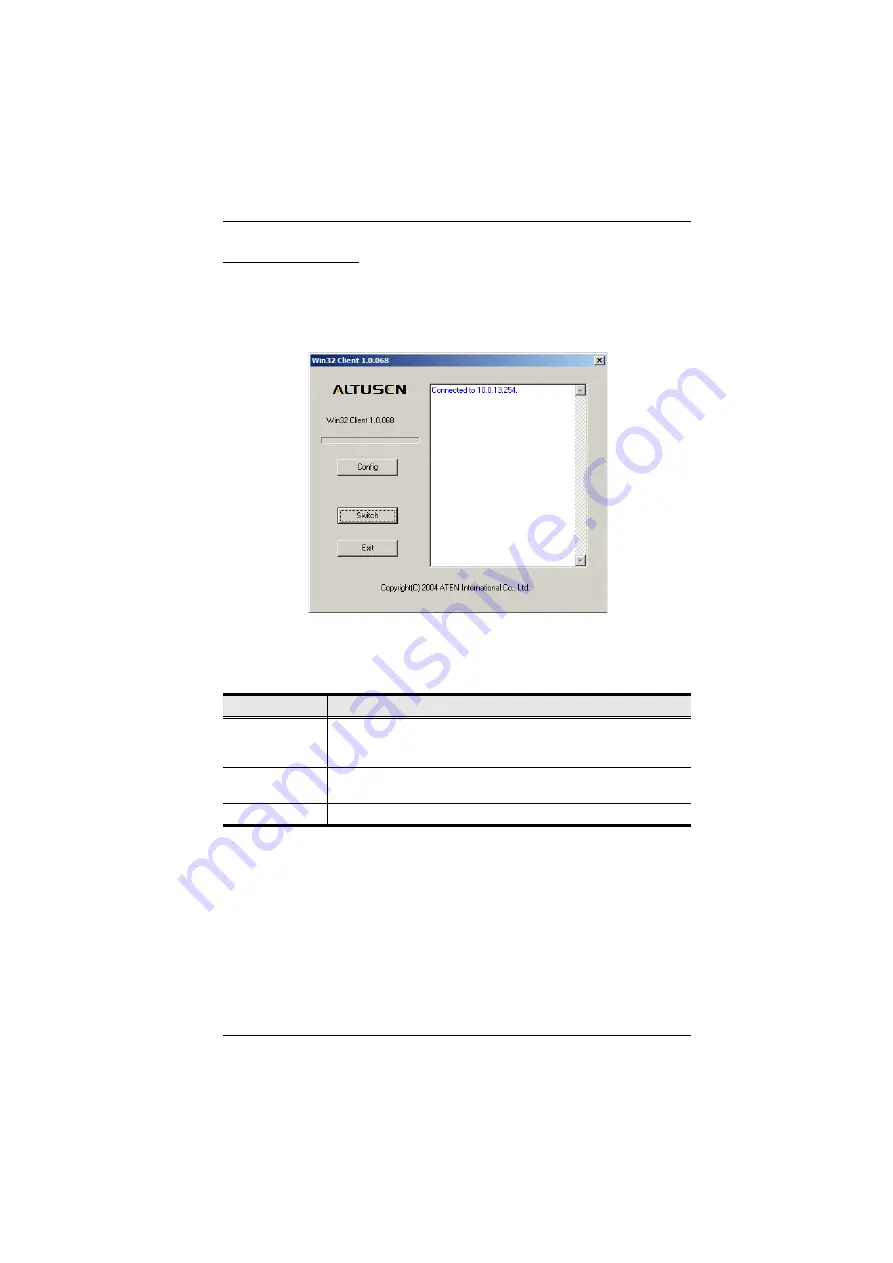
lower right of the remote display. a screen similar to the one below appears
There are three buttons: Config, Switch, and Exit. Their actions are described
in the table, below:
Button
Action
Config
Brings up the
Graphics Configuration
dialog box, which allows you
to set up the graphical environment. The Graphics Configuration
dialog box is discussed in the next section.
Switch
Switches you to the
Windows Client OSD
. The Windows Client
Exit
Ends the program and closes the application.
Summary of Contents for KL9108
Page 1: ...Dual Rail LCD KVM Switch KL9108 KL9116 User Manual www aten com...
Page 12: ...KL9108 KL9116 User Manual xii This Page Intentionally Left Blank...
Page 24: ...KL9108 KL9116 User Manual 12 This Page Intentionally Left Blank...
Page 29: ...Chapter 2 Hardware Setup 17 Single Stage Installation Diagram 5 4 1 2 3...
Page 31: ...Chapter 2 Hardware Setup 19 Two Stage Installation Diagram KH98 KL9116...
Page 32: ...KL9108 KL9116 User Manual 20 This Page Intentionally Left Blank...
Page 42: ...KL9108 KL9116 User Manual 30 This Page Intentionally Left Blank...
Page 72: ...KL9108 KL9116 User Manual 60 This Page Intentionally Left Blank...
Page 78: ...KL9108 KL9116 User Manual 66 This Page Intentionally Left Blank...
Page 104: ...KL9108 KL9116 User Manual 92 This Page Intentionally Left Blank...
Page 114: ...KL9108 KL9116 User Manual 102 This Page Intentionally Left Blank...