11
Chapter 2: Hardware Installation
Overview
Your ALL6501 is designed for easy installation. To help you get started, the following chapter
will help you quickly get your ALL6501 up and running. Please read it carefully to prevent
damaging your unit during installation.
Before You Begin
Before you begin, be sure to take the following precautions:
1.
Read and understand the
Safety Warnings
outlined in the beginning of the manual.
2.
If possible, wear an anti-static wrist strap during installation to prevent static
discharge from damaging the sensitive electronic components on the ALL6501.
3.
Be careful not to use magnetized screwdrivers around the ALL6501’s electronic
components.
Hard Disk Installation
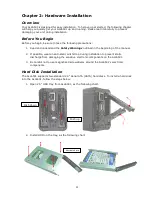
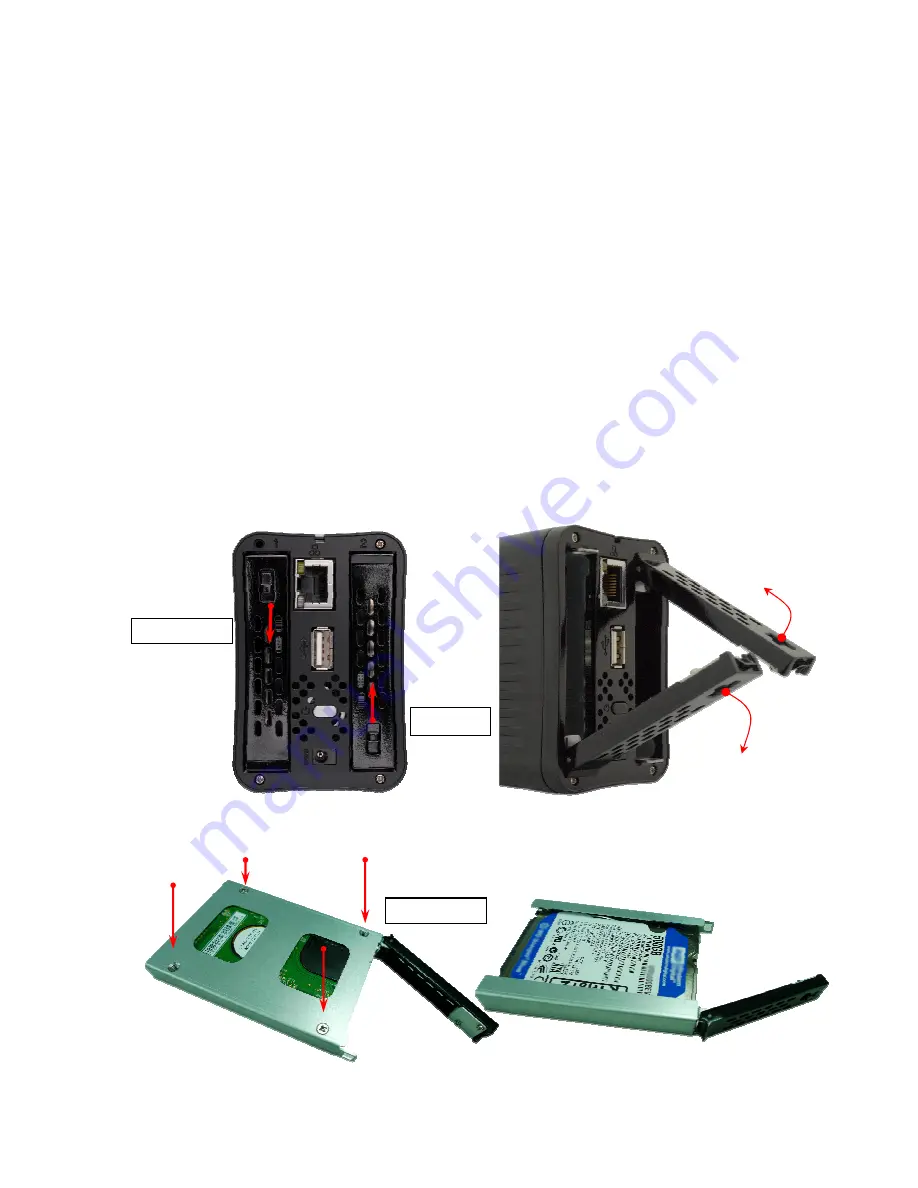
The ALL6501 supports two standard 2.5” Serial ATA (SATA) hard disks. To install a hard disk
into the ALL6501, follow the steps below:
1.
Open 2.5” HDD tray from ALL6501, as the following chart.
2.
Install HDD on the tray, as the following chart:
Push down
Push up
4 screws here

