801805
17
Section 3 Troubleshooting (Dryer)
© Copyright, Alliance Laundry Systems LLC – DO NOT COPY or TRANSMIT
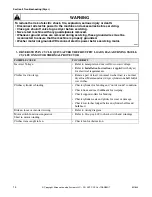
To reduce the risk of electric shock, fire, explosion, serious injury or death:
• Disconnect all electric power to the machine and accessories before servicing.
• Close gas shut-off valve to gas dryer before servicing.
• Never start machine with any guards/panels removed.
• Whenever ground wires are removed during servicing, these ground wires must be
reconnected to ensure that the machine is properly grounded.
• Washer motor not grounded! Disconnect electric power before servicing motor.
W502
WARNING
8. IGNITER DOES NOT GLOW (Gas Supply Sufficient) – GAS DRYER MODELS
9. BURNER IGNITES AND GOES OUT REPEATEDLY – GAS DRYER MODELS
10. IGNITER GLOWS BUT BURNER DOES NOT IGNITE – GAS DRYER MODELS
POSSIBLE CAUSE
TO CORRECT
No power to power leads on valve.
• Check thermostats, motor switch, and wiring.
Sensor failed with contacts open.
• Replace sensor.
Igniter broken or open.
• Replace igniter.
POSSIBLE CAUSE
TO CORRECT
Improper or inadequate exhaust system. Weather
hood flapper restricted.
• Refer to Installation Instructions (supplied with dryer)
for exhaust requirements.
Burner heat not holding sensor contacts open.
• Replace sensor, or correct gas supply problem.
Insufficient gas supply.
• Check gas supply and pressure.
• Make sure gas shut-off valve is turned on.
Cracked igniter.
• Replace igniter and bracket.
Inoperative or intermittent gas valve coils.
• Check coils and replace appropriate coils. Refer to
POSSIBLE CAUSE
TO CORRECT
Sensor failed in closed position.
• Replace sensor.
Open secondary coil or holding coil.
• Replace gas valve (in-warranty), or replace coils (out-of-
warranty). Refer to Paragraph 92.
Insufficient gas supply.
• Check gas supply and pressure.
• Make sure gas shut-off valve is turned on.
Igniter and bracket installed improperly on burner
tube assembly.
• Loosen screw and properly position igniter and bracket on
burner tube assembly.
Sensor installed improperly on burner housing.
• Loosen screw and properly position the sensor on the
burner housing.


