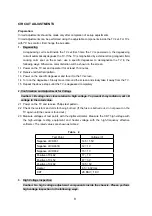
3.1 Connect a precise static high voltmeter to the second anode (inside the high voltage cap) of the
CRT.
3.2 Plug in the supply socket (150-250V ~, 50Hz) and turn on the TV. Set the brightness and
contrast to minimum (0 A).
3.3 The high voltage reading should be less than the limited EHT voltage.
3.4 Change the brightness from minimum to maximum, and ensure high voltage not beyond the
limitation in any case.
Nominal EHT voltage: 28.8KV 1KV Limited EHT voltage: 32KV
4. Focus Adjustment
Caution: Dangerously high voltages are present inside the TV. Extreme caution should
be exercised when working on the TV with the back removed.
4.1 After removing the back cover, look for the FBT on the main PCB. There should be a FCB on
the FBT.
4.2 Power on the TV and preheat it for 15 min.
4.3 Receive a normal TV signal. Rotate knob of the FCB until you get a sharp picture.
Before Adjusting After Adjusting
Fig. 4
5. Safety Inspection
5.1 Inspection for insulation and voltage-resistant
Perform safety test for all naked metal of the TV. Supply high voltage of 3000V, 50Hz (limit
current of 10mA) between all naked metal and cold ground. Test every point for 3 sec. and
ensure no arcing and sparking.
5.2 Requirements for insulation resistance
Measure resistance between naked metal of the TV and feed end of the power cord to be
infinity with a DC-500 high resistance meter and insulation resistance between the naked metal
and degaussing coil to be over 20M .
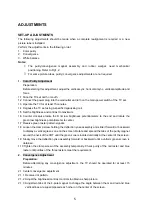
6. SERVICE mode
6.1 To enter the SERVICE mode
Set the volume to 0 by the remote control. Then press and hold the MUTE button on the
remote control and MENU button on the TV at the same time for over 2 seconds. In the S mode,
press the POWER button to quit the S mode.
S
( S is red and other items are yellow.)
9
Summary of Contents for 25CT23FSR
Page 1: ...SERVICE MANUAL Models 25CT23FSR 29CT23FSR www akai ru COLOUR TV SET ...
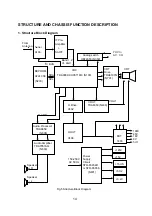
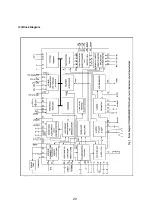
Page 21: ... 3 Block Diagram 7 20 ...
Page 22: ...8 21 ...
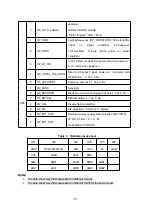
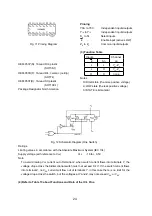
Page 23: ... 4 Pining 5 Refer to Table 12 about Functions and Data of the IC s Pins 9 22 ...
Page 31: ... 2 Circuit Block Diagram Dwg MK 003 50mm Fig 18 Fig 17 3 Pin Configuration and Functions 30 ...
Page 46: ...CIRCUIT DIAGRAM JUC 820 975 JUC 820 591 JUC 820 725 JUC 820 644 APPENDIX ...


