31
Also refer to "
10.3 Pre-operation checks/Checks
before initial start-up
".
Connect the water supply to the fill valve and open the valve.
Make sure the automatic air purge valve is open (at least 2 turns).
Fill with water until the manometer indicates a pressure of approximately 2.0 bar. Remove air in the circuit as much as
possible using the air purge valves. Air in the water circuit could lead to malfunction of the backup electric heater.
9.5 Adding water
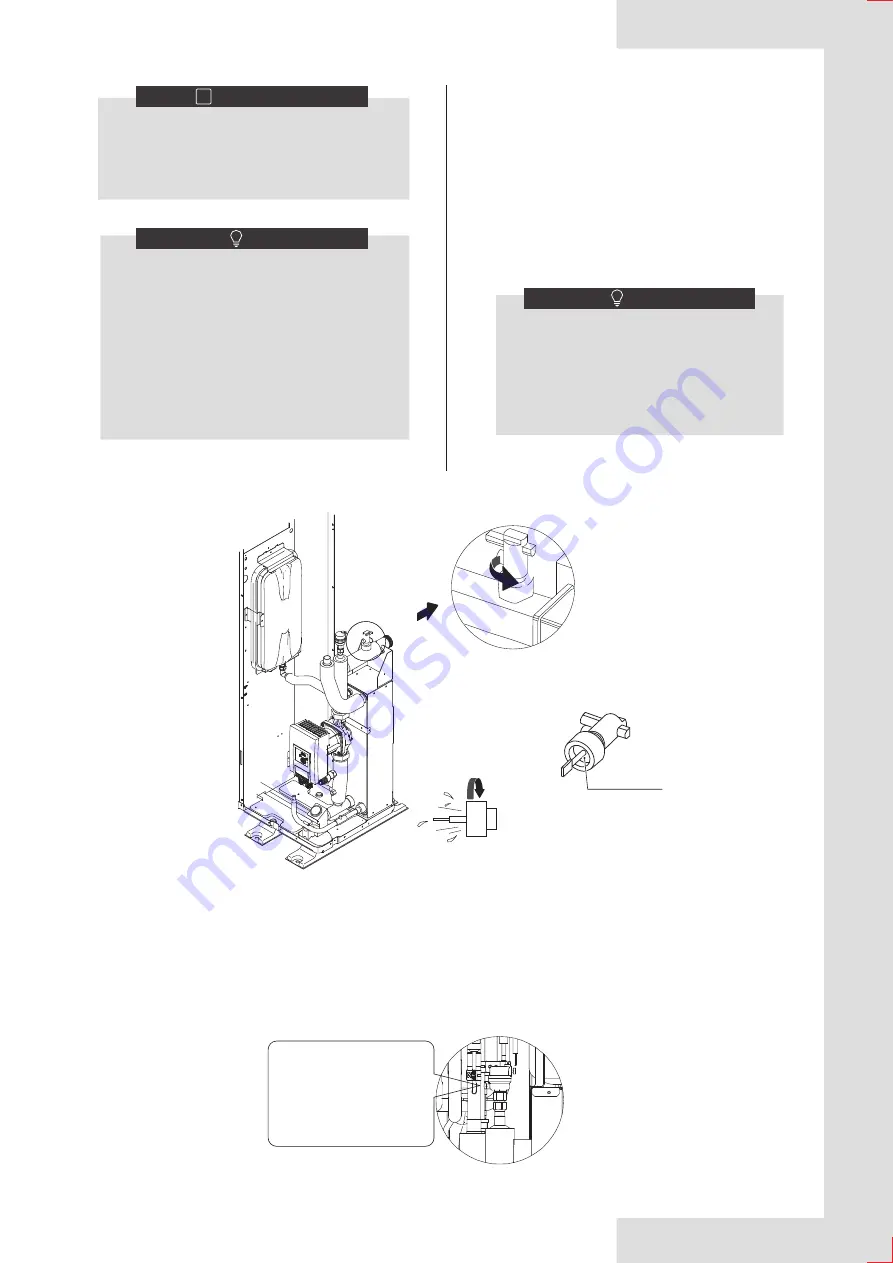
Do not fasten the black plastic
cover on the vent valve at the
topside of the unit when the
system is running. Open air
purge valve, turn anticlockWise
at least 2 full turns to release air
from the system.
▪ Protection against bursting: the glycol will prevent
the piping from bursting, but NOT the liquid inside the
piping from freezing.
▪ Protection against freezing: the glycol will prevent
the liquid inside the piping from freezing.
INFORMATION
i
▪ The required concentration might differ depending
on the type of glycol. ALWAYS compare the
requirements from the table above with the specifica-
tions provided by the glycol manufacturer. If
necessary, meet the requirements set by the glycol
manufacturer.
▪ If the liquid in the system is frozen, the pump will
NOT be able to start. Mind that if you only prevent
the system from bursting, the liquid inside might still
freeze.
▪ When water is at standstill inside the system, the
system is very likely to freeze and get damaged.
NOTE
2. Freeze protection by freeze protection
valves
About freeze protection valves
When no glycol is added to the water, you can use
freeze protection valves to drain the water from the
system before it can freeze.
▪
Install freeze protection valves (field supply) at all
lowest points of the field piping.
Normally closed valves (located indoors near the
piping entry/exit points) can prevent that all water
from indoor piping is drained when the freeze
protection valves open.
▪
NOTE
Water may enter into the flow switch and
cannot be drained out and may freeze when
the temperature is low enough. The flow switch
should be removed and dried, then can be
reinstalled in the unit.
Counterclock Wise rotation, remove the flow
switch.
Drying the flow switch completely.
Keep dry
Summary of Contents for AW-WHPMA18-H93
Page 2: ......
Page 78: ...NOTE...
Page 154: ...REMARQUE...
Page 230: ...HINWEIS...
Page 306: ...OPMERKING...
Page 382: ...NOTA...
Page 458: ...NOTATKI...
Page 459: ...NOTATKI...


