


26
8 – SmartyCam 3 and the PC
As for Firmware Updating, Tracks and Configuration Loading SmartyCam 3 can be configured using the (Micro) SD but, in addition to this
mode, SmartyCam 3 Dual can be configured also connecting it directly to the PC through Ethernet or USB – C connection.
8.1 – Creating SmartyCam 3 configuration
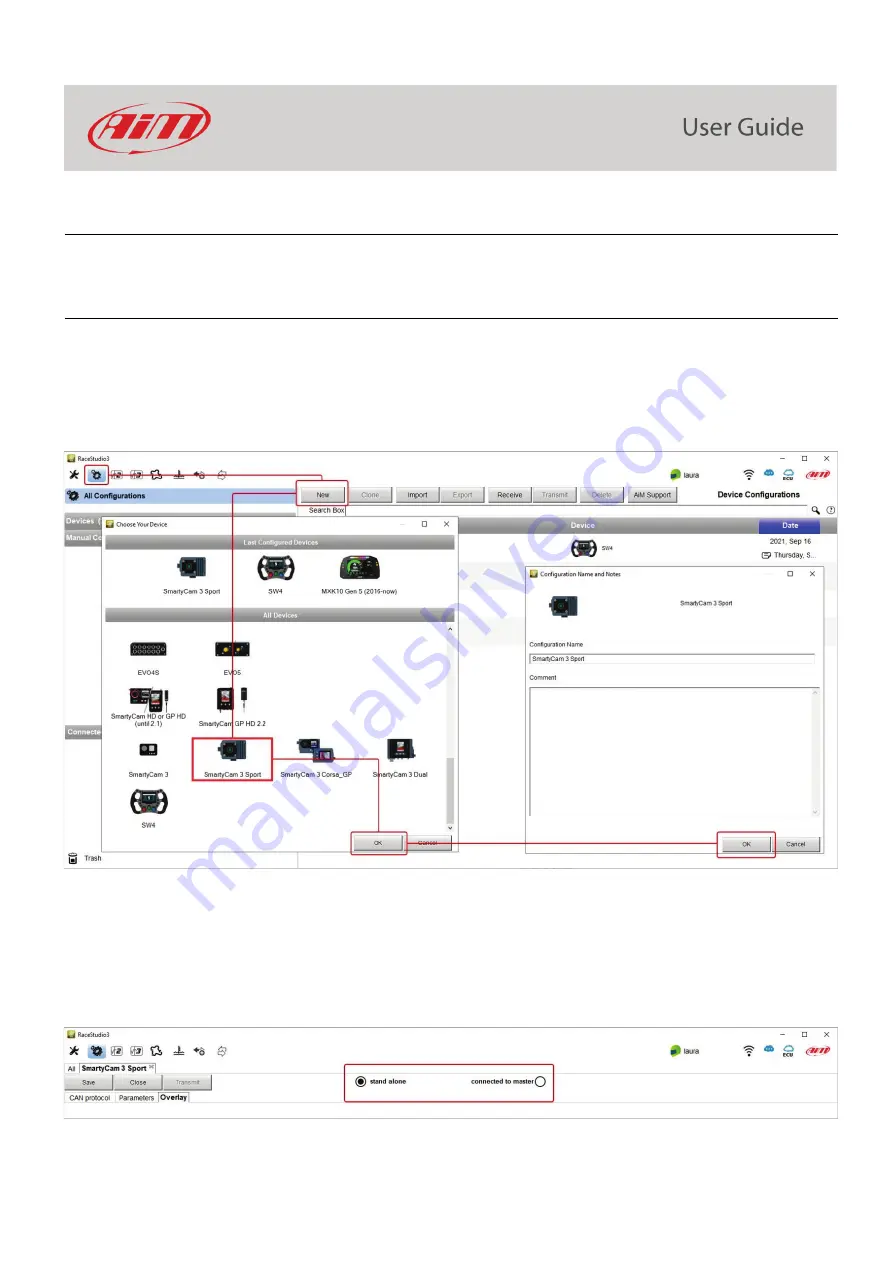
To create SmartyCam 3 configuration:
•
Run Race Studio 3 software
•
press “NEW” to create a new configuration
•
“New configuration” panel appears
•
select “SmartyCam 3”
•
fill in the panel that is prompted and press “OK”
Race Studio 3 software enters directly SmartyCam 3 overlay tab. The tab layout changes according to the camera working mode.
SmartyCam 3 can be:
•
connected to a
MASTER
(any
AiM Logger
): in this case, it must be configured in “
SLAVE MODE
” and will receive all the information
to be shown from the logger
•
Standalone
: in this case it is connected to AiM GPS Module only and will show only GPS data (position, speed, accelerations, Lap
Number, Lap Time)
Summary of Contents for SmartyCam 3 Dual
Page 25: ...25 7 5 Video file This page shows the list of video file stored in SmartyCam 3 Micro SD card...
Page 40: ...40 Video download starts...
Page 43: ...43 SmartyCam 3 Sport dimensions in mm inches...
Page 44: ...44 SmartyCam 3 Sport pinout...
Page 45: ...45 SmartyCam 3 Dual Dimensions in mm inches...
Page 46: ...46 SmartyCam 3 Dual pinout...
Page 47: ...47 SmartyCam 3 Dual Standard harness SmartyCam 3 Dual Standard Ethernet harness...


