background image

24 


2.3.1.9. 

Instructions specific to AGRISEM seeders 


In addition to the instructions applicable to all machines, the user of an AGRISEM seeder must comply 
with the following instructions: 


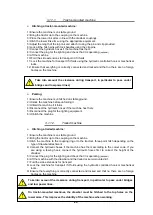
Never  climb  on  the  machine  elsewhere  than  on  the  AGRISEM  walkway  provided  for  this 
purpose. 
Only climb on the machine when it is stopped. 


When  operations  are  performed  on  the  AGRISEM  seeder  or  during  flow  tests,  the  seeder  must  be 
stationary  and  a  50  meter  safety  area  must  be  enforced  around  it.  The  hydraulic  system  must  be 
depressurised  (e.g.  turbine  stopped)  and  the  rear  window  of  the  tractor  must  be  shut,  the  tractor 
switched off and the ignition keys removed. 
 
Ensure that no one is on or near the seeder when the grain is being loaded. The AGRISEM walkway 
must only be used when the seeder is stationary. 
 
Always ensure that the entire area corresponding to the size of the seeder is completely clear. 
 
Never stand under the sun wheel when it is in transport position. 
 
When  testing  the  distribution  flow,  the  user  must  turn  the  sun  wheel  with  care  to  avoid  any  injury. 
When the  wheel is rotating, no  one must be  within  50 meters of the machine. No one must put their 
fingers into the distribution grooves unless the transmission system is completely stopped.  
 
When  changing  the  transmission  gear  ratios,  ensure  the  gearing  and  chain  are  handled  with  the 
greatest care to avoid any injury. No one must be within 50 meters of the machine. Ensure you do not 
put  yourself in danger  when changing the gearing by  avoiding climbing on the beams or disks of the 
machine, as this could be dangerous. 
 
Ensure the sun wheel is protected during transport to avoid it hitting anything or injuring anyone. 
 
When  starting  up  the  turbine,  a  safety  area  must  be  enforced  around  the  machine  due  to the  risk  of 
objects or liquids being ejected (e.g. soil, oil, stones, metal, etc.). 
 
When  travelling  on  the  public  highway,  always  be  very  careful  and  alert.  As  the  rear  visibility  is 
reduced during transport, ensure that the way is clear before reversing the machine (50 meter safety 
area). 
 
The  user  must  comply  with  the  highway  regulations  applicable  in  his  country  with  regard  to  the  the 
front hopper. 
If the tractor’s signalling equipment is not sufficient (or not sufficiently visible) ensure you fit your front 
hopper with lighting and signalling plates. 


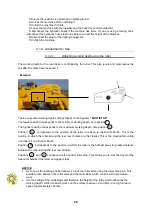
When  working,  a  50  meter  safety  area  must  be  enforced  due  to  the  risk  of 
objects being ejected.


Summary of Contents for DS1100

Page 1: ...44158 ANCENIS CEDEX Tél 02 51 14 14 40 Fax 02 40 96 32 36 NOTT E 601 C 21 11 14 MECHANICAL SEEDERS DS610 DS1100 DS1400 Return the warranty certificate within 15 days together with a copy of the invoice without these elements the warranty procedure cannot be implemented ...

Page 2: ...2 ...

Page 3: ...he manual is an essential accessory which must remain with the machine at all times and that in the event of resale article 1615 of the Civil Code requires that as such it must be handed over to the new owner You are also reminded that as the manual is essential to the machine all owners must undertake to leave it physically available with the machine for all users to consult ...

Page 4: ...4 ...

Page 5: ...5 AGRISEM INTERNATIONAL 535 Rue Pierre Levasseur CS 60263 44158 ANCENIS CEDEX Tél 02 51 14 14 40 Fax 02 40 96 32 36 ...

Page 6: ...6 ...

Page 7: ... referred to above certifies that the new equipment described below MECHANICAL SEEDERS Complies with the measures of the modified Machines directive directive 98 37 CE and with the applicable national legislation Ligné 30th March 2010 Michal GUZOWSKI Chief Executive Officer ...

Page 8: ...afts with universal joints 25 2 3 1 12 Instructions relating to loading and transport 25 2 3 2 Safety symbols on the machine 26 3 TECHNICAL INSTRUCTIONS 27 3 1 ADJUSTMENTS USING THE MECHANICAL DISC O SEM 27 3 1 1 Hitching unhitching 27 3 1 1 1 Tractor mounted machine 28 3 1 1 2 Trailed machine 28 3 1 2 Adjustments Use 29 3 1 2 1 Adjusting working depth using the roller 29 3 1 2 2 Disc O Sem settin...

Page 9: ...9 3 2 6 Disks 43 3 2 7 Lighting system 44 4 WARRANTLY CLARM FORM 45 ...

Page 10: ...pection Transport AGRISEM INTERNATIONAL cannot be held liable for personal injury or damage to equipment and malfunctions resulting from failure to comply with the instructions given by the manufacturer in this manual This user manual is an integral part of the machine and must always be kept with the machine especially in case of resale AGRISEM INTERNATIONAL is constantly seeking to improve its p...

Page 11: ...hydraulic hoses etc even though these parts are also supplied by the Company The warranty is void if any modifications have been made to the machine without the formal agreement of AGRISEM INTERNATIONAL or if parts other than those manufactured by the Company have been fitted e g counterfeit wear parts EXTENT OF THE WARRANTY The warranty is limited to the reimbursement or repair of parts recognise...

Page 12: ...ring transport or handling by a transporter It is the recipient s responsibility to lodge the necessary complaints with the transporter The adverse consequences of the machine being immobilised due to a fault or incident on the machine are not covered by the warranty Personal injury to the owner or third party and the indirect consequences resulting from this are not covered by the warranty Moreov...

Page 13: ... no send photocopy of the invoice C Supposedly faulty parts are to be returned by the dealer to the Company address for expert inspection together with the copy of the warranty claim form provided for this purpose The dealer must order the faulty part from the spare parts department Transport costs incurred by the return of the said parts are at the sender s expense D The final decision regarding ...

Page 14: ...s Modification made to the machine without the written permission of AGRISEM Fitting of spare parts accessories or equipment on the machine which are not genuine or which have not been recommended by AGRISEM Failure to monitor the wear parts on the machine Using the machine other than for the applications specified by the manufacturer Non compliant repair and maintenance Catastrophes resulting fro...

Page 15: ...nes must not be combined with other machines or instruments without prior written permission from AGRISEM INTERNATIONAL For any combination the user must also comply with the instructions given by the tractor manufacturer AGRISEM machines must only be used serviced and repaired by competent persons who are familiar with the features and mode of use of the machine These persons must be informed of ...

Page 16: ...g the machine for the first time read all the safety instructions in this user manual carefully and familiarise yourself with the controls The machine must never be entrusted to a person who is not trained to use it Responsibility and warranty In addition to the other cases mentioned in this manual the manufacturer declines any responsibility for any injury or damage to equipment resulting from on...

Page 17: ...so check the condition of the tools and their fastening elements in accordance with the instructions in this manual While folding and unfolding the machine no one must be within 50 metres of the machine Check that the machine is correctly hitched Always install the pins and locking systems Check that the machine complies with personal safety Check before each time you use the machine that the safe...

Page 18: ...sed load on the coupling point You will find this information on the data plate or on the vehicle s registration papers and in the tractor user manual The tractor s front axel must systematically be able to support at least 20 of the empty weight of the tractor Calculation of the real values of the total tractor weight tractor axle load and the load capacity of the tyres and of the minimum ballast...

Page 19: ... 2 3 1 4 Instructions to respect before using the machine WARNING Risk of accident involving crushing cuts entanglement pinching or impacts linked to a safety fault concerning movement or operation Before starting up check that the machine and the tractor are able to move and operate in complete safety Never climb on to the machine or stand on it when it is moving Never work in reverse Never allow...

Page 20: ... Ensure that the rules for safety and caution required for situation are applied The speed and method of driving must always be adapted to the land roads and tracks On uneven ground or tight corners reduce speed In bends take into account the overhang and the inertia of the mounted tool Avoid sudden changes of direction at all times Do not leave the driver s seat until the equipment has completely...

Page 21: ... at more than 25km hour when under load Clean off any soil sticking to the machine before going out on the road After using the public highway ensure the road is cleaned of any mud left by the tractor and tools When transporting the machine on the public highway the driver owner is fully responsible 2 3 1 5 Instructions to respect before carrying out any operations on the machine In particular dur...

Page 22: ...ices This type of influence may be a source of danger for people if the following safety instructions are not followed If devices and or electrical components are installed and connected to the dashboard electrical circuit at a later date the user must first check that the installation will not disturb the vehicle s electronics or other components Ensure that electric and electronic components sub...

Page 23: ...es to detect any signs of tears or abnormal wear When replacing hydraulic hoses ensure you only use hoses with the characteristics and quality recommended by the manufacturer of the machine After each time the machine is used clean the end fittings of the hydraulic quick connectors and fit protective caps Replace connectors which do not lock correctly or which leak Hydraulic hoses must never trail...

Page 24: ...ithin 50 meters of the machine No one must put their fingers into the distribution grooves unless the transmission system is completely stopped When changing the transmission gear ratios ensure the gearing and chain are handled with the greatest care to avoid any injury No one must be within 50 meters of the machine Ensure you do not put yourself in danger when changing the gearing by avoiding cli...

Page 25: ...ess than three tonnes The transporter carries out the loading chocking securing and unloading of the equipment from when he takes charge of it until its delivery For transportation over three tonnes Loading chocking and securing on the one hand and unloading on the other hand are respectively the responsibility of the contracting party or the recipient The responsibility for equipment damage which...

Page 26: ... when lowering it ETIQ 503 Beware of pinching Risk of serious injury Do not touch the hazardous areas under any circumstances while the tractor engine is running and the universal joint shaft hydraulic circuit or electronic system is operating ETIQ 504 Keep a safe distance from the rear of the tractor during manoeuvres Risk of serious injury Warning never exceed a maximum air pressure of 60mbar as...

Page 27: ...actor s three point hitch are adjusted to the same dimensions The tractor tyres are inflated to the same pressure The tractor is adapted to the tool to be hitched and is weighted appropriately The tractor connections are adapted to the tool to be hitched When hitching do not exceed The total authorised weight for the tractor The permissible load capacities of the tyres mounted on the tractor The a...

Page 28: ...ug for the lighting equipment 6 Unhitch the machine 3 1 1 2 Trailed machine Hitching a trailed machine 1 Ensure the machine is on stable ground 2 Bring the tractor up to the coupling on the machine 3 Hitch the machine to the coupling ring or to the tractor s three point hitch depending on the type of drawbar attachment 4 Connect the hydraulic hoses if the machine has them according to the colour c...

Page 29: ...st position corresponds to the maximum working depth here position 15 Position A corresponds to the position of the roller in relation to the Disc O Mulch This is the position in which the roller kit and the rear row of disks are the closest This is the standard mounting of a roller kit on a Disc O Mulch Position B corresponds to the position in which the roller is the furthest away for greater di...

Page 30: ...ar roller with the help of the multi stops 3 1 2 3 Disc O Sem settings for soft ground On soft ground the pressure of the Disc O Sem on the tractor s top link can render the machine unstable You should therefore modify the settings of the machine Disconnect the tractor s top link from the Disc O Sem You must then adjust the working depth of the 1st row of disks accurately using the tractor s 3 poi...

Page 31: ...es 1 2 and 3 Empty the seed from the hopper into the trough fully opening the hatches figure 4 To move the drum from WIDE pitch to NARROW pitch the batchers must be clean Once the batcher pitch and the opening of the moveable base have been adjusted the flow of seed to be distributed will depend on the speed of the batcher drums The speed variator allows you to sow accurately from 0 to 600kg ha Sm...

Page 32: ...r is in position 1 ALL the tongues must be resting on the groove without forcing 3 1 2 6 Batcher calibration Check that the batchers are open and the hatches are not closing the seed pitch Before filling the hopper connect the agitator bushing to the variator spindle and check beforehand that there is nothing in the hopper Adjust the batcher position lever to the right A WIDE pitch for wheat barle...

Page 33: ... carry out a batcher test Slide the tube lowering support bar G forwards releasing the levers H holding it in its working position Turn the SUN wheel a few times until the seed starts to fall into the trough Remove the seed and then turn the sun wheel the required number of times according to the width of the seeder Recover the seed and weigh it Multiply the result by 40 to obtain the flow rate pe...

Page 34: ...A second test must therefore be carried out 3 1 2 8 Flow rate test 3 1 3 Metering table for the DS610 and DS1100 The quantities given in the table are for information only they may vary due to dust humidity or if the densities are different For accurate sowing please refer to the table in page 35 METERING TEST N B A small seed requires a smaller opening than a large seed A round seed requires a sm...

Page 35: ...35 3 1 3 1 Seed metering table kg ha ...

Page 36: ...midity or if the densities are different For accurate sowing please refer to the table in paragraph 4 METERING TEST N B A small seed requires a smaller opening than a large seed A round seed requires a smaller opening than an elongated seed A heavy seed requires a smaller opening than a light seed 3 1 4 1 Seed metering table kg ha ...

Page 37: ...ectly and that the tongue springs are correctly calibrated Flow rate test Check that no metered seed remains stuck in the pipes during the test Sun wheel drive Ensure that the number of rotations of the sun wheel over 100m corresponds with the number given in the metering table The seed does not run from some of the drill elements Tube or hose tilt Try to reduce bends as far as possible to facilit...

Page 38: ...ncy is determined by various factors Thus different usage conditions the weather driving and working speeds dust and the type of soil etc affect the frequency and the lubrication and maintenance products used also determine the time until the next servicing work is required The servicing frequency indicated is therefore only to be used as a reference If you deviate from the normal conditions of us...

Page 39: ...lubricants and mineral products in line with the recommendations does not represent any risk to health However avoid prolonged contact with the skin or inhaling the vapours Handling lubricants WARNING Protect yourself from direct contact with oils by wearing gloves or protective cream Carefully wash all traces of oil off your skin with soap and hot water Do not clean your skin with petrol diesel o...

Page 40: ... two self aligning bearings with greasers To ensure the self alignment operates correctly the bearings must be greased at the start of each new season and then regularly throughout the season Use lithium grease reinforced with molybdenum disulphide Grade NLG12 AGRISEM INTERNATIONAL may not be held liable if another type of grease is used The following points must be lubricated regularly Narrow wid...

Page 41: ...mal for hoses and connectors to age which is why they have a limited storage time and service life Nevertheless the duration of use can be established in line with empirical values in particular taking into account potential risks Other reference values can be taken into consideration for thermoplastic hoses and pipes Dispose of used oil in accordance with current regulations If this poses a probl...

Page 42: ...ttened There are no external mechanical actions on the hydraulic hoses Avoid hoses rubbing against parts of the machine or against each other by arranging and attaching them correctly Protect hydraulic hoses with protective sheaths if necessary Cover parts with sharp edges The authorised bending radius are not exceeded If hydraulic hoses are connected to moving parts measure the length of the hose...

Page 43: ...L cannot be held liable if the DISC O SEM is used with disks showing wear greater than that specified above AGRISEM INTERNATIONAL cannot be held liable if the DISC O SEM is used with disks showing wear greater than that specified above Disk diameter Maximum wear diameter Ø 460 Ø 400 Ø 510 Ø 440 Ø 560 Ø 480 Ø 610 Ø 520 ...

Page 44: ...to remove the lighting board when using the DISC O SEM in the field As the lighting board is designed solely for transport AGRISEM INTERNATIONAL cannot be held liable if the lighting board breaks due to being used during work Using the DISC O SEM correctly ensures work on crops takes place safely under optimum conditions It is the user s responsibility to decide and assume sole responsibility for ...

Page 45: ...45 ...

Page 46: ...46 ...

Page 47: ...47 ...

Page 48: ...48 ...

Page 49: ...49 ...

Reviews:

Related manuals for DS1100