


SA (Spectrum Analyzer) Mode
105
o
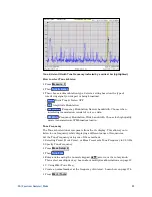
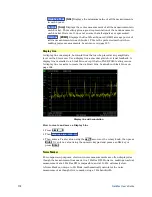
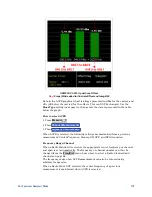
Gate Width
Set the width of the gating area within the non-zero span
window. The gating area is indicated by two vertical green lines. Enter a
value using the numeric keypad, the
▲|▼
arrows, or the rotary knob.
o
Gate Delay
Effectively moves the gating area left (negative delay) or right
(positive delay) relative to the trigger event. Enter a value using the numeric
keypad, the
▲|▼
arrows, or the rotary knob.
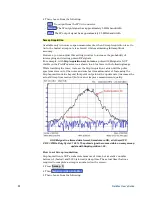
When you have properly setup the Gate Trigger, Width, and Delay using the Gate
View measurement, you can turn
Gate View OFF
to return to the full screen non-
zero span measurement with FFT Gating ON, the RBW set, and the Trigger
settings active.
Single / Continuous / Restart
NOTE
The following behavior is unique to SA Mode.
This setting determines whether the FieldFox measures continuously or only
once each time the
Single
or
Run / Hold +/-
button is pressed. Use
Hold /
Single
or to conserve battery power or to allow you to save or analyze a specific
trace.
How to set Single or Continuous
Press
Sweep 3
.
Then choose one of the following:
o
Continuous
o
ON
Causes the SA to make continuous sweeps. This is the typical setting
for making measurements. Each
Run / Hold +/-
press causes the SA to
toggle between continuous sweep and Hold.
o
OFF
Causes the SA to Hold. Each
Run / Hold +/-
or
Single
press causes
the SA to make ONE sweep, then Hold. The
Hold
annotation changes to
an arrow
-->
while the sweep occurs.
o
Single
Automatically sets Continuous OFF and causes the SA to make ONE
sweep, then Hold.
o
Restart
Resets the Average counter to 1. When in Hold, causes the SA to
make ONE sweep, then Hold. The Average counter has is used with MaxHold
and MinHold Trace States. Learn more on page 107.
Points
Points is the number of measurements that are displayed along the X-axis. The
higher number of data points, the better the ability to resolve closely spaced
signals and the slower the sweep speed.
How to set number of points
Press
Sweep 3
Then
Points [current setting]
Then choose from:
101 | 201 | 401 | 601 | 801 | 1001


