Adobe Creative Suite 4 Printing Guide
119
Changing Page Size
Here’s how to increase the page size (media box) of a PDF document:
1. Open the Crop Pages dialog box, using one of the methods just described in “Cropping Pages.”
2. Select a fixed page size or specify values for a custom page size.
3. Click OK.
You have control over top, bottom, left, and right margins. So, for example, you could add extra
“paper” at the left of a document that will be punched for comb binding.
Note:
If you increase the page size, the content appears smaller in the dialog box preview, but
the dimensions of actual page content aren’t reduced. The original content is centered in the
enlarged page.
Permanently Altering Page Dimensions
The cropping function available in the Print Production toolbar enables you to visually crop
out unwanted content, but this is a masking effect; the content is still actually there, and may be
perceived by imposition and other processes, producing unwanted results. Acrobat 9, however,
offers you the ability to permanently change the media size for a PDF, by using a Preflight Fixup.
Here are the steps:
1. Choose the Crop tool (Tools > Advanced Editing > Crop Tool).
2. Click and drag to create a rectangle of the size and position you want for a final crop.
3. Once you are satisfied with the cropping rectangle, right-click (Mac: Control-click) and choose
Set ArtBox from the contextual menu that appears. You will invoke this newly-defined ArtBox
in a Fixup to truly crop the document.
Now, to create and apply the Fixup:
1. Open the Preflight dialog (Advanced > Preflight), click the Options button, and choose Create
New Preflight Single Fixup.
2. In the left column, choose the appropriate Fixup category.
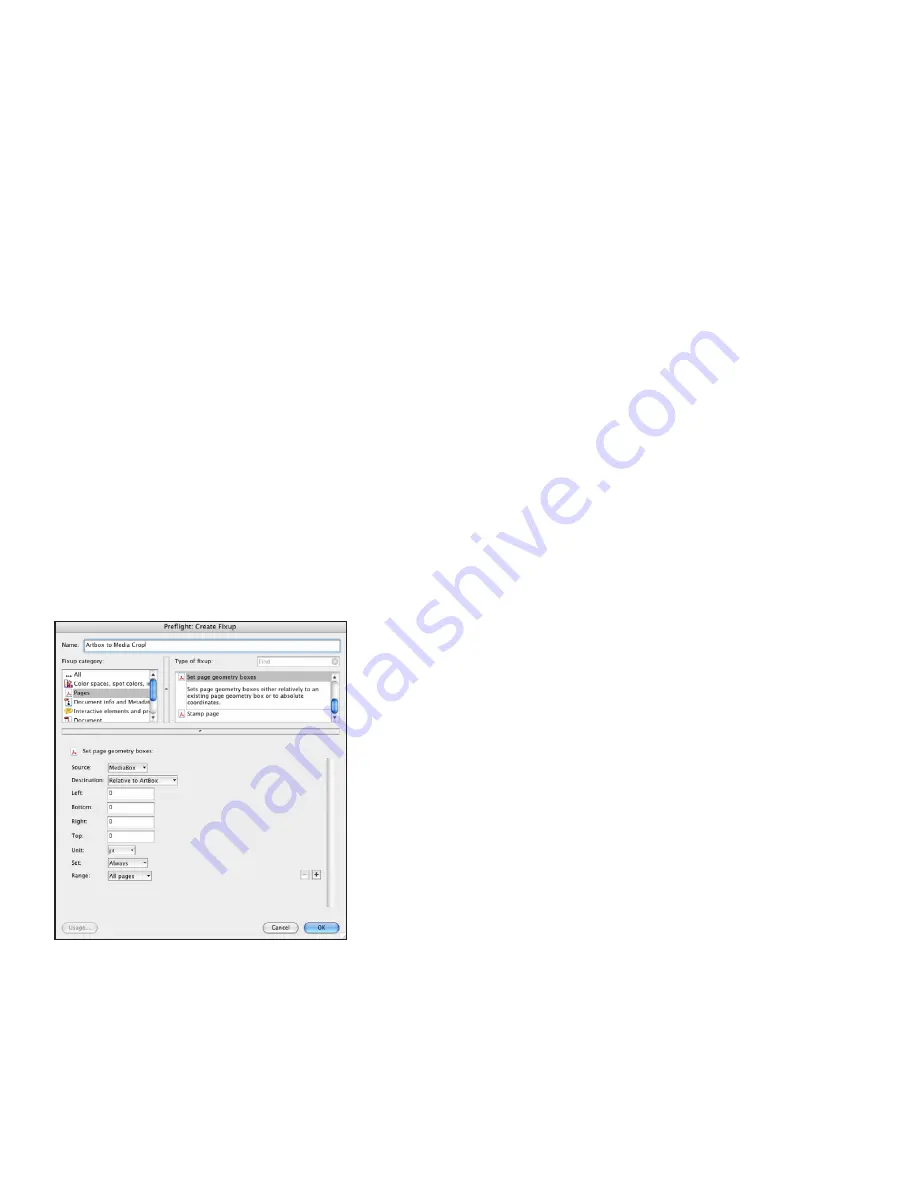
Single Fixup for Page Geometry
Choose the Fixup category, then select a
prebuilt Fixup as a starting point . Modify the
settings, give the Fixup a name, and click OK .
3. Set the Fixup options as necessary: Assign a name, choose the Set Page Geometry Boxes op-
tion in the Type of Fixup column, and modify the settings as shown above. Click OK, and then
save the fixup.
When you run the Fixup by clicking the Fix button in the Preflight dialog, you’ll be prompted for
a new file name, because this Fixup will permanently alter the file, deleting all content outside
the newly-defined trim and resetting the trim definition as you have specified.


