


Page 18/54
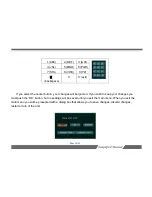
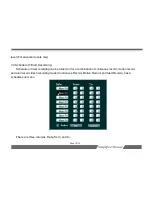
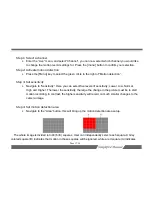
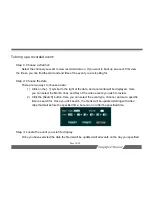
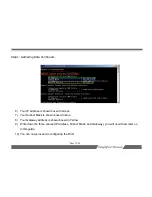
that motion in these areas will be recorded. You can use the
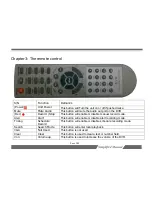
[↑]
,
[↓]
,
[←]
, and
[→]
keys to move the cursor,
and the
[menu]
key to select a square. The cursor will turn yellow indicating that you can move around
without making changes, blue indicating that it will add red squares, and green indicating that it will remove
red squares. Once finished, hit the
[0]
key to exit and save.
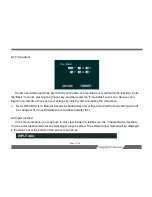
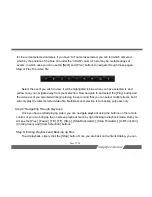
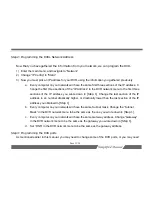
Step 5: Set motion detection time
Navigate to “Alarm”. Here you can set the amount of time the unit will record before (pre-record)
and after (post-record) a motion event has begun or ended. Normally set to 3 seconds pre-record and
10 seconds post-record, it can be adjusted between 1 and 60 seconds.
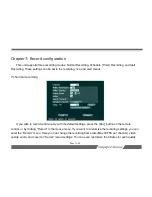
Step 6: Set alarm settings
In the “Alarm” submenu, you can setup this unit to do specific things when a motion event is
triggered:
•
Trigger Record:
if there is a motion event on a channel, you can specify any number of
channels to record video for the duration of the motion event
•
Buzzer:
you can set this unit to continuously beep on a motion event, keep in mind the unit will
continue beeping until you hit the “Clear” button on the remote control, or in the mouse menu.
•
Alarm Upload:
Coming soon
•
Send e-Mail:
This unit can be setup to send you an email with the camera number and trigger
time (See Step 5 in chapter IX)
•
PTZ Act:
If you have a PTZ camera connected, you can set this unit to call a specific preset on


