57
Installing and removing a hard disk
Although the Altos G310 has four hard disk slots, the system board
only supports a maximum of three.
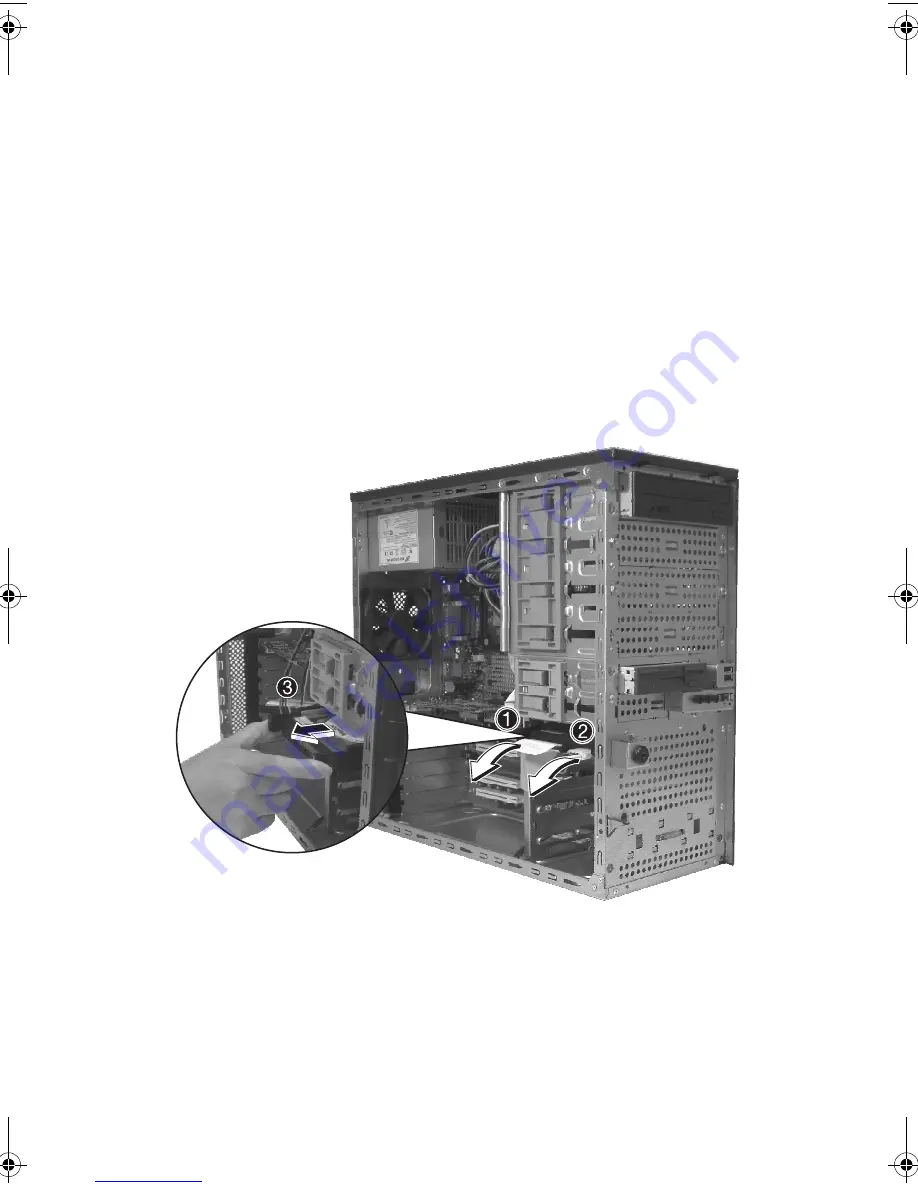
To remove a hard disk
Follow these steps to replace your computer’s hard disk:
1
Remove the side and front panels (see page 43 and page 44).
2
Detach the cables from the exposed end of the HDD
(1)
and
(2)
.
3
Squeeze the two locking tabs that secure the drive to the chassis
slot and gently remove the HDD from the system
(3)
.
BB!H421!.!FO/cppl!!Qbhf!68!!Xfeoftebz-!Gfcsvbsz!29-!3115!!5;67!QN
Summary of Contents for G310 Altos
Page 1: ...Acer Altos G310 User s guide ...
Page 10: ...Contents x ...
Page 11: ...1 System information ...
Page 18: ...1 System information 8 ...
Page 19: ...2 System tour ...
Page 32: ...2 System tour 22 ...
Page 33: ...3 Getting Started ...
Page 34: ...This chapter gives information on setting up and starting to use your system ...
Page 46: ...3 Getting Started 36 ...
Page 47: ...4 Configuring the system ...
Page 90: ...4 Configuring the system 80 ...
Page 91: ...5 BIOS setup ...
Page 124: ...5 BIOS setup 114 ...
Page 125: ...Appendix A Management software installation ...
Page 126: ...This appendix shows you how to install the ASM and EasyBUILDTM software packages ...
Page 130: ...Appendix A Management software installation 120 ...


