Hardware removal and installation
43
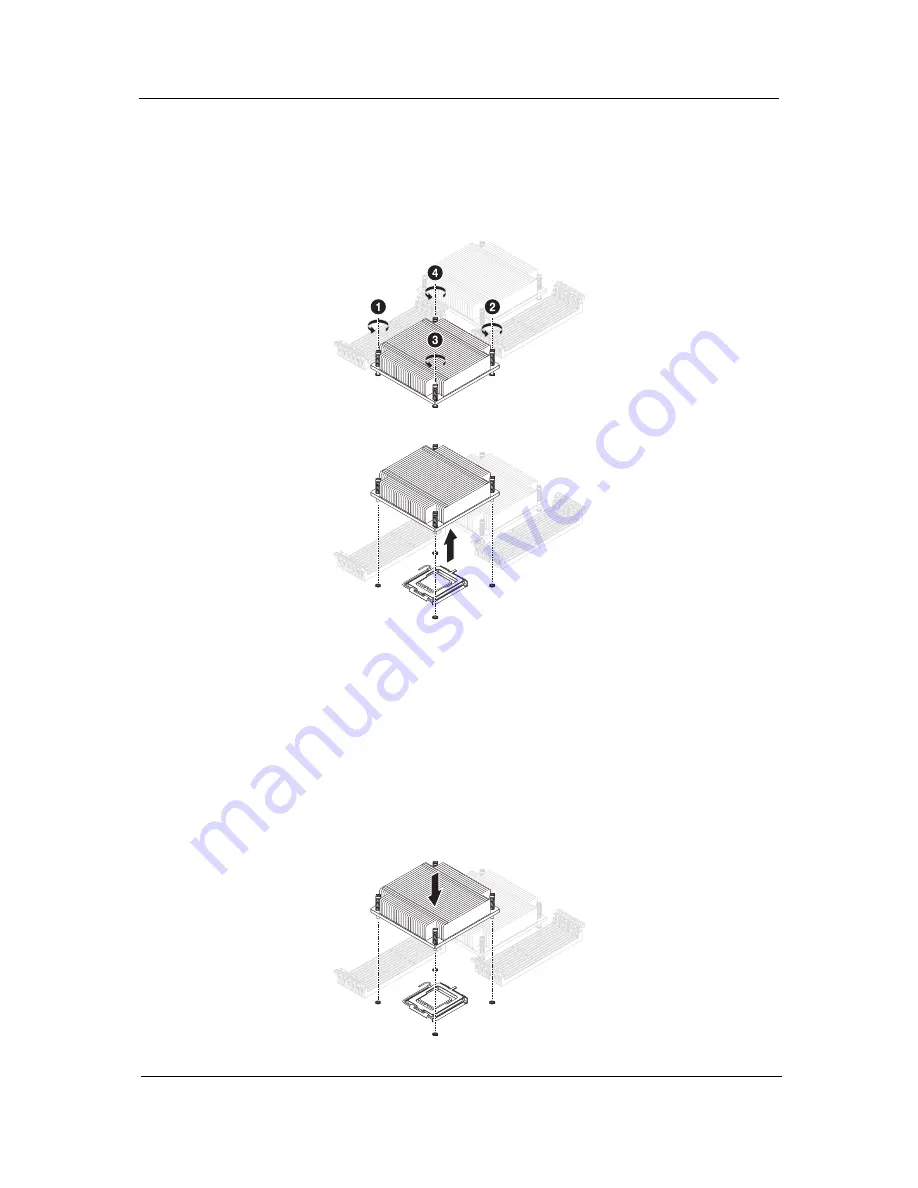
Heatsink removal and installation
Follow these steps:
1.
Power down the server and unplug the power cord.
2.
Open the top cover. See “PCI Express card removal and installation” on page 38.
3.
Using a screwdriver, loosen the heatsink screws from the mainboard.
4.
Lift the heat sink away from the processor.
5.
Lay down the heat sink in an upright position — with the thermal patch facing upward. Do not let the
thermal patch touch the work surface.
To install a heatsink, do as follows:
CAUTION:
The heat sink has a thermal interface material (TIM) on the underside. Use caution so that you do
not damage the TIM. If a protective film is installed on the TIM, remove it.
1.
Power down the server and unplug the power cord.
2.
Open the top cover. See “PCI Express card removal and installation” on page 38.
3.
Do not apply any thermal grease to the heatsink or the CPU die; the required amount has already been
applied.
4.
Place the heatsink on top of the CPU so that the four mounting holes are aligned with those on the
(preinstalled) heatsink retention mechanism.
Summary of Contents for AW2000h-AW175h F1
Page 1: ...Acer AW2000h Service Guide PART NO PRINTED IN TAIWAN ...
Page 8: ...2 Chapter 1 System parts list Currently unavailable ...
Page 14: ...8 Chapter 2 ...
Page 26: ...20 Chapter 4 ...
Page 32: ...26 Chapter 5 ...
Page 41: ...Hardware removal and installation 35 c Lock the HDD carrier ...
Page 85: ...Chapter 10 79 ...
Page 86: ...80 Chapter 10 ...
Page 87: ...Chapter 11 81 Information unavailable BIOS POST Error Messages List Chapter 11 ...
Page 88: ...82 Chapter 11 ...


