


Chapter 3
129
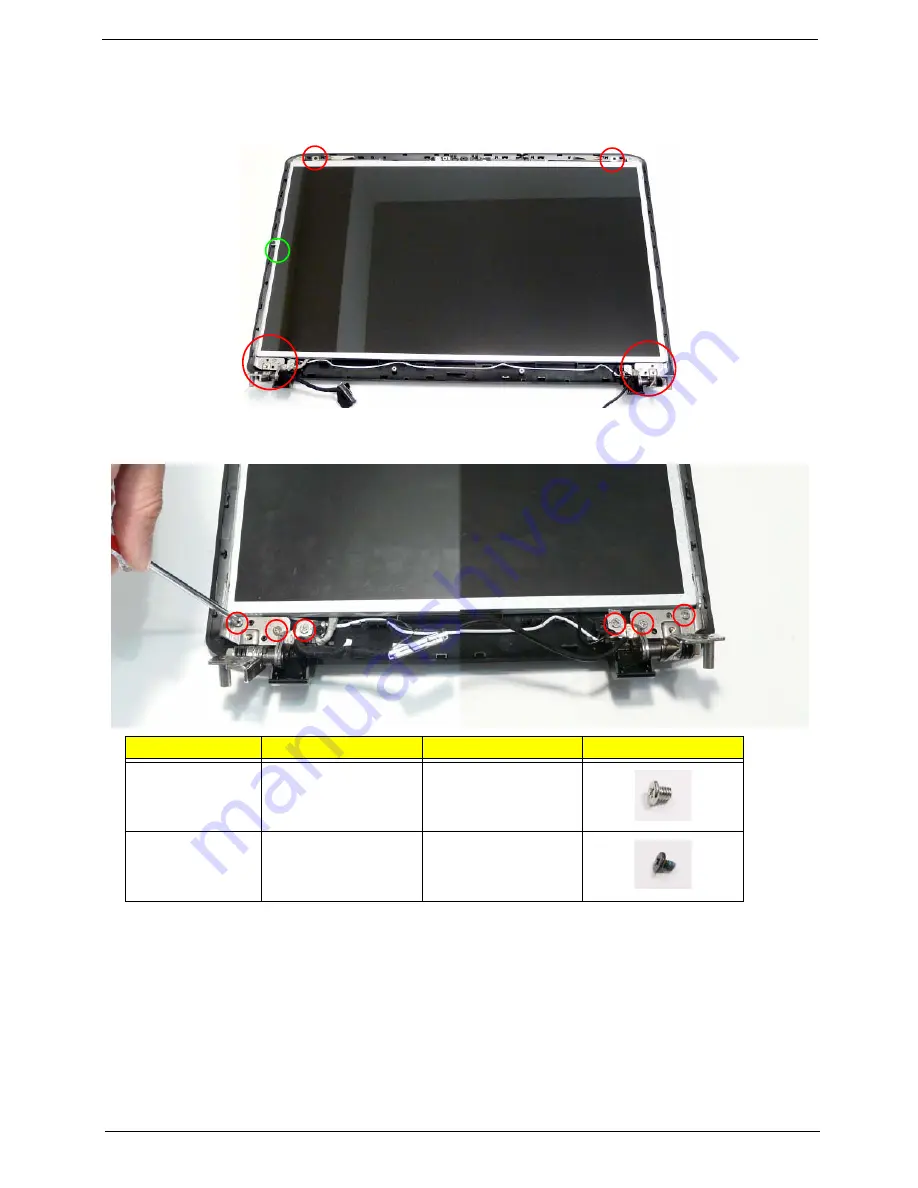
Removing the LCD Panel
1.
See “Removing the Flush LCD Bezel Cap” on page 125.
2.
Remove the nine screws securing the LCD Panel to the cover.
NOTE:
The six bracket screws are numbered from 1 to 3 on each bracket. Remove the screws in reverse order
from 3 to 1.
Step
Size
Quantity
Screw Type
LCD Panel
(red callout)
M2.5*4
8
LCD Panel
(green callout)
M2*3
1
1
2
3
3
2
1
Summary of Contents for Aspire 8935G
Page 6: ...VI ...
Page 44: ...34 Chapter 1 ...
Page 62: ...52 Chapter 2 ...
Page 78: ...68 Chapter 3 4 Remove the TV Tuner as shown ...
Page 80: ...70 Chapter 3 4 Detach the WLAN Module from the WLAN socket ...
Page 97: ...Chapter 3 87 5 Lift the board clear of the Upper Cover ...
Page 100: ...90 Chapter 3 5 Lift the Media Board clear of the Upper Cover ...
Page 106: ...96 Chapter 3 8 Lift the board clear of the Upper Cover ...
Page 109: ...Chapter 3 99 5 Remove the Bluetooth Board from the Lower Cover ...
Page 118: ...108 Chapter 3 4 Using both hands lift the Subwoofer clear of the Lower Cover ...
Page 155: ...Chapter 3 145 3 Press down around the perimeter of the bezel to secure it in place ...
Page 173: ...Chapter 3 163 4 Connect the Bluetooth cable to the Mainboard ...
Page 184: ...174 Chapter 3 4 Connect the Volume Control FFC to the Media Board and close the locking latch ...
Page 202: ...192 Chapter 3 2 Tighten the seven captive screws in the Lower Door ...
Page 204: ...194 Chapter 3 ...
Page 239: ...Chapter 6 229 ...
Page 316: ...306 Appendix C ...
Page 320: ...310 ...