39
Removing and Installing the Processor
Air Duct
Always operate your server chassis with the processor air duct in place.
The air duct is required for proper airflow within the chassis.
For instructions on adding or replacing a processor, first remove the
processor air duct and the processor air dam, and then see your server
board User Guide for instructions on processor installations and
removals. Return to these instructions to reinstall the processor air dam
and processor air duct after installing your processor and heat sink.
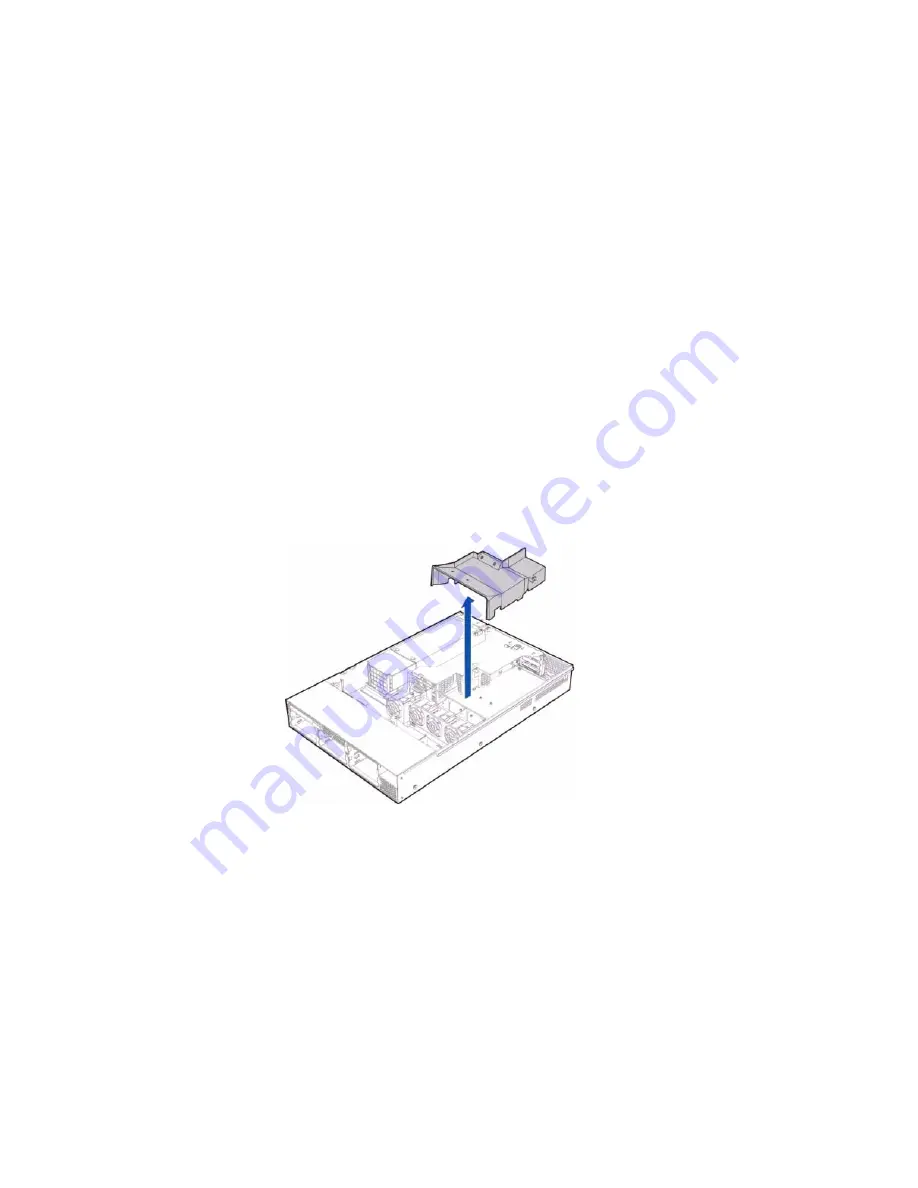
Removing the Processor Air Duct
1
Remove the chassis cover. For instructions, see "Removing the
Chassis Cover."
2
Lift the processor air duct from its location over the two processor
sockets.
Installing the Processor Air Duct
1
If you are installing the processor air duct for the first time after
installing a second processor, break out the airflow tab over on the
side of the processor air duct that will fit over the CPU2 processor
socket.
2
Place the processor air duct over the two processor sockets,
regardless of whether one or two processors is installed. The front
edge of the air duct should contact the front fan module and the
top of the installed air duct should be flush with the top surface of
Summary of Contents for Altos R710
Page 1: ...Acer Altos R710 User s Guide ...
Page 12: ......
Page 13: ...1 System information ...
Page 21: ...2 System tour ...
Page 37: ...3 Getting Started ...
Page 38: ...This chapter gives information on setting up and starting to use your system ...
Page 42: ...3 Getting Started 30 ...
Page 43: ...4 Configuring the system ...
Page 94: ...4 Configuring the system 82 ...
Page 95: ...5 BIOS setup ...
Page 155: ...6 Troubleshooting ...
Page 170: ...6 Troubleshooting 158 ...
Page 171: ...Appendix A Management software installation ...
Page 172: ...This appendix shows you how to install the ASM software packages ...
Page 176: ...Appendix A Management software installation 164 ...
Page 177: ...Appendix B Tool less rail kit installation ...
Page 189: ...Appendix C RAID Configuration ...
Page 190: ...This appendix shows you how to create RAID ...
Page 195: ...Appendix D BIOS POST Checkpoint Codes ...
Page 211: ...199 F7h Boot to Full DOS Checkpoint Code Beep Code Description ...
Page 212: ...Appendix D BIOS POST Checkpoint Codes 200 ...
Page 214: ...202 U Upgrading the CPU 45 62 80 Upgrading the system 33 ...


