81
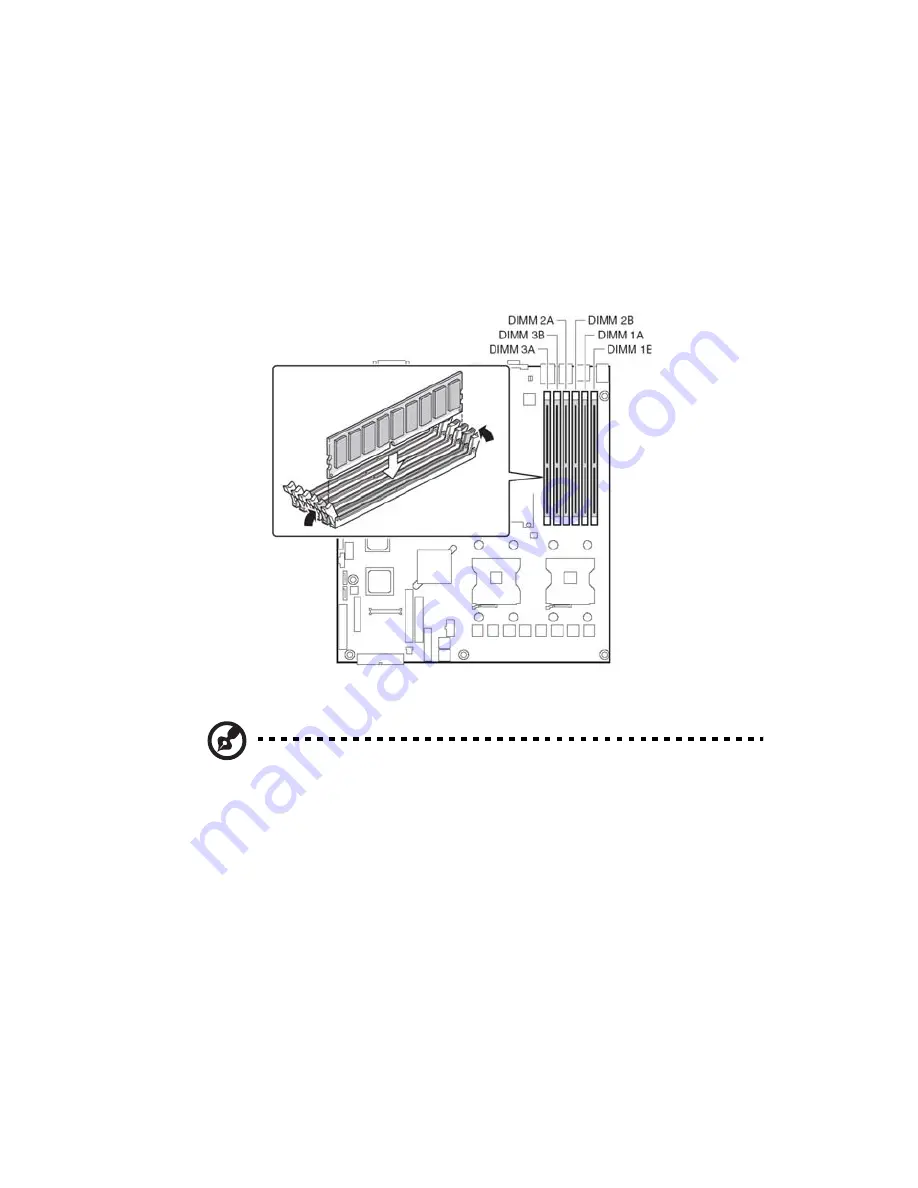
To install a DIMM
1
Observe the ESD precautions and pre-installation procedures
described on page 34.
2
Locate the DIMM sockets on the mainboard.
3
Open the clips on the socket.
4
Align and insert the DIMM into the socket .
5
Press the holding clips inward to lock the DIMM in place .
Note: The DIMM socket is slotted to ensure proper installation.
If you insert a DIMM but it does not fit easily into the socket, you
may have inserted it incorrectly. Reverse the orientation of the
DIMM and insert it again.
6
Observe the post-installation instructions described on page 35.
Reconfiguring the system memory
The system automatically detects the amount of memory installed.
Run the BIOS setup to view the new value for total system memory and
make a note of it.
Summary of Contents for Altos R710
Page 1: ...Acer Altos R710 User s Guide ...
Page 12: ......
Page 13: ...1 System information ...
Page 21: ...2 System tour ...
Page 37: ...3 Getting Started ...
Page 38: ...This chapter gives information on setting up and starting to use your system ...
Page 42: ...3 Getting Started 30 ...
Page 43: ...4 Configuring the system ...
Page 94: ...4 Configuring the system 82 ...
Page 95: ...5 BIOS setup ...
Page 155: ...6 Troubleshooting ...
Page 170: ...6 Troubleshooting 158 ...
Page 171: ...Appendix A Management software installation ...
Page 172: ...This appendix shows you how to install the ASM software packages ...
Page 176: ...Appendix A Management software installation 164 ...
Page 177: ...Appendix B Tool less rail kit installation ...
Page 189: ...Appendix C RAID Configuration ...
Page 190: ...This appendix shows you how to create RAID ...
Page 195: ...Appendix D BIOS POST Checkpoint Codes ...
Page 211: ...199 F7h Boot to Full DOS Checkpoint Code Beep Code Description ...
Page 212: ...Appendix D BIOS POST Checkpoint Codes 200 ...
Page 214: ...202 U Upgrading the CPU 45 62 80 Upgrading the system 33 ...


