


Installation & Operation Manual - Model AVR6000
Contents of this Manual are Subject to Change Without Notification
Page 19
6.4.1
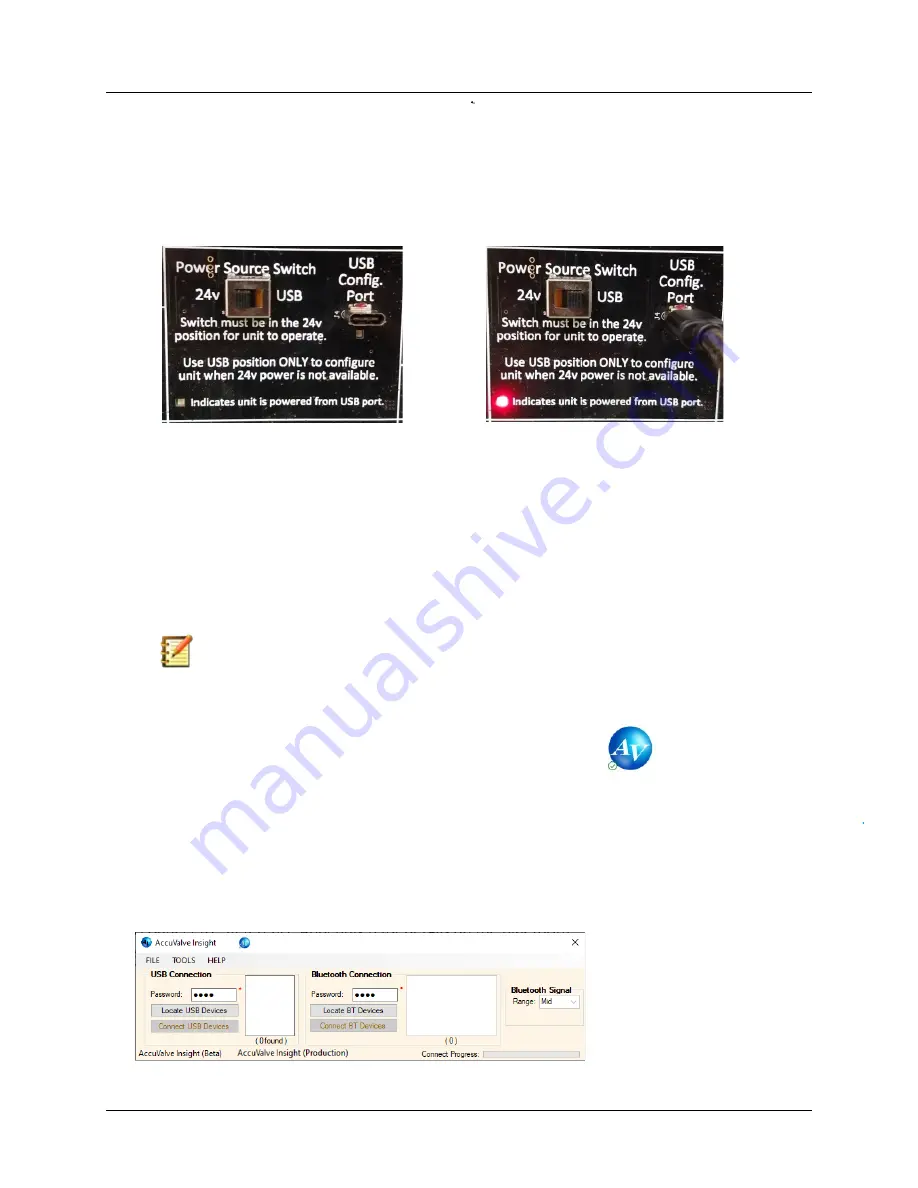
Power Source Switch
The AVR6000 control module includes a Power Source Switch which should always be in
the “24v” position for the controller to function normally. The “USB” position is
provided so the controller can be programmed or configured when there is no 24v
power source available. This is a convenient feature for configuring the AVR prior to
having 24v field power.
24v Position
USB Position
This is the normal operational
position for the AVR6000 controller.
If the Power Source Switch is not in
the 24v position, the AVR controller
will not function properly.
The USB position shall only be used
to temporarily power the AVR6000
from the computer’s USB 5vdc
power source when 24v filed power
is not connected. The AVR controller
will not fully function with the Power
Source Switch in the USB position.
Note:
The Power Source Switch must be returned to the 24v Position
otherwise the controller will not function properly.
6.5
Opening the AccuValve Insight Software
To open AccuValve Insight, either click on the desktop shortcut or go to the Start
Menu and select Programs > AccuValve Insight.
To connect to the AVR6000 via USB cable, select the “Locate USB Devices” button then
select the COM port associated with the AVR6000 and click “Connect USB Devices”. To
connect to the AVR6000-W using Bluetooth, select the “Locate BT Devices” and wait until
the discovered device list populates. From the list, select the TAG Name associated with the
AVR6000-W device that you are attempting to connect to and click “Connect BT Devices”.
Reference Appendix B for details on the Bluetooth connection.


