


26
| 2105551-001 rev. AC
7.2 Configuring
Ethernet
communication
When connecting to a network, the RMC must be configured with a valid public IP
address. The Ethernet interface supports static (manual) or dynamic (DHCP) IP
addressing.
To configure the network parameters:
1. Connect the Ethernet cable from the RMC to the network communication
equipment (hub, switch, router, etc.).
2. Verify the Ethernet port LED is green (the network Ethernet link is on).
3. Configure the network parameters.
a. Select
Communications
on the navigation tree. The
Communications
Setup
tab displays.
b. Select
the
Network
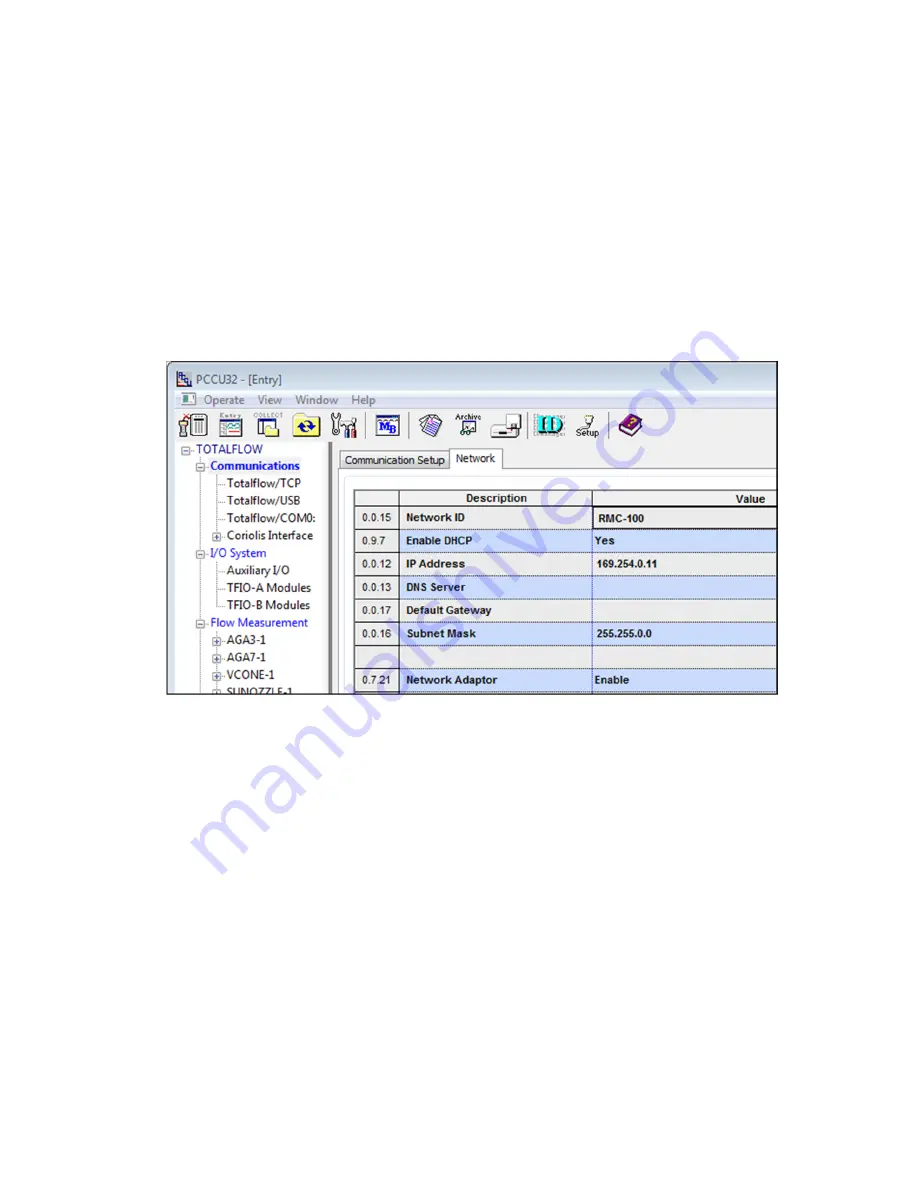
tab (Figure 21).
Figure 21: Ethernet remote communication setup
c. Verify that the Network Adaptor is set to Enable.
d. If using DHCP for dynamic addressing, change the Enable DHCP field to
Yes
.
e. If using static addresses, type each of the parameters: IP Address, Default
Gateway, and Subnet Mask.
f. Click
Send
. An Information box displays a message to warm-start or reset
the device for the changes to take effect.
g.
Click
OK.
4. Remember to press the reset button shown in Figure 11.
5. Verify that the Ethernet interface has been properly configured by pinging the
device from the network. The RMC should reply to the ping from the network.
6. Reconnect PCCU32 to the controller after startup is complete.
7.3 Configuring a third party serial-to-Ethernet module
Third party serial-to-Ethernet modules can be used to add serial communication
ports for external devices such as XMVs and transmitters. The configuration
instructions are provided from the manufacturer. Refer to the
RMC-100 User Manual
for the configuration of the RMC to support third party devices.


