(6)
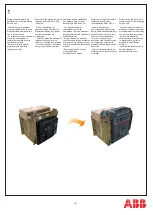
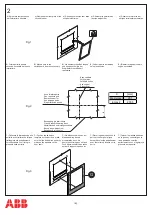
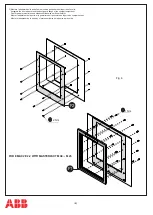
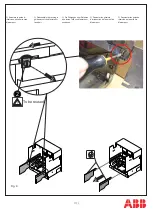
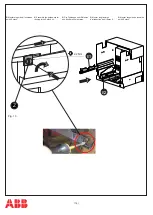
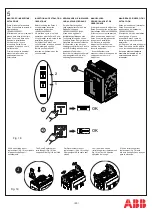
B) Forare portella quadro
secondo necessità del nuovo
interruttore.
B) Make a hole in the
switchboard door, as necessary.
B) Die erforderlichen Bohrungen
und den ausschnitt in der
Schaltfeldtür nach Bedarf
realisieren.
B) Percer la porte du tableau
selon les besoins.
B) Taladrar la tapa del cuadro
según necesidad.
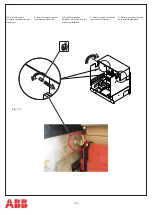
C) Collocare la dima adesiva alla
portella e controllare che la linea
tratteggiata sia perfettamente
corrispondente con li foro già
presente sulla portella.
C) Position the adhesive
template on the door and make
sure that the dotted line perfectly
matches the aperture on the
door itself.
C) Die Klebeschablone an der
Klappe anbringen und
sicherstellen, dass die
gestrichelte Linie ganz mit den
Loch übereinstimmt, das schon
auf der Klappe vorhanden ist.
C) Placer le gabarit adhésif à la
porte et vérifier que la ligne
hachurée coïncide parfaitement
avec l’ouverture présente sur la
porte.
C) Colocar la plantilla adhesiva
en la puerta y controlar que la
línea punteada coincida
perfectamente con el agujero ya
presente en la puerta.
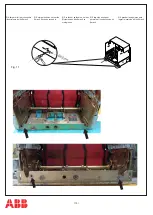
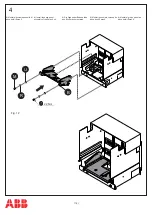
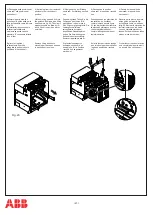
A) Smontare la mascherina
dell’interruttore obsoleto.
A)Dismantle the front plate of the
circuit breaker.
A) Den abdeckrahmen vom alten
schalter montieren.
A) Démonter la garniture de
l'ancien disjoncteur.
A) Desmontar el marco del
antiguo interruptor automático.
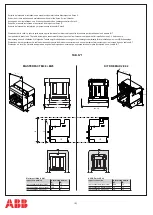
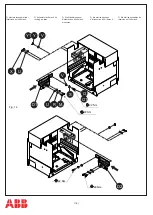
- Asse foratura porta
- Door aperture axis
- Bohrachse der Tur
- Axe perçage porte
- Eje perforacion puerta
- Base appoggio interruttore
- Circuit-breaker’s bearing base
- Abstellfläche des leistungsschalters
- Base d'appui disjoncteur
- Base apoyo interruptor
- Asse verticale
- Vertical axis
- Vertikale Achse
- Axe vertical
- Eje vertical
X
X
[mm]
Masterpact
201
Emax 2
230,5
Fig. 1
Fig. 2
Fig. 3
2
G


