


Configuring Softkeys
94
41-001524-00 REV01 – 07.2014
Configuring a Callers List Key Using the Aastra Web UI
Aastra Web UI
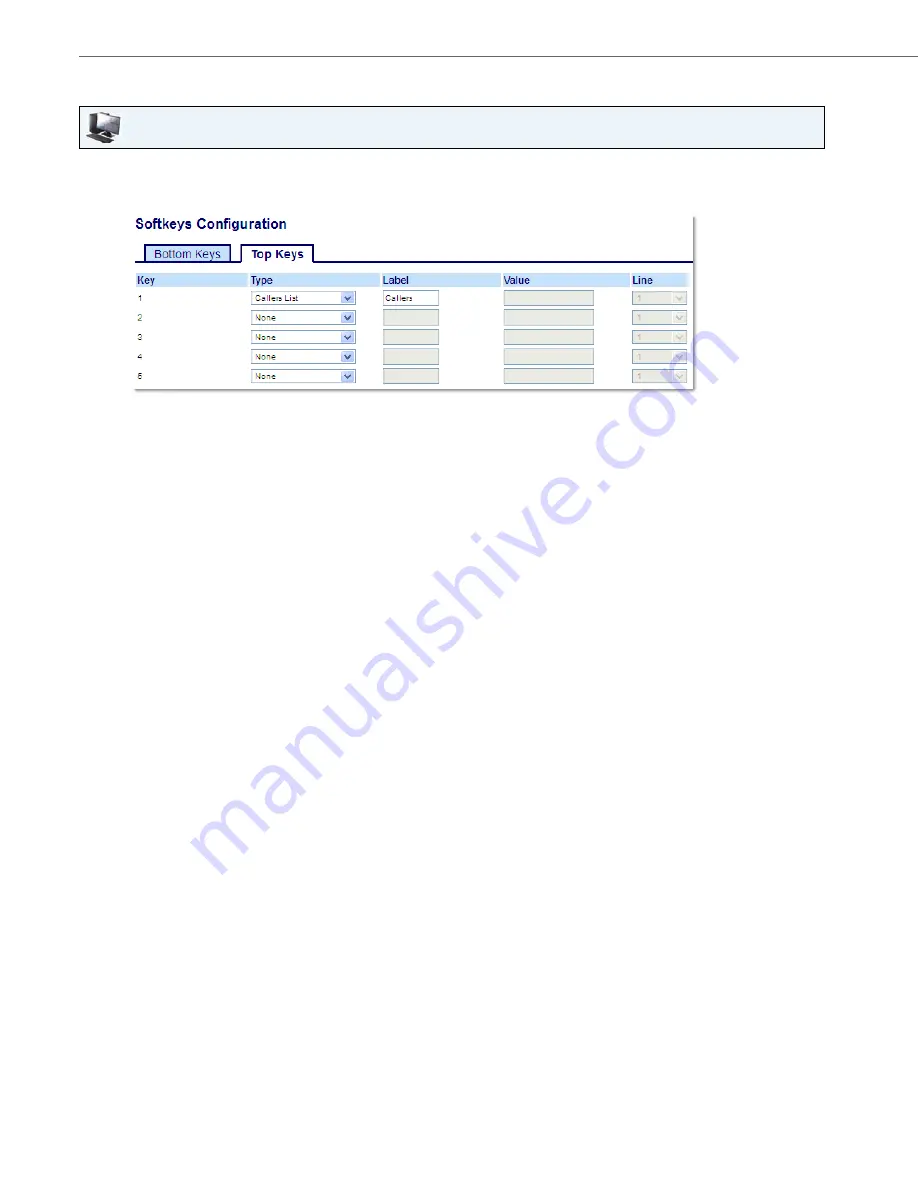
1.
Click on
Operation > Softkeys and XML
.
or
Click on
Operation > Expansion Module <N>
.
Softkeys
2.
Select from
Key 1
through
Key 20
on the Top keys.
or
Select from
Key 1
through
Key 18
on the Bottom keys.
3.
In the
Type
field, select
Callers List
.
4.
In the
Label
field, enter a label to apply to this key.
5.
In the state fields, check (enable) or uncheck (disable) the states you want to apply to this softkey.
Expansion Module Keys
6.
Select from
Key 1
through
Key 16
.
7.
In the
Type
field, select
Callers List
.
8.
Click
Save Settings
.


