


Zone
Zone
MAIN SCREEN
Pioneer Gold 1.10 & 2.05 Touch Screen Operator Interface
2-6
First Things First
The first thing you need to do when setting up your Touch Screen
is to Login. The second thing you need to do is establish user
passcodes. The third thing you need to do is set the time and
date. After you complete these simple tasks, you are ready to set
your system’s schedule(s) and set setpoints and configurations.
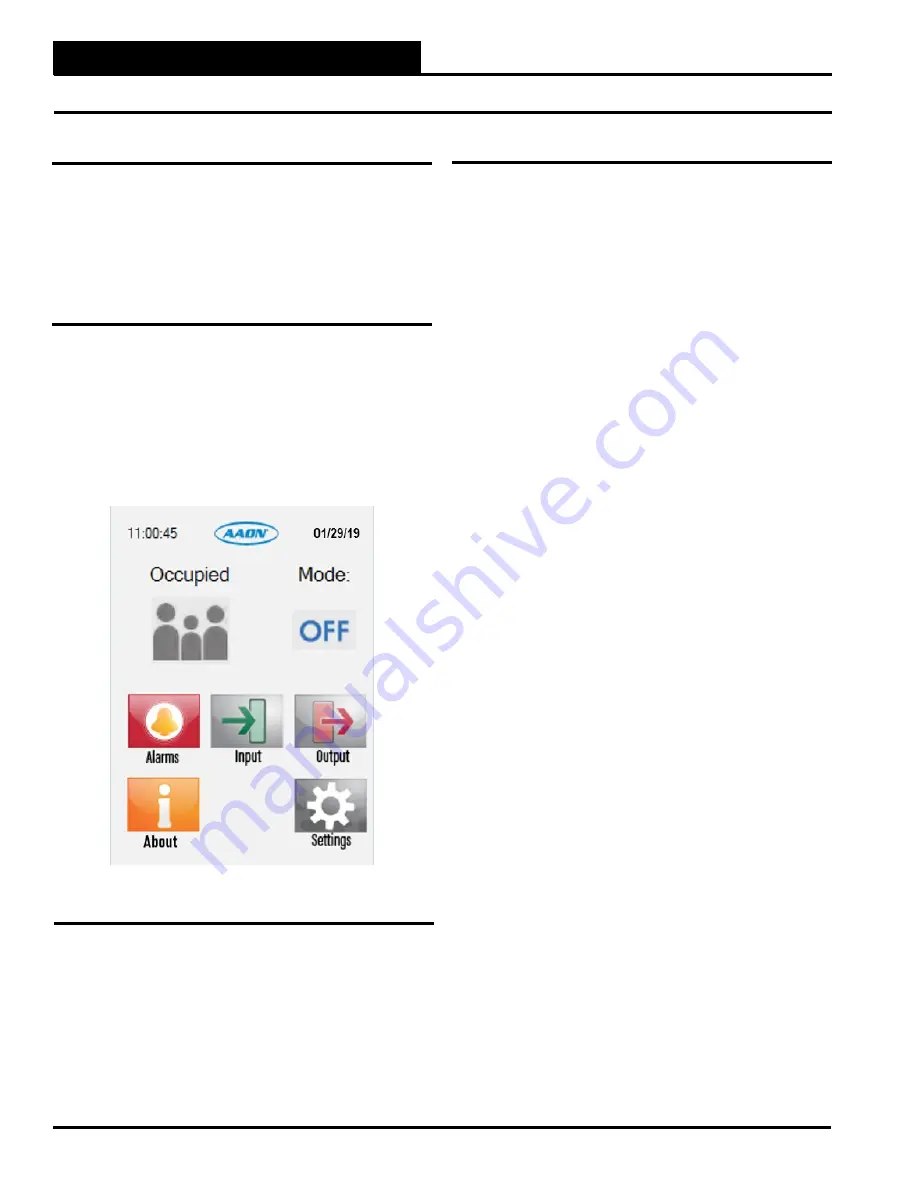
Main Screen
Once you have powered up the Pioneer Gold Controller with the
proper power supply, the
Main Screen
will appear. See
Figure 2
.
The top of the screen displays the
Time of Day
and the
Date
. The
current Operation Mode is displayed underneath those items and
whether the unit is in Occupied or Unoccupied Mode. Underneath
those items, the screen displays the icons
Alarms
,
Inputs, Outputs,
About,
and
Settings
.
Main Screen & Step-by-Step Guide
Figure 2: Main Screen
Administrator Step-by-Step Guide
In order to operate the Pioneer Gold Controller successfully, you
should read this entire guide. This guide will lead you through each
step in configuring the Pioneer Gold Controller using its on-board
touch screen operator interface. Below is a quick overview of each
step.
Step 1:
Login using your Administrator Passcode—
From
the
Main Screen
, select
<Settings>
and enter your Administrator
Passcode.
Step 2:
Change the Passcodes —
From the
Administrator
Settings Screen
, select
<Security>
to change both your Administrator
Passcode and the Manager Passcode.
Step 3: Set the Correct Date & Time—
From the
Administrator
Settings Screen
, select
<Clock>
to change the date and time.
Step 4: Set the Schedules—
From the
Administrator Settings
Screen
, select
<Schedule>
and set up the controller schedule.
Step 5: Verify Controller Configuration
—
From the
Administrator
Settings Screen
, select
<Configuration>
and verify the controller’s
configurations.
Step 6: Set the Setpoints—
From the
Administrator Settings
Screen
, select
<Setpoints>
and set up all of the setpoints.
Step 7: Download Setpoints to USB—
From the
Administrator
Settings Screen
, select
<USB>
and download the Setpoints and
Configurations you just created to a USB flash drive.
Step 8: Set the Network Settings—
From the
Administrator
Settings Screen
, select
<Network>
and set up the network settings.


