


VISIX S-Series Network Camera
|
USER MANUAL v6.0
10385 Westmoor Drive, Suite 210, Westminster, CO 80021 | www.3xlogic.com | (877) 3XLOGIC
63
4.
Click
to save and exit the interface.
Configuring Port Settings
Purpose:
If there is a router and you want to access the camera via Wide Area Network (WAN), you need to forward the
necessary ports for the camera.
Steps:
1.
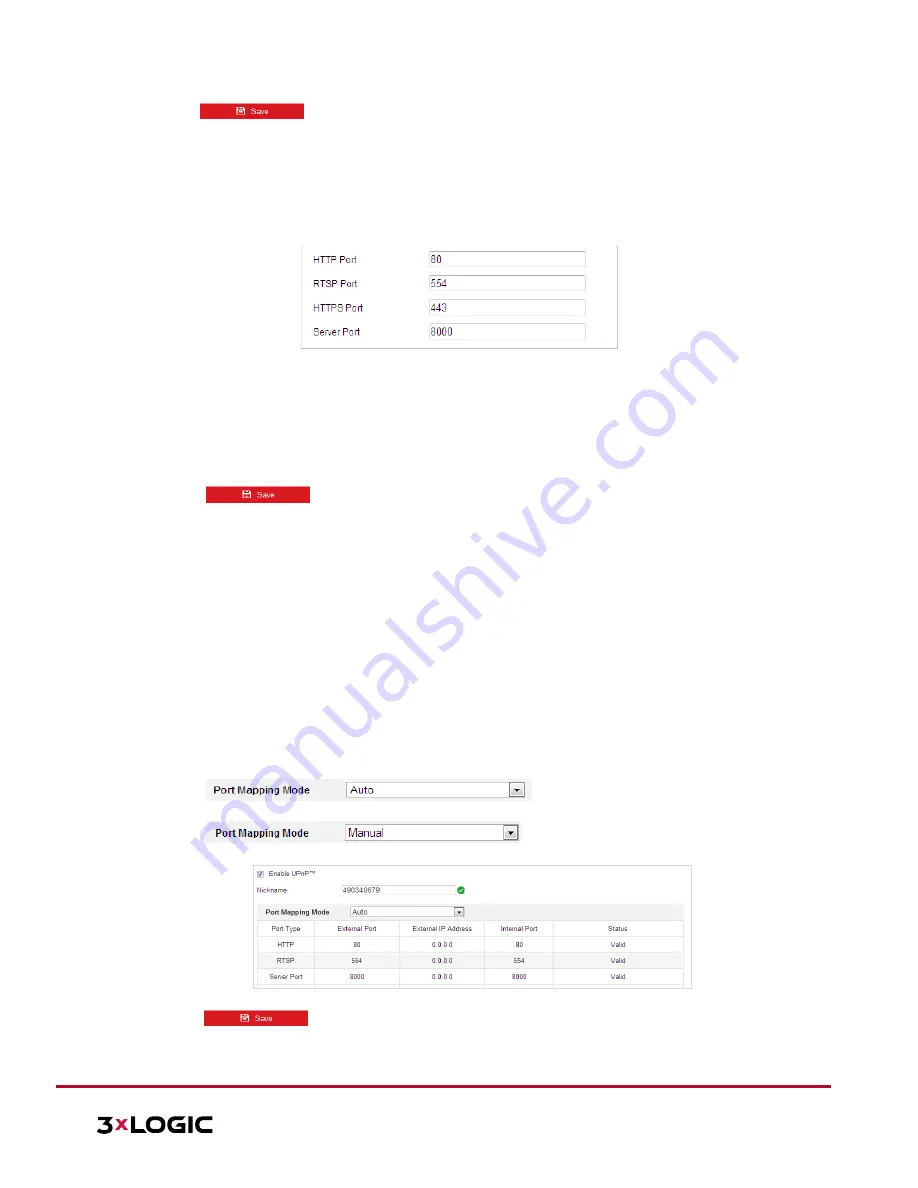
Enter the Port settings interface:
Configuration > Network > Basic Settings > Port
Figure 6-5
Port Settings
2.
Set the
HTTP port, RTSP port and port of the camera.
HTTP Port
: The default port number is 80.
RTSP Port
: The default port number is 554.
HTTPS
Port
: The default port number is 443.
Server Port
: The default port number is 8000.
3.
Click
to save the settings.
Configuring NAT (Network Address Translation) Settings
Purpose:
Universal Plug and Play (UPnP™) is a networking architecture that provides compatibility among networking
equipment, software and other hardware devices. The UPnP protocol allows devices to connect seamlessly
and to simplify the implementation of networks for home and corporate environments.
With the function enabled, individual port configuration is not required and the camera is connected to the
Wide Area Network via router.
Steps:
1.
Enter the UPnP™ settings interface:
Configuration >Network > Basic Settings > NAT
2.
Toggle the checkbox to enable the UPnP™ function.
NOTE:
The user can edit the Friendly Name of the camera. This name can be detected by corresponding
devices, such as a router.
3.
Set the port mapping mode:
To port mapping with the default port numbers:
Choose
To port mapping with the customized port numbers:
Choose
And you can customize the value of the port number by yourself.
Figure 6-6
Port Mapping Mode
4.
Click
to save the settings.