


VISIX S-Series Network Camera
|
USER MANUAL v6.0
10385 Westmoor Drive, Suite 210, Westminster, CO 80021 | www.3xlogic.com | (877) 3XLOGIC
32
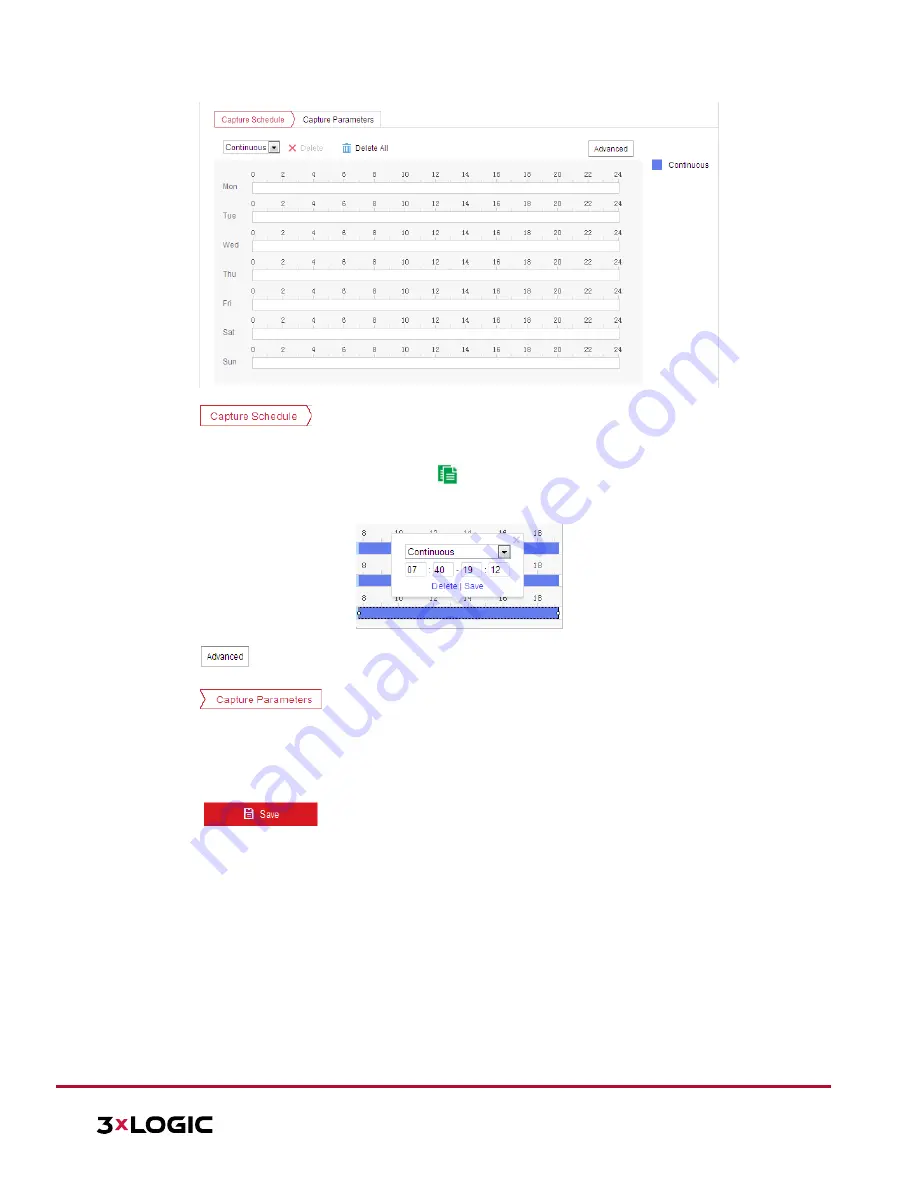
Figure 5-3
Snapshot Settings
2.
Click
to enter the Capture Schedule interface.
3.
Select the timeline of a specific day, and drag the left button of the mouse to set the capture schedule
(the start time and end time of the recording task).
4.
After you set the scheduled task, you can click
and copy the task to other days (optional).
5.
After setting the capture schedule, you can click a capture segment to display the segment capture
settings interface to edit the segment capture parameters. (Optional)
Figure 5-4
Segment Snapshot Settings
6.
Click
to enter the advanced settings interface. The user can select the stream type from this
interface.
7.
Click
to enter the Capture Parameters interface.
8.
Toggle the
Enable Timing Snapshot
checkbox to enable continuous snapshots and configure the schedule
for this mode accordingly. Toggle the
Enable Event-triggered Snapshot
checkbox to enable event-
triggered snapshot.
9.
Select the format, resolution and quality of the snapshot.
10.
Set the time interval between two snapshots.
11.
Click
to save the settings.
Uploading to FTP
NOTE:
Make sure that the FTP server is online.
Follow the below configuration instructions to upload snapshots to an FTP server.
Upload continuous snapshots to FTP
Steps:
1.
Configure the FTP settings and check
Upload Picture
checkbox in FTP Settings interface. Refer to
Section
6.1.2 Configuring FTP Settings
for more details to configure FTP parameters.
2.
Toggle the
Enable Timing Snapshot
checkbox.
3.
Click
Edit
to set the snapshot schedule. Refer to
Section
5.2.1 Configuring Motion Detection
for details on
configuring schedules.
Upload event-triggered snapshots to FTP