35
34
3DISON H700
User Manual V.1
3DISON H700
User Manual V.1
Laser Engraver
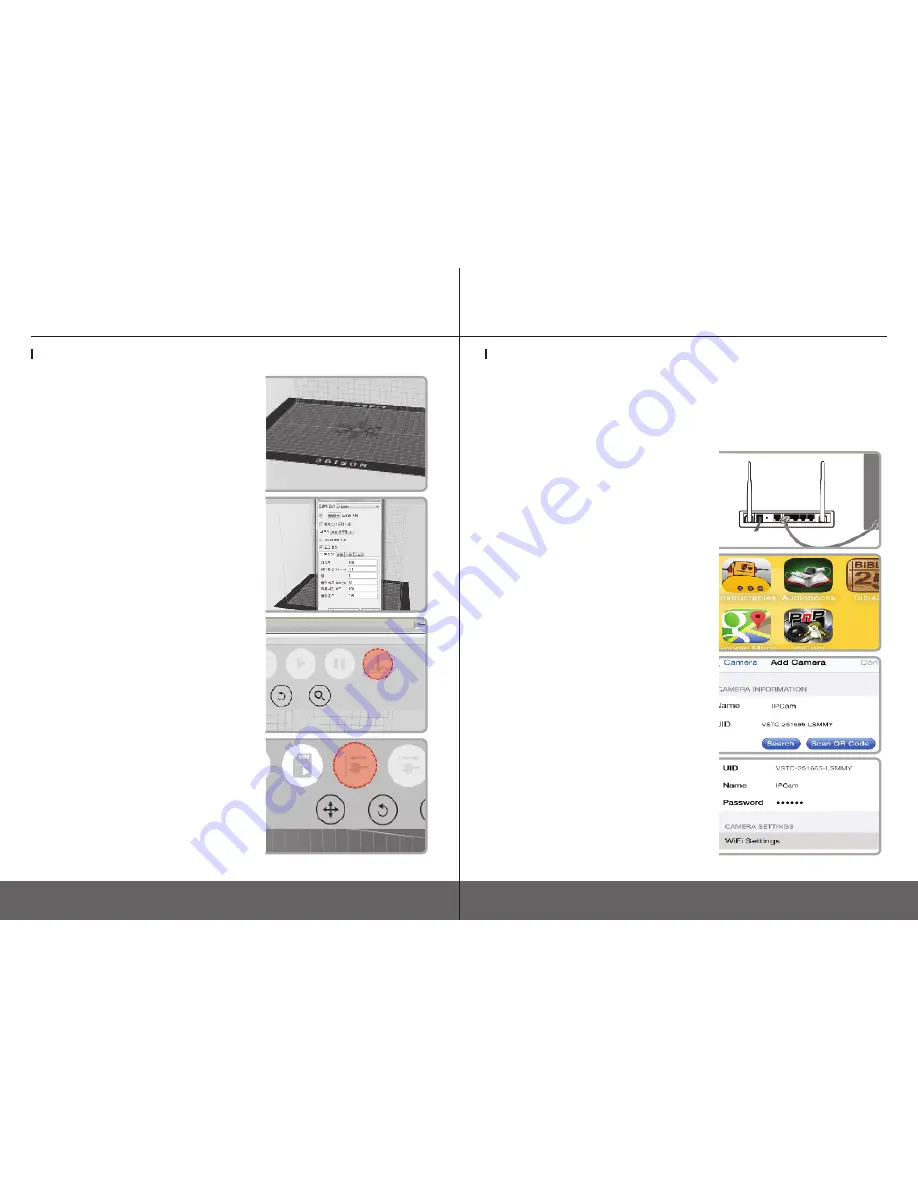
③
Import worked .stl file after execute CreatorK 8
and click G-code generating button on the top.
④
Select
Laser Mode
in Printing Option and click
Generate Gcode
.
⑤
Transfer the generated Gcode to another Gcode
optimized to use the laser function by clicking
Laser Icon.
⑥
Save the generated Gcode for laser use in the
format of x3g in SD Card. Then directly insert it in
the printer and turn on the printer.
NOTE : Go to Utilities < Laser Blinking to check if
laser works properly or not. This blinking lasts for 5
seconds.
NOTE : Before using the laser engraver, make sure
that ‘Standard Leveling’ has been completed.
(refer to page 13)
Annex2. Extra Features
(Laser Engraver / WiFi Camera / Embedded Battery)
WiFi Camera
It is now now more convenient to check on the printing progress with the Wifi camera. You
can promptly take action to solve any kind of trouble using smart phone application (VS Cam).
Following is the instruction on how to utilize WiFi Camera monitoring through your mobile
or computer.
④
Click an added camera to set IPCAM for wireless
connect-ion.
[Camera settings] > [WIFI settings] > [WIFI Man-
ager]
> select a currently used wireless
SSID
> fin-
ish by inputting PIN.
③
Enter
[Add Camera]
after execution of ‘VsCam
app’ to input UID number attached to a rear surface
of body, and input an initial PIN (personal identifica-
tion number) 888888.
②
Download “VsCam” app using a mobile phone.
(Android and IOS are supportable)
①
Connect the Internet router to WIFI Camera via
LAN cable. About one minute of booting time is
required.
Annex2. Extra Features
(Laser Engraver / WiFi Camera / Embedded Battery)
1. Connecting to your mobile


