


Installation Guide for the 2GIG EDGE Security Panel
30
Sensor Reports
1 .
Highlight
Sensor Reports
.
2 .
Choose
Enabled
or
Disabled
.
3 .
Tap
to move to the next option.
Sensor Supervised
1 .
Highlight
Sensor Supervised
.
2 .
Under Sensor Supervised, choose
Enabled
or
Disabled
.
3 .
Tap
to move to the next option.
Next Steps
The wireless zone is now programmed. Next, choose one of these options:
¾
To program the next wireless zone, tap
Next Zone
. Then, repeat the programming steps for the next zone.
¾
To erase all of the programmed settings for the wireless zone, tap
Reset Zone
.
¾
To go to the list of wireless zones, tap
Back to Zones
.
¾
Changes are saved instantly, so simply exit the toolbox to start using the new sensor/device.
P
anel
P
rogramming
– B
uilt
-i
n
Z
ones
You can program up to three (3) Built-In Zones per system (two Hard-wired zones and the Panel Glassbreak detector). To get started, navigate to
the
Installer Toolbox
. Tap
Panel Programming
, then tap the Built-In Zones option.
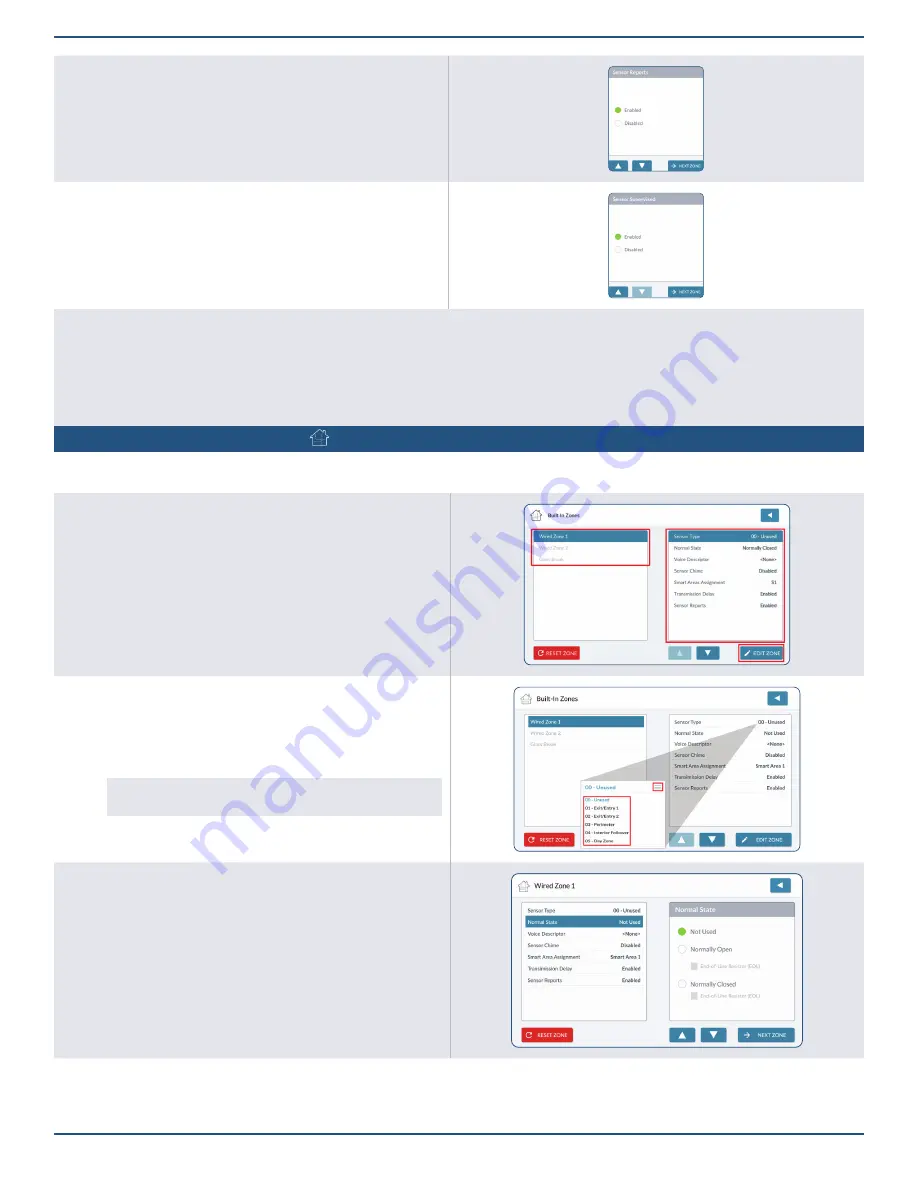
Selecting a Wired Built-In Zone
1 .
On the left side of the Built-In Zone screen, review the list of zones.
2 .
Tap one of the available zones to highlight it. A zone is available when it
appears in gray text.
3 .
Tap
EDIT ZONE
.
Sensor Type
1 .
Highlight
Sensor Type
.
2 .
Tap
≡
to expand the list.
3 .
Select the appropriate sensor type from the list.
For example:
for a Door/Window Contact for a Patio Door,
perhaps select 03-Perimeter.
4 .
Tap
to move to the next option.
Normal State
1 .
Highlight
Normal State
.
2 .
Choose one of these options:
¾
Normally Open (NO):
Sends alert signal to the security system
when the sensor’s circuit is no longer in the NO state.
¾
Normally Closed (NC):
Sends alert signal to the security system
when the sensor’s circuit is no longer in the NC state.
End-of-Line Resistor (EOL):
Choose when an end- of-line (EOL)
resistor is present.


