Copyright © 2022 Nortek Security & Control LLC
29
If you selected a Sensor Type other than those listed above, skip this step.
1 .
Highlight
Sensor Equipment Type
.
2 .
Choose
Contact
,
Emergency
or
Motion
. Available options vary, depending on the selected Sensor Type.
3 .
Tap
to move to the next option.
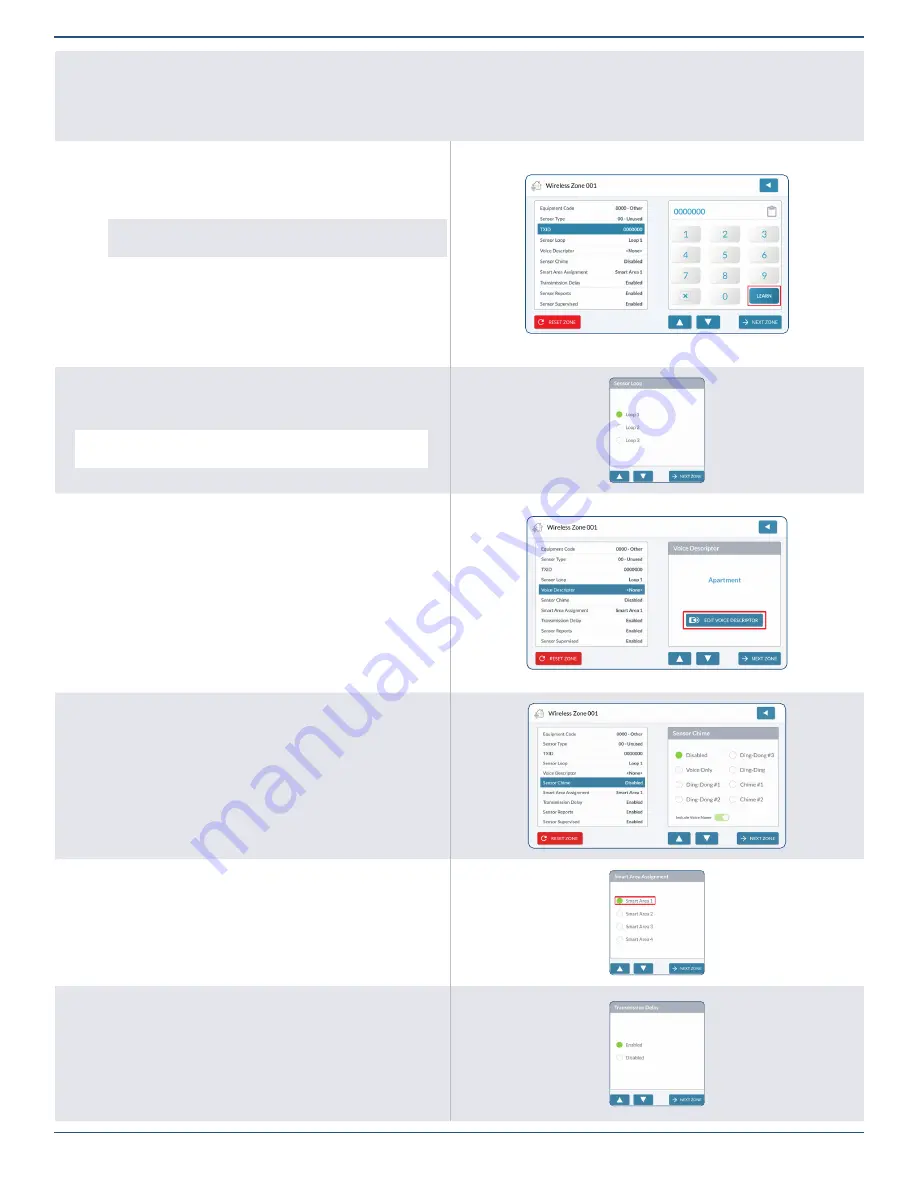
Enter TXID
1 .
Tap
TXID
.
2 .
Tap
Learn
to enter
Learning Mode
. This panel listens for the 7-digit TX
ID transmission from the sensor or peripheral.
TIP
: Along with Learning Mode, you also have the option to
manually enter the 7-digit TX ID using the keypad.
3 .
Trigger the sensor or peripheral (see the product’s Installation
Instructions). When the 7-digit TX ID is received,
Sensor Received
appears.
4 .
Verify that the 7-digit TX ID on product and touchscreen match, then tap
Accept
.
5 .
Tap
to move to the next option.
Sensor Loop
1 .
Highlight
Sensor Loop
.
2 .
Choose
Loop 1
,
Loop 2
, or
Loop 3
.
NOTE:
To determine the appropriate loop number, see the
Installation Instructions included with the sensor or peripheral.
3 .
Tap
to move to the next option.
Voice Descriptor
Create a voice descriptor for the sensor or peripheral.
1 .
Highlight
Voice Descriptor
.
2 .
Tap
Edit Voice Descriptor
to reveal the keypad.
3 .
Enter the first few letters of the desired word.
4 .
Tap the matching word.
5 .
Repeat the steps above to enter the desired phrase.
6 .
Tap
Done
.
7 .
Review the voice descriptor.
8 .
Tap
to move to the next option.
Sensor Chime
1 .
Highlight
Sensor Chime
.
2 .
Choose the desired chime from the list. The default setting is
Disabled
.
Smart Areas Assignment
1 .
Highlight
Smart Areas Assignment
.
2 .
Under Smart Areas Assignment, choose a Smart Area (Partition) for the
zone.
3 .
Tap
to move to the next option.
Transmission Delay
1 .
Highlight
Transmission Delay
.
2 .
Select
Enabled
or
Disabled
.
3 .
Tap
to move to the next option.


