background image


P. 11


Fxbox 2.0 User Manual 

1/22/19 

3:54 PM 
v. 2.0 

Copyright ©1010music LLC 2019  


Working with Effects 

Fxbox takes audio input from 

IN1

 and 

IN2

, processes the configured effects using two distinct effects chains, and sends 

the results of 

Chain A

 to 

OUT1

 and 

OUT2, 

and the results of

 Chain B 

to

 FX1 

and

 FX2

.  

 
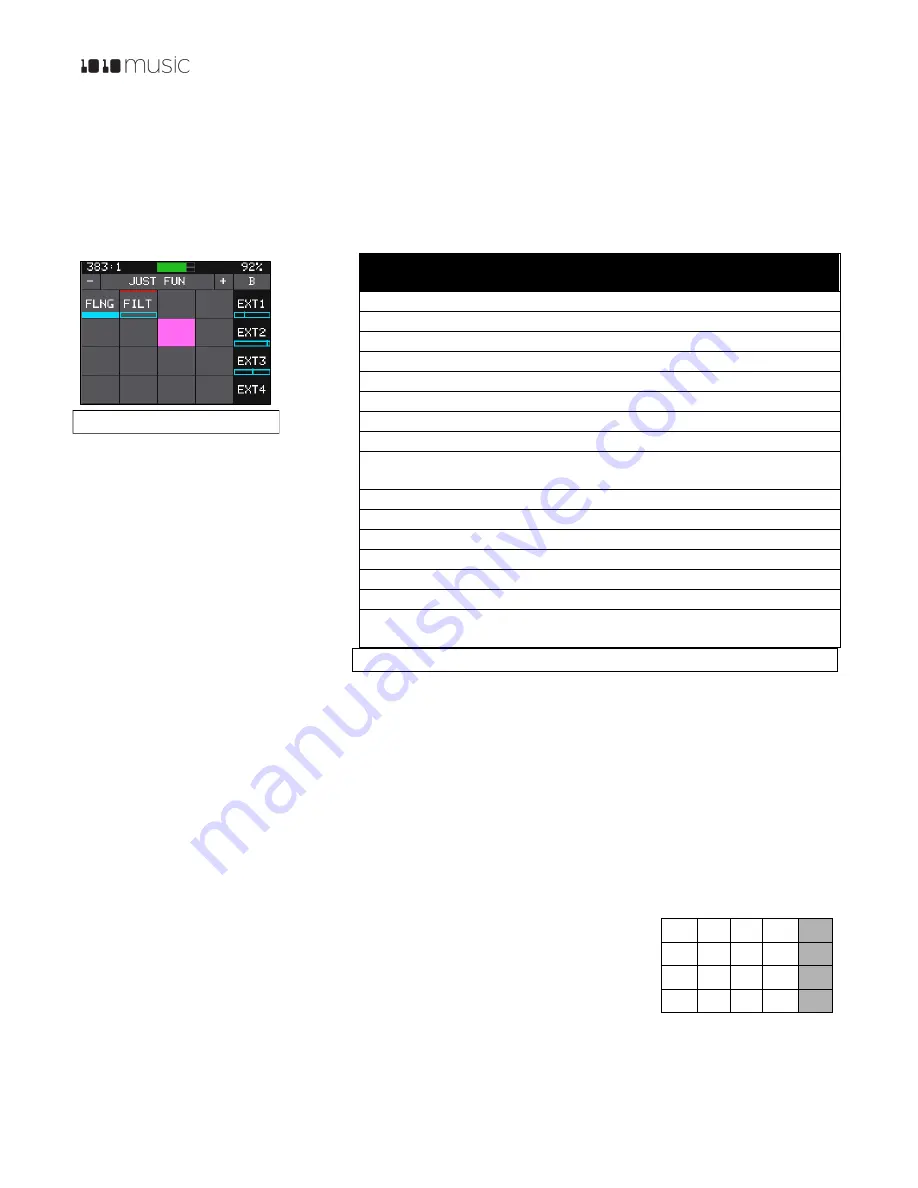
When fxbox starts up, the touch screen displays the Main screen with the grid containing up to 16 effects for the selected 
preset. The available effects are listed in the table below: 


The effects are applied by the signal 
processing chain in the order in which they 
appear in the grid, from top left, moving 
across to the right and then moving across 
each subsequent row moving down.  You 
can add or remove effects on the grid for 
each chain. 
 
Effects can be momentarily enabled using 
the touch screen, triggered via control 
voltage (CV) and MIDI inputs, sequenced 
via individual Gate Sequencers, or set to 
always on by configuring the parameters for the effect.  

Momentarily Apply an Effect 

If you want to apply an effect manually, you can do so by touching and holding the cell for that effect on the touch screen.  
The effect is applied while you are touching the cell, and stops when you remove your finger. 

Trigger an Effect via Control Voltage Signal 

You can use an external signal to control when an effect is applied using independent signals for each effect. To do this, 
plug a control voltage gate signal into the 

CV Trigger

 jack that maps to the effect in the grid. The effect will be applied 

when the CV signal goes high, and be turned off when the CV signal goes low. 

Trigger an Effect via MIDI Input 

You can trigger an effect by plugging a MIDI controller source into the 

MIDI 

input jack. The 

MIDI

 input uses a TRS connection compatible with the Arturia BeatStep Pro. Be sure to use 

a TRS cable. By default, Fxbox responds to 

MIDI

 inputs on MIDI Channel 10. You can select 

a different MIDI port on the Settings screen, as described in General Module Settings above.  

MIDI

 inputs for notes 36 to 51 are mapped to the effects in the grid as shown in the 

diagram to the right. The 

Play

 button is mapped to note 52 and will toggle play mode. 

Label 

Effect 

Uses 
Allowed 

BTCR 

Bit reduction and sample rate reduction 

CHR 

Chorus 

DIST 

Distortion 

DLY 

Delay 

FILT 

Low or High Pass Filter 

FLNG 

Flanger 

FRZE 

Granulator based freeze effect 

GATE 

Clock based gating 

LOOP 

Automated looping, with quantized start and 
length 

PAN 

Automated panning 

PHAS 

Phaser 

PIT 

Pitch Shifter 

RING  

Ring modulator 

RVB 

Reverb 

RVRS 

Reverse 

VNYL 

Turntable and similar effects including scratching, 
tape stop, and backspin 

Figure 10: Effects List 

48  49  50  51   
44  45  46  47   
40  41  42  43   
36  37  38  39  52 

Figure 9:Main Screen 

Summary of Contents for Fxbox v 2.0

Page 1: ...P 1 Fxbox 2 0 User Manual 1 22 19 3 54 PM v 2 0 Copyright 1010music LLC 2019 Fxbox v 2 0 User Manual ...

Page 2: ...rameters of an Effect 12 Use the XY Pad to Control Parameters 12 Bypass Effects 13 Effect Parameters 13 Visually Monitor the Effects 16 Working with Presets 17 Select a Preset 17 Save a Preset 17 Create a New Preset 17 Rename a Preset 18 Delete a Preset 18 Working with the Step Sequencer 19 Start and Configure the Step Sequencer 19 Sequence an Effect 19 Using External Signals to Modulate Effects a...

Page 3: ...P 3 Fxbox 2 0 User Manual 1 22 19 3 54 PM v 2 0 Copyright 1010music LLC 2019 Connect with the 1010music Community 22 Contact Us 22 ...

Page 4: ...nagement Then we will walk you through how to use the sequencers and modulators After that we will cover how to synchronize fxbox with other modules Finally we will go into more depth about preset management tasks and discuss how to upgrade or swap out your firmware Fxbox is part of the Series 1 family of 1010music Eurorack modules This means that you can swap out the firmware on this module for o...

Page 5: ...x contains a touch screen control knobs HOME and INFO buttons MIDI and CLOCK input jacks CV Trigger input jacks CV Modulator jacks and 2 pairs of stereo Output Jacks as shown in Figure 1 The jacks in the right column of CV Triggers serve double duty as EXT5 through EXT8 for use in CV modulation The INFO and HOME buttons at the top of the front panel of fxbox are used to navigate the screens Press ...

Page 6: ...e CV clock input for a few seconds or sending a MIDI Start signal To the right of the clock display you will see a bar graph and a percentage The bar graph represents the levels of the incoming audio signals the top bar represents In1 and the bottom bar is In2 When this graph turns red the signal is overdriving the system and could result in clipping The percentage number represents the current pr...

Page 7: ...ot matter which end is inserted into the module However the connector must be in the correct orientation The connector on the module is keyed so the ribbon cable won t fit in the wrong orientation The correct orientation places the edge of the ribbon cable with the red line on the left side of the module as shown in Figure 4 to the right Next connect the other end of the ribbon cable to the power ...

Page 8: ...e your CV source to send a varying CV signal in the 5V to 5V range Connect an Output In order to hear the sound effects created by your fxbox you will need to connect the outputs to some speakers Start by inserting two mini TS cables to the OUT1 and OUT2 jacks and then connecting the other ends to your mixer or speakers General Module Settings We are just about ready to put fxbox to work but we sh...

Page 9: ...INFO is always on the right The alignment of the Control Knobs in this mode is slightly high compared to the parameters on the touch screen However the top left control knob will control the top left parameter and the lower right control knob will control the lower right parameter The CV Trigger inputs are also now mapped to the inverted display The Input Jacks and Output Jacks maintain their orig...

Page 10: ... screen if needed 2 Touch the Chain Selection icon A or B near the top right corner of the screen This will display the Chain Management Screen 3 Touch an input button on the left side of the screen to toggle the input for the corresponding chain Light blue inputs are enabled 4 Touch a chain box to view the effects grid for that chain on the Main screen You can route any combination of inputs to t...

Page 11: ...an use an external signal to control when an effect is applied using independent signals for each effect To do this plug a control voltage gate signal into the CV Trigger jack that maps to the effect in the grid The effect will be applied when the CV signal goes high and be turned off when the CV signal goes low Trigger an Effect via MIDI Input You can trigger an effect by plugging a MIDI controll...

Page 12: ...effects list table above to review how many times each effect type can be used To delete an effect from a cell choose the effect type of none Edit the Parameters of an Effect Each effect in the grid has a set of parameters that control how and when the effect is applied to the input signal Follow these steps to edit the parameters for an effect 1 Touch the cell of the effect in the grid on the Mai...

Page 13: ...the names of bypassed or disabled effects Effect Parameters The table below describes the parameters for each of the effects Label Effect Parameter Settings Mod Target BTCR Bit reduction and sample rate reduction Frequency 0 to 100 Determines sampling frequency from 187Hz to 48kHz Yes Resolution 0 to 100 Determines output resolution from 1 bit to 24 bits Yes Trigger ON the effect is constantly app...

Page 14: ...sity of the effect No Trigger ON the effect is constantly applied Gate effect is triggered via CV input momentary touch MIDI input or the step sequencer No FRZE Granulator based freeze effect Speed 100 to 100 Determines the scanning of the read position once the effect is held 100 is reverse at original speed 0 is held in place 100 is scanning forward at the original speed Yes Spread 128 to 8192 D...

Page 15: ... or the step sequencer No PHAS Phaser Rate 0 to 100 Controls the rate at which the effect sweeps through the full range from 0 1Hz to 10Hz Yes Feedback 0 to 100 Determines the amount of feedback or intensity of the effect No Trigger ON the effect is constantly applied Gate effect is triggered via CV input momentary touch MIDI input or the step sequencer No PIT Pitch Shifter Pitch 24 semitones to 2...

Page 16: ... table below describes what the icons and color changes indicate User Interface Example Description What it means Cell highlighted pink The cell is selected Pressing the INFO button will show the details for this cell Red bar across the top of the cell The effect is bypassed and will not be heard Unfilled blue bar across the bottom of the cell The Trigger for the effect is set to On Filled blue ba...

Page 17: ...nt to restore the factory presets follow the steps in Updating and Swapping Firmware below Save a Preset When you are ready to save your changes to a preset you have two options Save to save over the existing preset or SaveAs to create a new file that contains the changes to the preset 1 Touch the preset name at the top of the grid or the space above it to display the Presets screen 2 Touch the Ed...

Page 18: ...e the changes and go back to the Presets screen Delete a Preset Follow these steps to delete a preset Warning there is no undo and no prompt to ask are you sure So make sure you are on the correct preset before you use this If you do accidentally delete a preset you can reload it from the factory image or a back up using the steps outlined in Reset fxbox Presets to Factory Settings below 1 Touch t...

Page 19: ...s in the sequence Values 2 through 32 Quant Size Determines when the sequencer will be engaged or disengaged as specified in musical length The incoming clock or MIDI clock sets the tempo for this setting Values 2 bars 1 bar T T 1 8 1 8 T 1 16 1 16 T 1 32 1 32 T 1 64 Sequence an Effect 1 From the Main screen select an effect to sequence by touching the grid cell 2 Push the INFO button twice to dis...

Page 20: ...l this parameter Available values are None no modulation and EXT1 through EXT8 EXT1 through EXT8 are the CV inputs into the right hand columns of jacks under the screen Note The Control Voltage jacks on fxbox map to the EXT modulators as shown in the diagram below EXT5 EXT1 EXT6 EXT2 EXT7 EXT3 EXT8 EXT4 5 Use the Control Knobs to select the Amount of modulation that will be applied This is used to...

Page 21: ...he latest firmware images on our forum at https forum 1010music com under the Firmware Downloads forum You must register for the forum in order to access the download files Forum registration is free 2 Unpack the zip file Some browsers do this automatically for you 3 If you want to replace the Presets with the factory image copy the full contents of the zip file onto a microSD card If you do not w...

Page 22: ...his user manual Connect with the 1010music Community There is a very active community of users of 1010music modules at forum 1010music com If you have a question about the module that isn t answered in this manual this is your best source for help We actively monitor the wish list sub forums for ideas for future versions of our products Forum registration is free We hope to see you out there Conta...

Reviews: