Chapter 31 Bandwidth Management
UAG5100 User’s Guide
320
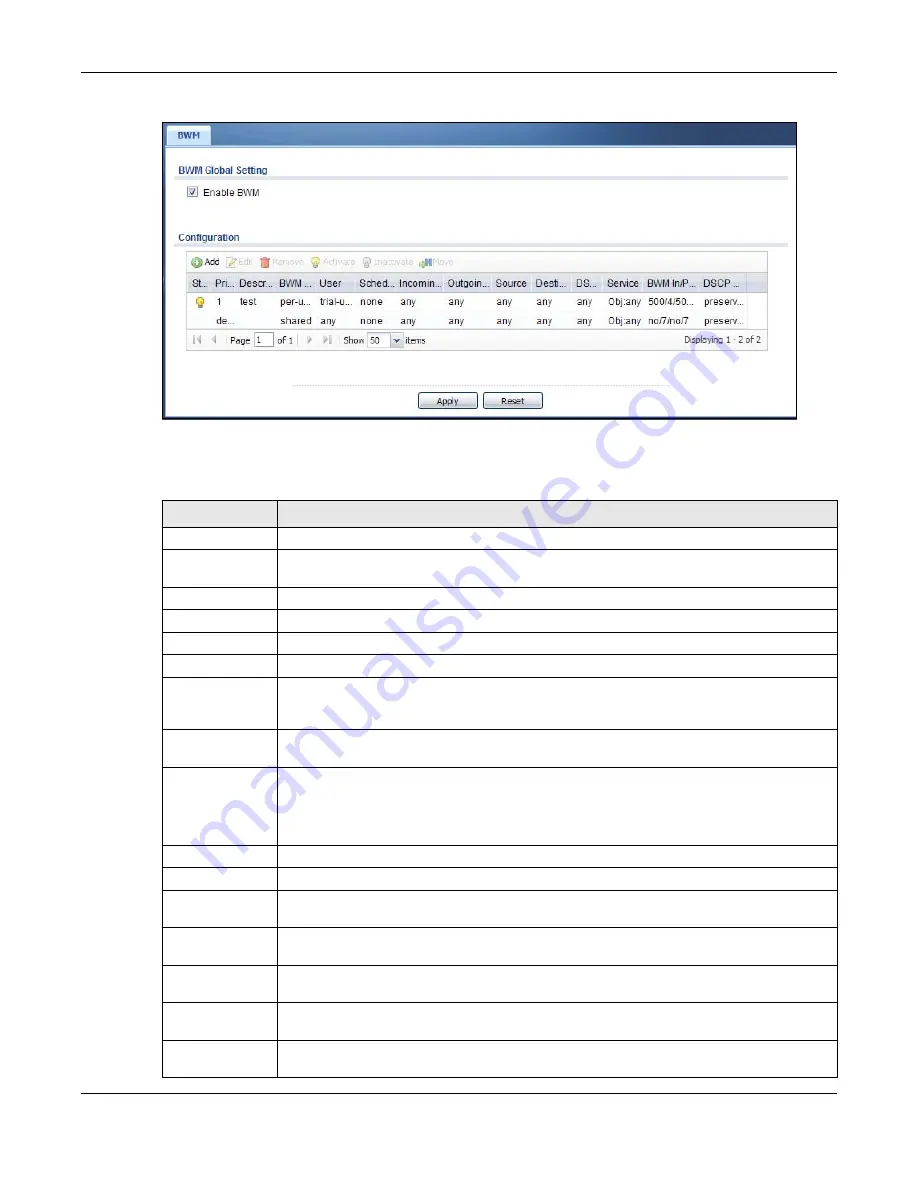
Figure 214
Configuration > BWM
The following table describes the labels in this screen. See
for more
information as well.
Table 141
Configuration > BWM
LABEL
DESCRIPTION
Enable BWM
Select this check box to activate management bandwidth.
Add
Click this to create a new entry. Select an entry and click Add to create a new entry after
the selected entry.
Edit
Select an entry and click this to be able to modify it.
Remove
Select an entry and click this to delete it.
Activate
To turn on an entry, select it and click Activate.
Inactivate
To turn off an entry, select it and click Inactivate.
Move
To change an entry’s position in the numbered list, select it and click Move to display a
field to type a number for where you want to put that entry and press [ENTER] to move the
entry to the number that you typed.
Status
The activate (light bulb) icon is lit when the entry is active and dimmed when the entry is
inactive. The status icon is not available for the default bandwidth management policy.
Priority
This is the position of your bandwidth management policy in the list. The ordering of your
rules is important as rules are applied in sequence.
This field displays default for the default bandwidth management policy that the UAG
performs on traffic that does not match any other bandwidth management policy.
Description
This is the descriptive name of the policy.
BWM Type
This is the bandwidth management type of the policy.
User
This is the user name or user group to which the policy applies. If any displays, the policy
applies to all users.
Schedule
This is the schedule that defines when the policy applies. none means the policy always
applies.
Incoming
Interface
This is the source interface of the traffic to which this policy applies.
Outgoing
Interface
This is the destination interface of the traffic to which this policy applies.
Source
This is the source address or address group for whom this policy applies. If any displays,
the policy is effective for every source.
Содержание UAG5100
Страница 42: ...Chapter 3 Printer Deployment UAG5100 User s Guide 42 ...
Страница 124: ...Chapter 10 Interfaces UAG5100 User s Guide 124 Figure 82 Configuration Network Interface Ethernet Edit External Type ...
Страница 125: ...Chapter 10 Interfaces UAG5100 User s Guide 125 Figure 83 Configuration Network Interface Ethernet Edit Internal Type ...
Страница 135: ...Chapter 10 Interfaces UAG5100 User s Guide 135 Figure 88 Configuration Network Interface PPP Add ...
Страница 213: ...Chapter 20 UPnP UAG5100 User s Guide 213 Figure 139 Network Connections My Network Places Properties Example ...
Страница 227: ...Chapter 24 Web Authentication UAG5100 User s Guide 227 Figure 152 Configuration Web Authentication Web Portal ...
Страница 228: ...Chapter 24 Web Authentication UAG5100 User s Guide 228 Figure 153 Configuration Web Authentication User Agreement ...
Страница 273: ...Chapter 26 Billing UAG5100 User s Guide 273 Figure 190 Configuration Billing Payment Service Custom Service ...
Страница 292: ...Chapter 30 IPSec VPN UAG5100 User s Guide 292 Figure 201 Configuration VPN IPSec VPN VPN Connection Add Edit ...
Страница 298: ...Chapter 30 IPSec VPN UAG5100 User s Guide 298 Figure 203 Configuration VPN IPSec VPN VPN Gateway Add Edit ...
Страница 314: ...Chapter 30 IPSec VPN UAG5100 User s Guide 314 ...
Страница 387: ...Chapter 39 Certificates UAG5100 User s Guide 387 Figure 256 Configuration Object Certificate Trusted Certificates Edit ...
Страница 436: ...Chapter 42 Log and Report UAG5100 User s Guide 436 Figure 302 Configuration Log Report Email Daily Report ...
Страница 440: ...Chapter 42 Log and Report UAG5100 User s Guide 440 Figure 304 Configuration Log Report Log Settings Edit System Log ...
Страница 445: ...Chapter 42 Log and Report UAG5100 User s Guide 445 Figure 306 Configuration Log Report Log Settings Edit Remote Server ...
Страница 491: ...Appendix A Legal Information UAG5100 User s Guide 491 Environmental Product Declaration ...


