


P-2608HWL-Dx Series User’s Guide
Chapter 19 Certificates
259
19.8 Trusted CAs
Click
Security > Certificates >
Trusted CAs
to open the
Trusted CAs
screen. This screen
displays a summary list of certificates of the certification authorities that you have set the
ZyXEL Device to accept as trusted. The ZyXEL Device accepts any valid certificate signed by
a certification authority on this list as being trustworthy; thus you do not need to import any
certificate that is signed by one of these certification authorities.
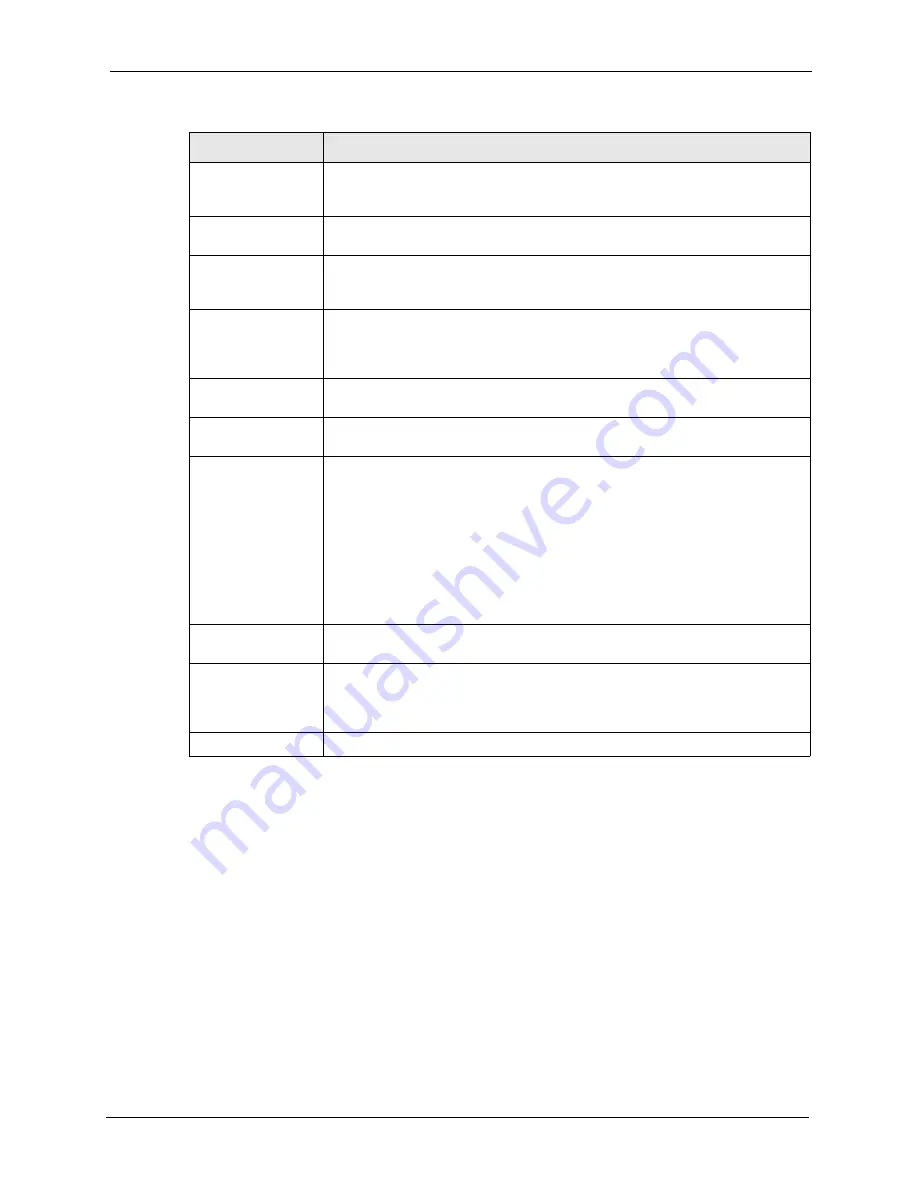
Key Algorithm
This field displays the type of algorithm that was used to generate the
certificate’s key pair (the ZyXEL Device uses RSA encryption) and the length of
the key set in bits (1024 bits for example).
Subject Alternative
Name
This field displays the certificate owner‘s IP address (IP), domain name (DNS) or
e-mail address (EMAIL).
Key Usage
This field displays for what functions the certificate’s key can be used. For
example, “DigitalSignature” means that the key can be used to sign certificates
and “KeyEncipherment” means that the key can be used to encrypt text.
Basic Constraint
This field displays general information about the certificate. For example,
Subject Type=CA means that this is a certification authority’s certificate and
“Path Length Constraint=1” means that there can only be one certification
authority in the certificate’s path.
MD5 Fingerprint
This is the certificate’s message digest that the ZyXEL Device calculated using
the MD5 algorithm.
SHA1 Fingerprint
This is the certificate’s message digest that the ZyXEL Device calculated using
the SHA1 algorithm.
Certificate in PEM
(Base-64) Encoded
Format
This read-only text box displays the certificate or certification request in Privacy
Enhanced Mail (PEM) format. PEM uses 64 ASCII characters to convert the
binary certificate into a printable form.
You can copy and paste a certification request into a certification authority’s web
page, an e-mail that you send to the certification authority or a text editor and
save the file on a management computer for later manual enrollment.
You can copy and paste a certificate into an e-mail to send to friends or
colleagues or you can copy and paste a certificate into a text editor and save the
file on a management computer for later distribution (via floppy disk for
example).
Export
Click this button and then
Save
in the
File Download
screen. The
Save As
screen opens, browse to the location that you want to use and click
Save
.
Apply
Click
Apply
to save your changes back to the ZyXEL Device. You can only
change the name, except in the case of a self-signed certificate, which you can
also set to be the default self-signed certificate that signs the imported trusted
remote host certificates.
Cancel
Click
Cancel
to quit and return to the
My Certificates
screen.
Table 94
My Certificate Details (continued)
LABEL
DESCRIPTION
Содержание P-2608HWL-D1
Страница 1: ...P 2608HWL Dx Series 802 11g Wireless ADSL2 VoIP IAD User s Guide Version 3 40 10 2006 Edition 1 ...
Страница 2: ......
Страница 7: ...P 2608HWL Dx Series User s Guide Safety Warnings 7 This product is recyclable Dispose of it properly ...
Страница 24: ...P 2608HWL Dx Series User s Guide 24 Table of Contents ...
Страница 32: ...P 2608HWL Dx Series User s Guide 32 List of Figures ...
Страница 38: ...P 2608HWL Dx Series User s Guide 38 List of Tables ...
Страница 44: ...P 2608HWL Dx Series User s Guide 44 Chapter 1 Getting To Know the ZyXEL Device ...
Страница 66: ...P 2608HWL Dx Series User s Guide 66 Chapter 3 Internet and Wireless Setup Wizard ...
Страница 72: ...P 2608HWL Dx Series User s Guide 72 Chapter 4 VoIP Wizard And Example ...
Страница 78: ...P 2608HWL Dx Series User s Guide 78 Chapter 5 Bandwidth Management Wizard ...
Страница 88: ...P 2608HWL Dx Series User s Guide 88 Chapter 6 Status Screens ...
Страница 118: ...P 2608HWL Dx Series User s Guide 118 Chapter 8 LAN Setup ...
Страница 138: ...P 2608HWL Dx Series User s Guide 138 Chapter 9 Wireless LAN ...
Страница 166: ...P 2608HWL Dx Series User s Guide 166 Chapter 11 SIP ...
Страница 176: ...P 2608HWL Dx Series User s Guide 176 Chapter 12 Phone ...
Страница 184: ...P 2608HWL Dx Series User s Guide 184 Chapter 13 Phone Book ...
Страница 206: ...P 2608HWL Dx Series User s Guide 206 Chapter 16 Firewall Configuration Figure 107 Firewall Edit Rule ...
Страница 220: ...P 2608HWL Dx Series User s Guide 220 Chapter 17 Content Filtering ...
Страница 257: ...P 2608HWL Dx Series User s Guide Chapter 19 Certificates 257 Figure 138 My Certificate Details ...
Страница 268: ...P 2608HWL Dx Series User s Guide 268 Chapter 19 Certificates Figure 146 Trusted Remote Host Details ...
Страница 276: ...P 2608HWL Dx Series User s Guide 276 Chapter 20 Static Route ...
Страница 288: ...P 2608HWL Dx Series User s Guide 288 Chapter 21 Bandwidth Management ...
Страница 292: ...P 2608HWL Dx Series User s Guide 292 Chapter 22 Dynamic DNS Setup ...
Страница 306: ...P 2608HWL Dx Series User s Guide 306 Chapter 23 Remote Management Configuration ...
Страница 318: ...P 2608HWL Dx Series User s Guide 318 Chapter 24 Universal Plug and Play UPnP ...
Страница 324: ...P 2608HWL Dx Series User s Guide 324 Chapter 25 System ...
Страница 344: ...P 2608HWL Dx Series User s Guide 344 Chapter 27 Tools ...
Страница 348: ...P 2608HWL Dx Series User s Guide 348 Chapter 28 Diagnostic ...
Страница 360: ...P 2608HWL Dx Series User s Guide 360 Chapter 29 Troubleshooting ...
Страница 378: ...P 2608HWL Dx Series User s Guide 378 Appendix B Setting up Your Computer s IP Address ...
Страница 402: ...P 2608HWL Dx Series User s Guide 402 Appendix F Triangle Route ...
Страница 440: ...P 2608HWL Dx Series User s Guide 440 Appendix H Internal SPTGEN ...


