Chapter 8 Basic Setting
GS1915 Series User’s Guide
102
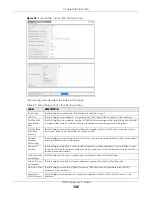
The following table describes the labels in this screen.
Table 36 Basic Setting > PoE Setup > PoE Setup
LABEL
DESCRIPTION
PoE Mode
Select the power management mode you want the Switch to use.
•
Classification
– Select this if you want the Switch to reserve the maximum power for each PD
according to the PD’s power class and priority level. If the total power supply runs out, PDs
with lower priority do not get power to function. In this mode, the maximum power is reserved
based on what you configure in
Max Power
or the standard power limit for each class.
•
Consumption
– Select this if you want the Switch to supply the actual power that the PD
needs. The Switch also allocates power based on a port’s
Max Power
and the PD’s power
class and priority level. The Switch puts a limit on the maximum amount of power the PD can
request and use. In this mode, the default maximum power that can be delivered to the PD is
30 W (IEEE 802.3at Class 4) or 22 W (IEEE 802.3af Classes 0 to 3).
MIB Trap
The Switch sends traps (monitoring event notification) to an SNMP (Simple Network Management
Protocol) manager when an event occurs. See
SNMP, MIB (Management Information Base), and SNMP traps.
Select
ON
to allow sending of MIB Trap when the following situations occur:
• Situation 1-
Trap sent whenever a PoE port status change occurs (PoE port delivers power or delivers no
power to a PD (powered device)
• Situation 2-
Trap sent in cases where the total power usage exceeds the PoE usage threshold
• Situation 3-
Trap sent if total usage power decreases below the PoE usage threshold (only if previous total
power usage exceeded the PoE usage threshold and a trap was sent).
Note: If the
MIB Trap
is
ON
, you must also configure:
• SNMP trap destination (
Management
>
Access Control
>
SNMP
), SNMP trap group
(
Management
>
Access Control
>
SNMP >
Trap Group
) and SNMP trap port (
Management
>
Access Control
>
SNMP
>
Trap Group
>
Port
) for Situation 1.
• SNMP trap destination and SNMP trap group for Situation 2 and Situation 3.
See
for more information on configuring SNMP.
PoE Usage
Threshold (%)
Enter a number ranging from 1 to 99 to set the threshold. The Switch will generate a trap and/or
log when the actual PoE usage is higher than the specified threshold.
Port
This is the port index number.
*
Settings in this row apply to all ports.
Use this row only if you want to make some settings the same for all ports. Use this row first to set
the common settings and then make adjustments on a port-by-port basis.
Changes in this row are copied to all the ports as soon as you make them.
Active
Select this to provide power to a PD connected to the port.
If left unchecked, the PD connected to the port cannot receive power from the Switch.
Priority
When the total power requested by the PDs exceeds the total PoE power budget on the Switch,
you can set the PD priority to allow the Switch to provide power to ports with higher priority.
Select
Critical
to give the highest PD priority on the port.
Select
High
to set the Switch to assign the remaining power to the port after all critical priority
ports are served.
Select
Low
to set the Switch to assign the remaining power to the port after all critical and high
priority ports are served.
Содержание GS1915 Series
Страница 17: ...17 PART I User s Guide ...
Страница 39: ...39 PART II Technical Reference ...
Страница 101: ...Chapter 8 Basic Setting GS1915 Series User s Guide 101 Figure 75 Basic Setting PoE Setup PoE Setup ...
Страница 209: ...GS1915 Series User s Guide 209 Figure 146 Advanced Application LLDP LLDP Local Status LLDP Local Port Status Detail ...
Страница 280: ...GS1915 Series User s Guide 280 Figure 206 Example Lock Denoting a Secure Connection EXAMPLE ...
Страница 309: ...309 PART III Troubleshooting and Appendices ...


