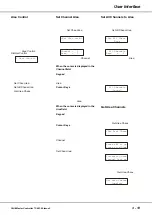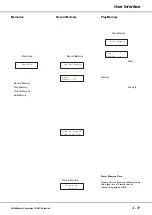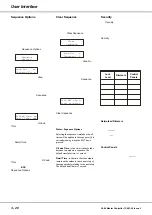
Area Control
Each dimmer channel in the network is
assigned to an area.
Initially, or after a Reset operation, all
channels are assigned to area 1.
This option allows the user to assign
dimmer channels to any of the 10
areas, or to assign all channels to a
specificed area.
Select the
Area Control
option from the
Dimmer Control
menu options:
< Area Control >
Press the ENT key to enter the Area
Control sub-menu.
The following menu options are
available:
•
Set Chan Area
•
Set All Chans Area
•
Get Area Chans
Use the cursor keys to select the
required menu option.
Press the ENT key to enter the
corresponding sub-menu.
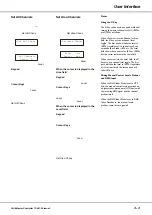
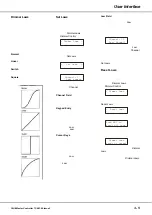
Set Channel Area
This option allows the user to assign
an area to individual master channels.
Select the
Set Chan Area
option from
the menu:
<Set Chan Area >
Press the ENT key. The LCD shows:
Channel : 1
Area : 1
A cursor is shown in the
Channel
field.
The channel number defaults to 1.
When the cursor is displayed in the
Channel
field:
Keypad
- Enter the channel number
using the numeric keys then press the
ENT key. The cursor moves to the
Area
field.
Cursor Keys
- Use the cursor keys to
select the channel number. As the
channel number changes, the
corresponding area is shown in the
Area field. Press the ENT key. The
cursor moves to the
Area
field.
When the cursor is displayed in the
Area
field:
Keypad
- Enter the required area
number (1 - 10) using the numeric keys
then press the ENT key.
Cursor Keys
- Use the cursor keys to
select the area number, then press the
ENT key.
The area is assigned to the master
channel and the cursor returns to the
Channel
field.
Pressing the ESC key at any point on
this screen will return the screen to the
Set Chan Area
screen.
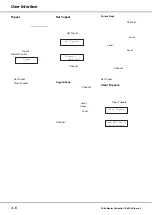
Set All Channels to Area
This option allows the user to assign
an area to all the master channels.
Select the
Set All Chans Area
option
from the menu:
<Set All Chans >
Area
Press the ENT key. The LCD shows:
All Channels
Area : 1
A cursor is displayed in the
Area
field
which defaults to Area 1.
Use the numeric or cursor keys to
enter the required area number, then
press the ENT key.
The LCD shows the following for 3
seconds before returning to the Set All
Chans Area screen:
All Channels
Saved
Pressing the ESC key on the above
screen will return to the Set All Chans
Area screen, losing any changes.
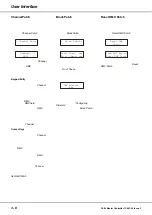
Get Area Channels
This option is used to interrogate the
channels in the network to determine
which area they are assigned to.
Select the
Get Area Chans
option from
the menu:
<Get Area Chans>
Press the ENT key. The LCD shows:
Press ENT to get
Areas from Dimm.
Press the ENT key. The LCD shows:
Collecting Area
Channel Data xx
After all the channels have been
interrogated, the LCD shows the
following for 3 seconds before
returning to the
Get Area Chans
screen.
Get Area Channel
Complete
Chilli Master Controller 73-861-00 Issue 3
3 - 13
User Interface
Содержание 01-201-00
Страница 1: ...CHILLI MASTER CONTROLLER OPERATING MANUAL ...
Страница 2: ......
Страница 8: ...2 2 Chilli Master Controller 73 861 00 Issue 3 Installation Figure 2 4 Figure 2 5 Figure 2 6 ...
Страница 32: ...4 2 Chilli Master Controller 73 861 00 Issue 3 Technical Specification ...
Страница 33: ......

