


PROVERGE SETUP AND ADJUSTMENT
PV152
3-14
PRO1200 PROVERGE SETUP
The
PROVERGE
is a fully automatic convergence and geometry
system for the PRO1200 CRT-based projection systems.
Using the
PROVERGE's
user friendly on-screen displays, the
unit effortlessly aligns the projected image on the screen
with extreme accuracy in the shortest possible time. This
makes the unit perfectly useful for a wide range of
applications.
Easy-to-use, high precision automatic convergence
system.
Various options on the menu offer you the optimal solution
for your own individual needs :
Align :
convergence starts from the current image situation
Align from midposition :
convergence starts from
midposition.
Touch-up :
convergence starts when the source switches or
after a user-defined time : alignment of static convergence
is almost invisible for the audience.
Easy-to-use, high precision automatic geometry system
Various options on the menu offer a comprehensive solution
to your geometry requirements :
Quick auto-picture :
aligns geometry within 45 seconds.
Full auto-picture :
aligns geometry very accurately followed
by auto convergence. This option offers a very powerful
adjustment tool.
Compact, built-in system
A very compact, monochrome CCD camera
Use of Sub-Pixel Resolution Techniques, a state-of-the-art
proprietary Digital Signal Processing System.
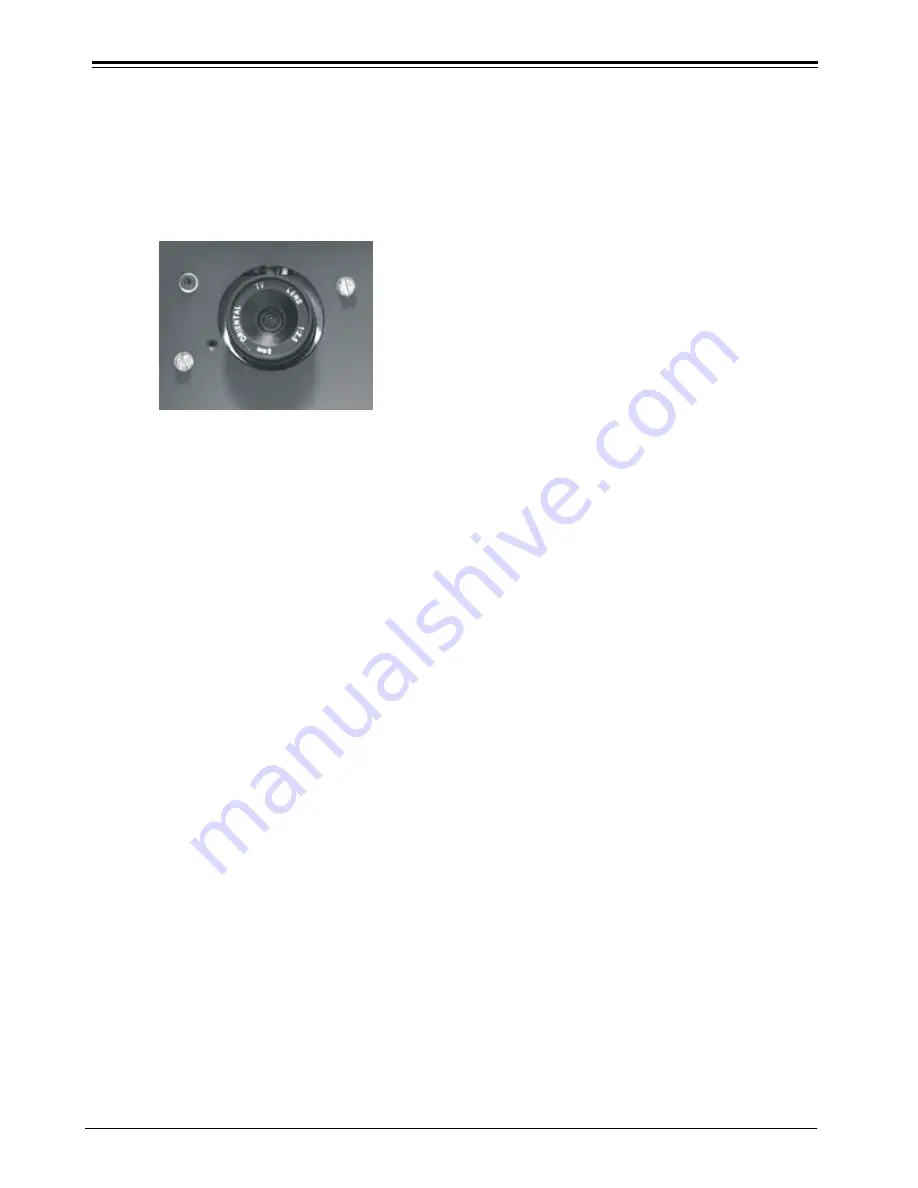
Preparing your PROVERGE
When the lens of the
PROVERGE
is covered with the lens
protection cap, ensure to remove this cap first before
starting the adjustment procedure for the Lense.
INTRODUCTION
ACCESS TO PROVERGE ON-SCREEN MENUS
Press the <ADJUST> button on the RCU (Remote Control
Unit) or the local keypad of the projector to enter the
‘Adjustment mode’ (please refer to the projector Owner’s
Manual). The PROVERGE path will be displayed in the menu:
1. Highlight
PROVERGE
by pushing the
é
or
ê
keys of the
control disc (on RCU).
2. Press the <ENTER>. button to enter the
PROVERGE
menu.
PROVERGE
menu
The
PROVERGE
menu will be displayed after the path
PROVERGE
is selected. Six items are available :
TOUCH UP.
Autoconvergence.
Quick AutoPICTURE.
FULL AutoPICTURE.
PROVERGE SETUP.
PROVERGE DIAGNOSTICS.
Choose
PROVERGE
SETUP first to carry out the SETUP
procedures.
Use
PROVERGE
DIAGNOSTICS to check whether the
PROVERGE
is functioning normally.
PROVERGE SETUP
The
PROVERGE
SETUP procedure needs to be done only once
after the projector is correctly installed or whenever the
projector is reinstalled in another position.
TO ENTER THE PROVERGE SETUP MENU :
1. Highlight
PROVERGE
SETUP by pushing the
é
or
ê
keys
of the control disc.
2. Press the <ENTER>. button to display the
PROVERGE
SETUP menu.
SETTING THE CONFIGURATION
The option is available for all PRO1200 projectors. When
using a retro-projector, this option must be set to rear.
Follow the steps described below to set the right configuration
3. Highlight FRONT (OR REAR) by pushing the
é
or
ê
keys
of the control disc.
4. Press the <ENTER>. button to set the correct projector
configuration.
The
PROVERGE
SETUP menu provides you with easy to use
methods to focus the camera lens and to center the camera.
Please pay attention while doing it, as a properly focused
camera lens and correctly centered camera are
prerequisites for a perfect automatic convergence.


