ZENA mobile welding system -- Operators Manual -- Series 150 & 200 Welders
27
27
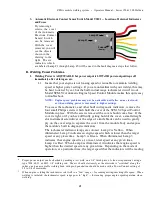
7. Automatic Speed Control Will NOT Increase Engine Speed
7.1
With the engine ON, disconnect the green wire that is used to connect Power
Control Module to the Speed Control Vacuum Switch, turn on power to the
Control Module, and observe throttle control actuator while temporarily
grounding the green wire which goes to the Vacuum Switch.
If engine speed stays at low/normal idle it is likely that either there is no 12V
power to the Vacuum Switch, or that the switch is malfunctioning, or that the
vacuum actuator has become physically “jammed” in some way. To check for
power to the switch use a volt meter -- touching one probe to the end of the
green wire with the other grounded. You should see 12-14.5V at this point with
the ignition on. If voltage is present and if no physical or mechanical problem is
noted, go to Step 7.2.
If engine speed goes to high idle it is likely that the Control Module is
malfunctioning. Go to Step 7.5.
7.2
The connection of the vacuum lines to the two connection points on the Speed
Control Vacuum Switch is important. One of the points is connected to the
vacuum source/supply, the other is connected to the actuator. Carefully check
the diagram in APPENDIX E to insure that your vacuum lines are properly
connected. If the connections are correct, go to the next step.
7.3
Temporarily disconnect the vacuum line going from vehicle vacuum
source/supply to the Speed Control Vacuum. A strong/definite vacuum should
be noted. If vacuum is not found correct, the problem and retest. If vacuum is
present, reconnect the vacuum line and go on to the next step.
7.3
Temporarily disconnect the vacuum line going from the Speed Control Vacuum
Switch to the Control Actuator (at the Actuator end). Place a finger tip over the
end of the hose and “feel” for vacuum at the hose end while temporarily
grounding the green wire which goes to the Vacuum Switch (as you did in step
7.1). As the wire is connected to ground, vacuum should appear at the hose
end. If it does not, the Speed Control Vacuum Switch is likely defective. Go on
to step 7.5
If vacuum appears at the hose end, the Control Actuator should be checked for
a vacuum leak. Go to the next step.
7.4
Check for a vacuum leak by disconnecting the vacuum line to the actuator,
manually moving the actuator to its “closed” position, placing a finger tip over
the vacuum connection pipe end and then releasing the actuator. If a good
vacuum seal exists within the actuator it will stay in position (moving only very
slightly, if at all) -- moving fully back to rest only when the pipe end is
uncovered.
A vacuum leak can occur if the diaphragm inside the actuator is damaged, or if
the fine adjustment screw on the rear of the vacuum actuator if the screw is
turned “out”(CCW) too far -- to the point where the fine adjustment screw
comes “free” of the Actuator’s Vacuum Chamber, exposing the o-ring which
seals the Actuator Vacuum Chamber -- resulting in a vacuum leak which will
prevent your Actuator from functioning.
If you find that an o-ring leak exists, you can often clear the problem by
carefully reinserting the part. However, before reinserting the fine adjustment
Содержание 150 series
Страница 2: ......
Страница 5: ......
Страница 6: ......
Страница 12: ...ZENA mobile welding system Operators Manual Series 150 200 Welders 6 6 This page intentionally left blank...
Страница 35: ...ZENA mobile welding system Operators Manual Series 150 200 Welders 29 29 This page intentionally left blank...
Страница 37: ...ZENA mobile welding system Operators Manual Series 150 200 Welders 31 31 This page intentionally left blank...


