Installation of the AxioCam MRc5
12
B 48-0028 e 10.2003
Operating the AxioCam MRc5 on a PC with
onboard FireWire interface
Connecting the camera to the PC
Lay the data cable carefully between the camera and the PC. Make
sure that the cable is a safe distance from hot light sources on the
microscope, to prevent it being damaged by heat.
To connect the camera to a PC, you require a FireWire cable with a 6-pin
connector at both ends. This cable is supplied with the camera.
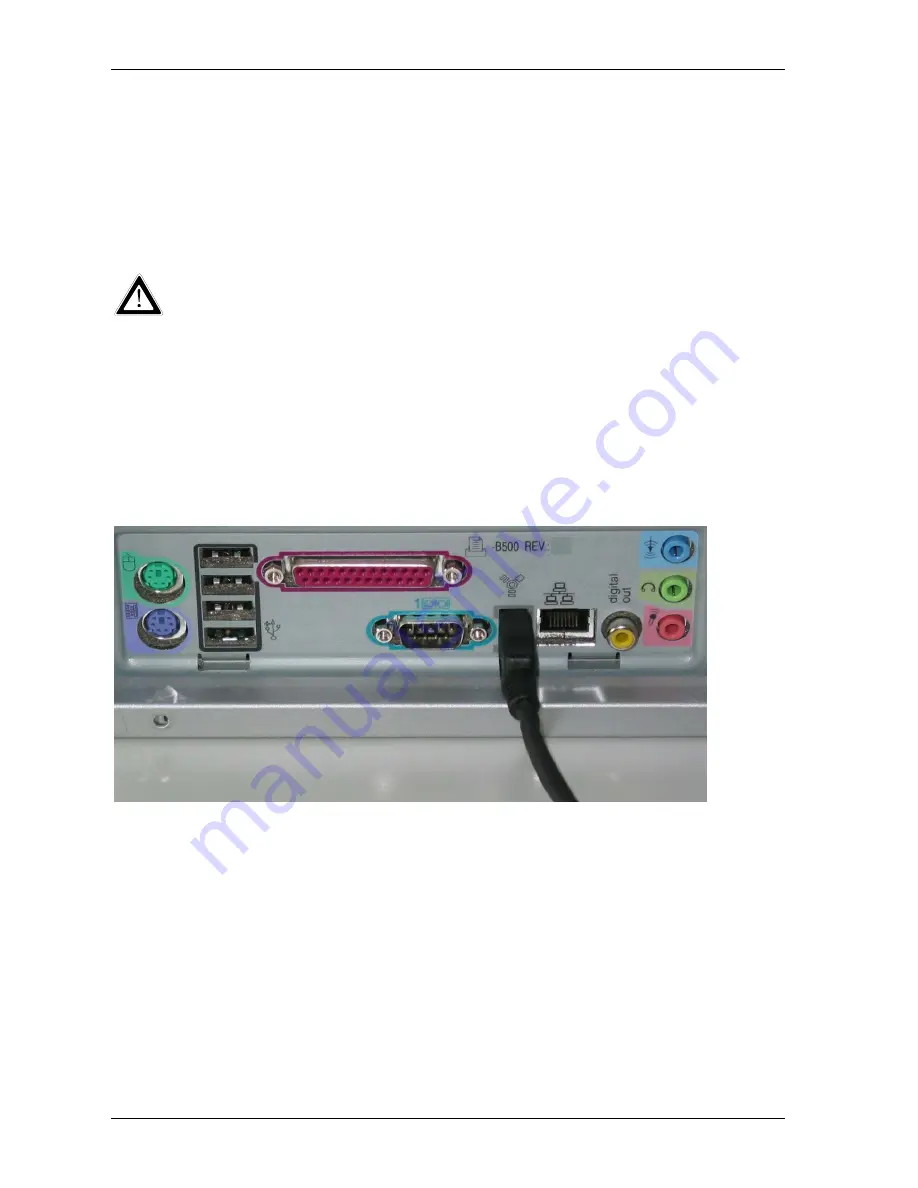
Connect the FireWire cable of the AxioCam MRc5 to the onboard FireWire
interface of the PC.
Connecting the AxioCam MRc5 to the onboard FireWire interface of the PC
Power is supplied to the AxioCam MRc5 via the FireWire interface. Before
operating the AxioCam MRc5 for the first time, you should therefore
check that the specifications of your PC’s FireWire interface correspond
with the power requirements of the AxioCam MRc5.
If you switch off the PC, the AxioCam MRc5 is also switched off.