Page 11
3 INSTALLATION.
Install the chopper baseplate onto a flat metallic surface that is clean and unpainted.
Apply a thin layer of thermo-conductive grease between the two surfaces to permit
better heat dissipation.
Despite the protection provided against external agents, the continuous attack of corro-
sive elements and substances may cause oxidization of connector contacts, resulting in
bad operation. Remember this point when deciding the installation position on the
vehicle.
Fix the chopper using the special holes located on the baseplate.
Verify that the wiring of the cable terminals and connectors has been carried out cor-
rectly. Ensure that suppression devices are fitted to the Horn, Solenoid Valves, the
coils of any relays, and contactors not supplied by logic or the chopper itself.
3.1 CONNECTION CABLES.
For the auxiliary circuits use cables better or equal to 0.5mm² section.
For power connections to the motor armature and battery use cable of 25 to 35mm²
section.
For the Field connections use cable of 4mm² section.
For the optimum chopper performance, the cables to the battery should be run side by
side and be as short as possible.
3.2 CONTACTORS.
A Main Contactor, designed for Continuous Operation should be installed. This contac-
tor should be fitted with a coil corresponding to the battery voltage. The current ab-
sorbed by the coil must not be greater than 3A.
Suppression for this contactor coil is within the chopper. Do not use external suppres-
sion. If contactors for power steer motors are supplied from the control logic, the sup-
pression will be inside the chopper logic.
For any Contactor using external suppression, ensure that connections are made re-
specting correct polarity.
3.3 FUSES.
- Use a 6.3A Fuse for protection of the auxiliary circuits.
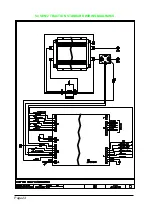
- For protection of the power unit, refer to diagrams.. The Fuse value shown is the
maximum allowable. For special applications or requirements these values can be
reduced.
- For Safety reasons, we recommend the use of protected fuses in order to prevent
the spread of fused particles should the fuse blow.
Содержание SEM2
Страница 15: ...Page 15 3 6 MECHANICAL DRAWING DIMENSIONS...
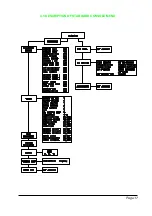
Страница 17: ...Page 17 4 3 DESCRIPTION OF STANDARD CONSOLE MENU...
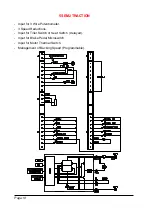
Страница 24: ...Page 24 5 4 SEM 2 TRACTION STANDARD WIRING DIAGRAMS...
Страница 38: ...INSTALLATION AND USER MANUAL CHOPPER SEM2...


