background image

· 08

09 ·

YZ-114 PLUS

YZ-114 PLUS

OPERATION

PREPARING THE CHARGER FOR USE

1. Connecting the power supply

A) Using an AC power supply

When  using  a  household  power  outlet  (100

240  V AC),  connect  the AC  power  cord  to  the AC 

input of the charger.

B) Using a DC power supply

When  using  a  DC  power  supply,  connect  DC  cable  to  the  DC  power  input  port.  The  DC  power 

supply should be provide a voltage of 11

18 V with power of at least 120 W.

Caution: Do not connect both AC and DC power into this product simultaneously.

2. Connecting the battery

Important! Before connecting the battery to the charger, be absolutely certain that the charger is 
set-up correctly. If the settings are incorrect, the battery may be damaged, and may cause a fire or 
an explosion.

Ensure  that  the  charge  cable  being  used  had  adequate  wire  thickness,  and  that  the  connectors 
are high quality, generally indicated by the use of gold-plated connectors. 

Connect the battery to the charger. The red wire is the positive (+), and the black wire is negative 
(-) polarity. To avoid a short circuit of the banana  plugs, always connect the charge cable to the 
charger  first,  then  connect  the  cable  to  the  batteries.  When  disconnecting  the  cable,  perform  in 
reverse order.

3. Balance Charging Port

When  charging  lithium  batteries  (LiPo,  LiIon, 
LiFe, LiHV) in the Charge, Fast Charge, Balance 
Charge  and  Storage  modes,  using  the  balancer 
is  required  by  connecting  the  battery  and 
charger with a balance charge cable. As a safety 
feature,  if  the  balance  charge  port  is  not 
connected  to  the  battery  in  the  aforementioned 
modes,  the  charger  has  been  designed  to  not 
start charging.

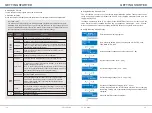
●  STOP, MENU/BACK Button

Stop the process in progress, or to go back to the previous screen or step during the set-up 
process.

Button

Navigation of program menus, or to decrease selected parameter values.

Button

Navigationof program menus, or to increase selected parameter values.

●  START, ENTER Button

Start the charge/discharge process. Also used to start editing and confirm the value of the 
selected parameter.

To change a parameter value in a program, press the ENTER button once in order to edit the 

value. While the value is blinking the value can be changed by pressing the 

and

buttons. 

Once the desired value is chosen, pressing the ENTER button once again to store the value. If 
multiple parameters can be changed in the same screen, when you confirm a parameter value, 
the next parameter value will start to blink to allow changes.

In order to start the charge or discharge process, press and hold the START button for 3 seconds. 
To terminate a process in progress, press the STOP button.

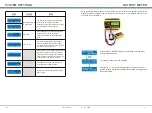
When the charger is turned on, the LiPo Balance Charge mode will be automatically selected. In 
order to select other LiPo programs such as CHARGE, FAST CHARGE, STORAGE, or 

DISCHARGE, navigate through the modes by using the 

and 

buttons.

To charge batteries other than LiPo batteries, use the MENU/BACK button to exit out of the LiPo 
Battery program and select the appropriate program by cycling through the battery types by using 

the 

and 

buttons. Press ENTER once the desired battery mode is selected.

Warning!
Failing  to  connect  the  battery  and  charger 
with  the  balance  cable  as  shown  can  result 
in damage to the charger.

To  avoid  a  short  circuit  through  the  charge 
cable  connectors,  always  connect  the  charge 
cable to the charger first, and then connect the 
cable  to  the  batteries.  When  disconnecting  the 
cable, perform in reverse order.

Содержание YZ-114 Plus

Страница 1: ...nual 株式会社ヨコモ 120 0005 東京都足立区綾瀬5 23 7 Tel 03 5613 7553 Fax 03 5613 7552 Web http www teamyokomo com Yokomo LTD Address 5 23 7 Ayase Adachi ku Tokyo 120 0005 Japan Tel 81 3 5613 7553 Fax 81 3 5613 7552 Web http www teamyokomo com ...

Страница 2: ...PLUS 充電器本体 AC電源ケーブル 充電ケーブル ノーマルコネクター 充電ケーブル T型コネクター 取扱説明書 オプション品 品番 RP 003 RP 004 YZ 114P 1 YZ 114P 2 YZ 114P 3 品名 角型LiPo用充電コード Φ4 Φ4バナナコネクター 角型LiPo用充電コード Φ4 Φ5バナナコネクター 1 6セルバランスボード XHプラグ仕様 YZ 114PLUS用温度センサー YZ 114PLUS用 DC ケーブル 60cm 定価 税抜 500 480 680 1200 780 ...

Страница 3: ...意 YZ 114PLUSはリチウムバッテリーを急速充電することで充電時間を短縮する Fast モード そして長期保管に適した電圧に充電する保管用充電の Storage モードを搭 載しています ニッカド NiCd ニッケル水素 NiMH のリピークモード搭載 リピークモードでは 充電器がピーク充電を連続して1 3回自動的に行うことができ バッテリーを確実に満充電できます ニッカド NiCd ニッケル水素 NiMH のデルタピーク感度調整が可能 YZ 114PLUSはデルタピーク検知方式を用いた充電停止方法に対応しています バッテ リーの電圧が設定値を上回った場合 充電が自動的に停止します 充電 放電サイクル機能 バッテリーのリフレッシュのため 1 5回の充電 放電もしくは放電 充電のサイクルを 自動的に行う機能を搭載しています 自動充電電流制限機能 ニッカド NiCd ニッケル水素 NiM...

Страница 4: ...ないように注意して下さい 極端に発熱した場合は動作を中止して冷却して下さい 本製品の動作中に煙が出たり 異臭が発生した場合は直ぐに使用を中止して下さい 本製品を使用しない時は 入力電源及びバッテリーを外してください 本製品の異常を感じたら使用を中止し 株式会社ヨコモ アフターサービス部へお問い合わ せ下さい 子供の手に触れないようにして下さい 本取扱説明書は万一に備え大切に保管して下さい ご使用上の注意 各種バッテリーの標準的な仕様 3 7V cell 3 7V cell 4 2V cell 3 8V cell 1C LiPo LiIon 3 6V cell 4 1V cell 1C 3 3V cell 3 6V cell 3 3V cell 4C LiFe 3 0 3 3V cell 2 9 3 2V cell 2 6 2 9V cell 1 2V cell 1 5V cell n a ...

Страница 5: ...CE CHG 2 0A 7 6V 2S LiHV CHARGE 2 0A 7 6V 2S LiHV FASTCHARGE 2 0A 7 6V 2S LiHV STORAGE 2 0A 7 6V 2S LiHV DISCHARGE 2 0A 7 6V 2S BATT PROGRAM LiHV BATT ENTER START BATT PROGRAM BATTMEMORY ENTER START BATTMEMORY 1 ENTER SET ENTER START BATTTYPE LiPo BATTVOLTS 7 4V 2S CHARGE CURRENT 4 9A DSCH CURRENT 2 2A DSCH VOLTAGE 3 0V CELL TVC YOUR RISK 4 20V ENTER START ENTER START BATT PROGRAM SYSTEM SETTING E...

Страница 6: ...ケーブルで充電器に繋げてない場合 上 記の充電モードは行えません YZ 114 PLUS YZ 114 PLUS STOP MENU BACKボタン 実行中の操作を中止する場合 メニュー画面を戻る場合に押します ボタン メニューの選択操作 及びに設定値を下げる時に押します ボタン メニューの選択操作 及びに設定値を上げる時に押します START ENTER ボタン 充放電の開始 もしくは設定値を変更したい場合 設定値を決定する場合に押します プログラムの設定値を変更したいときは 設定項目に ENTER ボタンを押して下さい 設定値 が変更可能であることを示す点滅状態が始まるので もしくは ボタンで設定値を変 えて下さい 設定値を決定するには再度 ENTER ボタンを押して下さい 同一プログラム内に 複数の設定項目がある場合 一個目の設定を決定した後に次の値が点滅し 変更が可能になりま す ...

Страница 7: ... ENTERボタンで決定して下さ い 充電開始 充電を開始するにはSTARTボタンを長押してください 充電器がバッテリーのセルを検出しています R が充電器の検出したセル数で S が前の画面で設定したセル 数です もし二つのセル数が一致しない場合 STOPボタンを押し 前 の画面でセル数を再度設定した上で再度充電を開始して下さい R が充電器の検出したセル数で S が前の画面で設定したセル 数です 二つのセル数が一致する場合 STARTボタンを押し 充電を開 始して下さい ステータスモニター 充電中はリアルタイムで充電のステータス情報が左の画面のように表 示されます 充電器の準備 充電器の準備 注 LiHVモードを使用する際は WARNING For LiHV battery only OK と表示されます LiHVバッテリーを充電する場合はSTARTボタンを押して処理を続行してください ...

Страница 8: ...適切な充 電電流を設定して下さい 一部の抵抗や容量が低いバッテリー は高い電流が流れることがあります リピークモードでは 充電器がピーク充電を連続して1 3回自動 的に行うことができ バッテリーを確実に満充電できます ま た バッテリーが急速充電をどの程度受け付けるかを試すこと ができます サイクルモードでは 1 5回の充電 放電もしくは放電 充電のサイク ルを行い バッテリーのリフレッシュやバランスをすることでバッテ リーを活性化させます LiPo Lilon LiFe LiHV CHARGE DISCHARGE STORAGE FAST CHG BALANCE CHA CHARGE AUTO CHG DISCHARGE CHARGE DISCHARGE リチウムバッテリーを長期間使わない時にバッテリーを充放電 するためのモードです NiMH ニッケル水素 NiCd ニッカド バッテリー...

Страница 9: ...ty Cut Off ON 5000mAH Temperature Unit Celsius Temp Cut Off ON 50 C 122 F 充電容量のカット機能の設定値です 充 電容量が設定値まで達した場合 充電が 停止します デルタピークが検出されなかった場合や タイマーによる充電停止前に設定最大容 量を超えた場合 充電が停止します 充電時の安全タイマーの設定値です 充 電開始時にタイマーも開始し この設定 値の時間充電を行った場合 充電を停止 します バッテリーは充電に伴い温度が上昇しま す バッテリーが設定した上限温度を超 えた場合 自動的に充電が停止します 別売りの温度センサー 品番YZ 114P 2 が必要です OFF ON 100 50000 mAh 画面 設定値 説明 OFF ON 1 720 Min OFF ON 20 C 68 F 80 C 176 F Celsi...

Страница 10: ...止し ます Load Factory Set Enter Version HW 1 00 FW 1 10 充電器を初期状態に戻す場合はこの画 面で ENTERボタンを押してください この充電器のハードウェアとファームウ ェアのバージョンが表示されます Bal Connection バランス充電以外の充電を行う際 バラ ンス充電ケーブルを必須とするかを選択 します 設定がONの場合 バランス充電 以外の場合もバランス充電コードを使用 しないと充電が行えないようにします 画面 設定値 説明 バッテリーメーター機能を使うことで バッテリー全体の電圧や各セルの電圧などを確認するこ とができます この機能を使用するにはバランスケーブルを接続する必要があります バッテリー プログラム選択メニューで BATT METER を選び ENTERボタンを押して下さい 次の画面で各セルの電圧が表示されます ボタ...

Страница 11: ...を押して下さい 次の画面で各セルの抵抗値が表示されます ボタンを押すことでバッテリー全体の抵抗値 バッテ リー内の最低と最高セル抵抗値が表示されます エラー発生時には警告音と共に下記のエラーメッセージが画面に表示されます バッテリーが逆に接続されました バッテリーへの接続が切れました バッテリー接続エラー バッテリーへの接続を確認してください バランス充電接続エラー バッテリーへの接続を確認してください 入力電圧が11Vを下回っています 入力電圧が18Vを上回っています バッテリー内のセル電圧が低すぎます バッテリー内のセル電圧が高すぎます バッテリー内のセル電圧の異常が起きてます セル数が間違っています 充電器の内部温度が高すぎます 温度センサーの温度が高すぎます 設定した容量の上限を上回りました 設定した充電時間の上限を上回りました バランス充電時に バッテリー電圧が設定した電圧を上回...

Страница 12: ...ランス両ポート使用 PC接続 ファームウェア更新用 5V 2 1A 5 低電圧警告音 高電圧警告音 AC DC入力 10W 内蔵ファンによる空冷 温度 0 40 湿度 0 80 温度 10 60 湿度 20 70 128 x 64 バックライト付 LCD 552 g 150 mm 長さ 145 mm 幅 80 mm 奥行 AC DC LiPo LiIon LiFe LiHV NiMH NiCd Pb 鉛 LiPo LiIon LiFe LiHV NiMH NiCd Pb 鉛 LiPo LiIon LiFe LiHV NiMH NiCd Pb 鉛 LiPo LiIon LiFe LiHV NiMH NiCd LiPo LiIon LiFe LiHV NiCd NiMH Pb 100 240 V 50 60 Hz 11 18 V 1 6セル 1 15セル 1 10 P 2 24 V 0 1 1...

Страница 13: ... shaped connector Instruction Manual Optional Parts Part No RP 003 RP 004 YZ 114P 1 YZ 114P 2 YZ 114P 3 Part Name LiPo Battery Charge Cable Φ4 Φ4 bullet connectors LiPo Battery Charge Cable Φ4 Φ5 bullet connectors 1 6S Balancer Board XH plugs Temperature Sensor for YZ 114PLUS DC Cable for YZ 114PLUS 60cm 定価 税抜 500 480 680 1200 780 Please contact your local distributor for pricing information ...

Страница 14: ...es in a row automatically This mode can be used to ensure that a battery will be fully charged Adjustable Delta peak Sensitivity for NiMH and NiCd Batteries YZ 114PLUS contains an automatic charging termination feature based on the delta peak voltage detection principle When the battery s voltage exceeds the user adjustable threshold the charging process will be automatically stopped Cycling Charg...

Страница 15: ... use Always look out for anomalies This product can become hot while in use Be cautious about temperature to avoid burns If product becomes hot while in use stop and let cool Stop using product immediately in case of anomalous events such as smoke or smell is detected Disconnect product from power supply and battery while not in use If you notice any anomalies during use immediately stop using the...

Страница 16: ...iIo BATT LiFe BALANCE CHG 2 0A 6 6V 2S LiFe CHARGE 2 0A 6 6V 2S LiFe FASTCHARGE 2 0A 6 6V 2S LiFe STORAGE 2 0A 6 6V 2S LiFe DISCHARGE 2 0A 6 6V 2S ENTER START BATT PROGRAM BATTMETER 4 20 4 19 4 19 V 0 00 0 00 0 00 V MAIN 0 00V H0 000V L0 000V NiCd RE PEAK 1 NiMH RE PEAK 1 NiMHAuto CHARGE CURRENT 2 0A NiCdAuto CHARGE CURRENT 2 0A LiHV BALANCE CHG 2 0A 7 6V 2S LiHV CHARGE 2 0A 7 6V 2S LiHV FASTCHARG...

Страница 17: ...P MENU BACK Button Stop the process in progress or to go back to the previous screen or step during the set up process Button Navigation of program menus or to decrease selected parameter values Button Navigationof program menus or to increase selected parameter values START ENTER Button Start the charge discharge process Also used to start editing and confirm the value of the selected parameter To...

Страница 18: ...ber of cells detected by the charger and S is the number of cells specified in the previous screen If both values do not match then press STOP to return to the previous screen to check the number of cells before proceeding If the values for R and S match then press the START button to start charging Real time Status Monitor Status of the charging process will be displayed on the LCD screen in real...

Страница 19: ...t in higher current In re peak charge mode the charger can peak charge the battery 1 3 times in a row automatically This can be useful to ensure that the battery is fully charged and to check how well fast charges can be accepted by the battery In cycle mode a charge discharge or discharge charge cycle will be performed 1 5 cycles continuously which can stimulate the battery by refreshing and bala...

Страница 20: ... Rest Time CHG DCHG 10Min Capacity Cut Off ON 5000mAH Temperature Unit Celsius Temp Cut Off ON 50 C 122 F This value sets the maximum charge time for the safety timer When the charging process starts the safety timer will engage and if the charge time exceeds this time the charge process will automatically stop This is intended to prevent overcharging the battery however it should be set long enou...

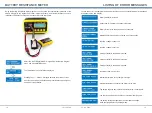
Страница 21: ...his is ON balance charge cable will be required even for processes other than balance charging 画面 設定値 説明 Using the Battery Meter program one can check the total voltage of the battery along with the highest and lowest voltages and the voltage of each individual cell A balance cable must be connected to use this feature Select the BATT METER program from the Battery Program menu and press ENTER but...

Страница 22: ...arning tones and one of the following error messages will appear on the LCD display Battery polarity is reversed Connection to the battery has been interrupted Battery is incorrectly connected Check connection Balance cable is incorrectly connected Check connection Input DC voltage is under 11 V Input DC voltage is over 18 V Voltage of cell s in the battery is too low Voltage of cell s in the batt...

Страница 23: ... LiIon LiFe LiHV Standard equipped Use of main and balance ports PC connection and firmware updates 5V 2 1A 5 Low Voltage Alarm High Voltage Alarm AC DC Input 10W Air cooled by internal fan Temperature 0 40 Humidity 0 80 Temperature 10 60 Humidity 20 70 128 64 LCD with backlight 552 g 150 mm length 145 mm width 80 mm height 10 11V 18 19V 50W 10 Liability Exclusion This charger is designed and appro...

Страница 24: ...アフターサービスについて YZ 114 PLUS YZ 114 PLUS 23 22 ...

Отзывы: