


14
Yealink Phones User Guide
© 2003 - 2012 Bicom Systems
Click on the
Auto Provision
button to run auto provisioning process, then you'll be
asked to confirm action. To continue click on
OK
button.
Auto provisioning process will start during phone reboot process, phone will pickup
appropriate configuration file from PBXware. If everything is done as above
described, you should have successfully registered your phone to PBXware. Dial
*123
to verify registration.
4.2.3.3
DNS SRV
This chapter describes how to use a DNS SRV record which specifies the location of the
PBXware.
N O TE
Y our DN S Serv er needs to be configured correctly for this to work.
B icom Sy stem s can prov ide serv ice to set up this for y ou.
1. Check if the DNS SRV is enabled in your PBXware
Contact your PBXware administrator to find out if the
DNS SRV
is enabled in your
PBXware, or if you have access to the PBXware you can check this yourself.
Open a new browser window and enter the IP address in order to access the
PBXware web administration login screen. Example:
http://192.168.1.10
.
Login to PBXware with your e-mail address and password.
Navigate to
Settings: Servers
. Click on the server corresponding
edit
button.
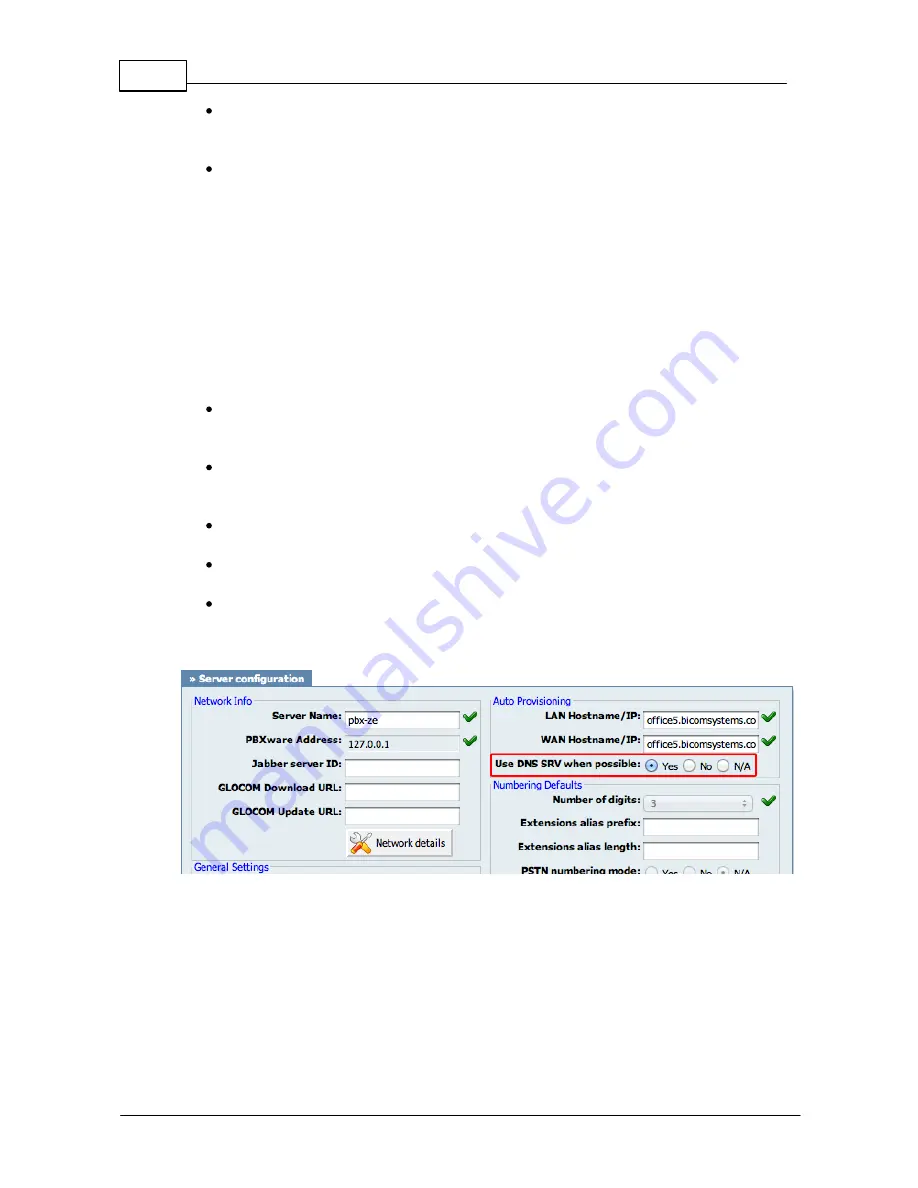
In
Auto Provisioning group
, make sure
Use DNS SRV when possible:
is set
to
Yes.
If it is set to
No
or
N/A
, set to
Yes
and click on the
Save
button.
N O TE
Y ou m ust re-sav e all y our ex tensions configured for Auto Prov isioning.
2. Login to phone web administration interface
If there is no DHCP in your network, you can still auto provision your Yealink phone.
Please refer to your Yealink phone model User Guide for instruction about setting static
IP address. After you configure your Yealink phone to use a static IP address, continue
with the following steps.