


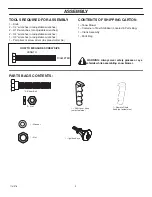


ASSEMBLY
10
1741078
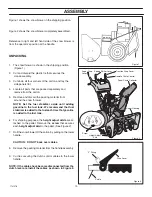
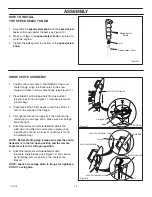
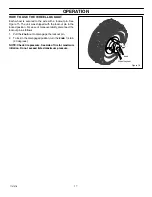
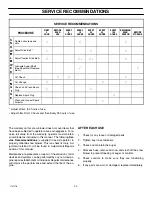
Figure 1 shows the snow blower in the shipping position.
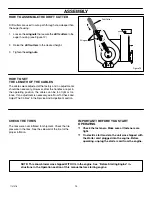
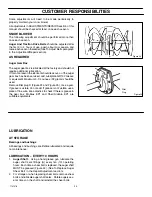
Figure 2 shows the snow blower completely assembled.
Reference to right and left hand side of the snow blower is
from the operator’s position at the handle.
UNPACKING
1. The snowthrower is shown in the shipping position
(Figure 1).
2. Cut and discard the plastic tie that secures the
crank assembly.
3. Cut down all four corners of the carton and lay the
side panels flat.
4. Locate all parts that are packed separately and
remove from the carton.
5. Remove and discard the packing material from
around the snow thrower.
NOTE: Set the fuel stabilizer aside until adding
gasoline to the fuel tank. We recommend that fuel
stabilizer is added to the fuel each time that gasoline
is added to the fuel tank.
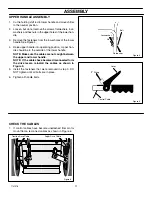
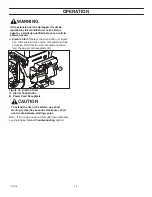
6.
For shipping purposes, the
height adjust skids
are at-
tached to the pallet. Remove the
screw
that secures
each
height adjust skid
to the pallet. (See Figure 2).
7. Roll the snow blower off the carton by pulling on the lower
handle.
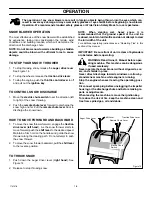
CAUTION: DO NOT back over cables.
8. Remove the packing material from the handle assembly.
9. Cut ties securing the clutch control cables to the lower
handle.
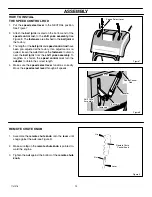
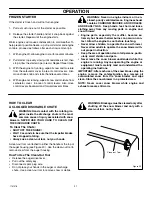
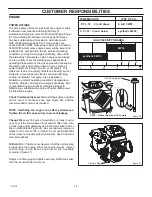
NOTE: If the cables have become disconnected from the
clutch levers, reinstall the cables as shown in Figure 3.
Figure 1
Figure 2
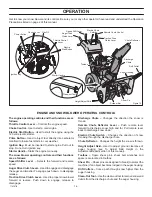
Auger Drive
Lever
Traction Drive Lever
Snow Chute Deflector
Height Adjust
Skid
Auger Housing
Remote Chute Control
Screw
Speed Shifter Lever
Figure 3
”Z” Fitting
Drive Lever
Cable
Содержание 6331790-43 Series
Страница 37: ...NOTES 37 1741078...
Страница 38: ...NOTES 38 1741078...


