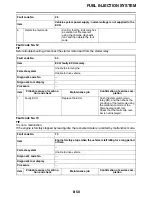
FUEL INJECTION SYSTEM
8-39
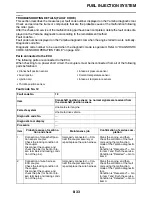
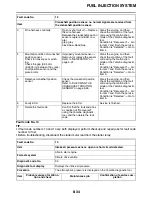
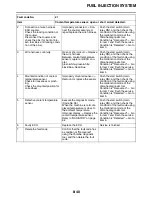
Fault code No. 21
TIP
•
Make sure that the machine is completely cold before checking the coolant temperature sensor.
•
Before troubleshooting, disconnect the starter motor lead from the starter relay.
1
Mounted condition of throttle
position sensor.
Check for looseness or pinch-
ing.
Check the mounted condition
for correctness.
Improperly mounted sensor
Remount or replace the sensor.
Refer to “ADJUSTING THE
Push the start switch (main
relay ON) and open and close
the throttle several times.
Check the condition of the fault
code using the malfunction
mode of the Yamaha diagnostic
tool.
Condition is “Recovered”
Go
to item 4 and finish the service.
Condition is “Detected”
Go to
item 2.
2
Defective throttle position sen-
sor.
Execute the diagnostic mode.
(Code No. 01)
When the throttle is fully closed,
11–14 displays.
When the throttle is fully
opened, 86–92 displays.
Incorrect display range
Replace the throttle position
sensor.
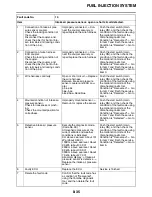
Push the start switch (main
relay ON) and open and close
the throttle several times.
Check the condition of the fault
code using the malfunction
mode of the Yamaha diagnostic
tool.
Condition is “Recovered”
Go
to item 4 and finish the service.
Condition is “Detected”
Go to
item 3.
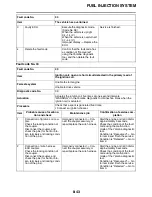
3
Faulty ECU.
Replace the ECU.
Service is finished.
4
Delete the fault code.
Confirm that the fault code has
a condition of “Recovered”
using the Yamaha diagnostic
tool, and then delete the fault
code.
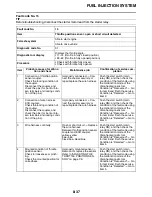
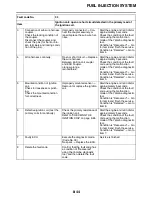
Fault code No.
21
Item
Coolant temperature sensor: open or short circuit detected.
Fail-safe system
Able to start engine
Able to drive vehicle
Diagnostic code No.
06
Diagnostic tool display
Displays the coolant temperature.
Procedure
Compare the actually measured coolant temperature with the Yamaha
diagnostic tool display value.
Item
Probable cause of malfunc-
tion and check
Maintenance job
Confirmation of service com-
pletion
1
Connection of coolant tempera-
ture sensor coupler.
Check the locking condition of
the coupler.
Disconnect the coupler, and
check the pins (for bent or bro-
ken terminals and locking condi-
tion of the pins).
Improperly connected
Con-
nect the coupler securely, or
repair/replace the wire harness.
Push the start switch (main
relay ON), and then check the
condition of the fault code using
the malfunction mode of the
Yamaha diagnostic tool.
Condition is “Recovered”
Go
to item 7 and finish the service.
Condition is “Detected”
Go to
item 2.
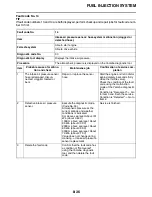
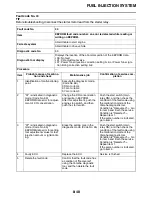
Fault code No.
16
Item
Throttle position sensor: stuck throttle position sensor is detected.
Содержание WR250F 2022
Страница 5: ...EAM20093 YAMAHA MOTOR CORPORATION U S A WR MOTORCYCLE LIMITED WARRANTY...
Страница 8: ......
Страница 10: ......
Страница 41: ...MULTI FUNCTION DISPLAY 1 29...
Страница 62: ...ELECTRICAL SPECIFICATIONS 2 9 Radiator fan motor fuse 5 0 A Spare fuse 15 0 A...
Страница 70: ...CABLE ROUTING DIAGRAM 2 17 EAM20152 CABLE ROUTING DIAGRAM Frame and engine left side view...
Страница 72: ...CABLE ROUTING DIAGRAM 2 19 Frame and engine right side view...
Страница 74: ...CABLE ROUTING DIAGRAM 2 21 Handlebar front view...
Страница 76: ...CABLE ROUTING DIAGRAM 2 23 Frame and engine top view...
Страница 78: ...CABLE ROUTING DIAGRAM 2 25 Frame and battery top view...
Страница 80: ...CABLE ROUTING DIAGRAM 2 27 Rear brake right side view...
Страница 82: ...CABLE ROUTING DIAGRAM 2 29 Front brake front view and right side view...
Страница 84: ...CABLE ROUTING DIAGRAM 2 31 Taillight top view and right side view...
Страница 86: ...CABLE ROUTING DIAGRAM 2 33...
Страница 131: ...GENERAL CHASSIS 4 5 a Projection b Slot c Rib side cover d Rib rear fender a a a 1 1 c c b b d d...
Страница 201: ...CHECKING THE SHIFT DRUM ASSEMBLY 5 73 CHECKING THE TRANSMISSION 5 73 INSTALLING THE TRANSMISSION 5 74...
Страница 204: ...LUBRICATION SYSTEM CHART AND DIAGRAMS 5 3 1 Oil filter element 2 Oil pump...
Страница 205: ...LUBRICATION SYSTEM CHART AND DIAGRAMS 5 4 1 Intake camshaft 2 Exhaust camshaft...
Страница 206: ...LUBRICATION SYSTEM CHART AND DIAGRAMS 5 5 1 Camshaft 2 Oil pressure check bolt 3 Oil pump 4 Oil filter element...
Страница 259: ...SHIFT SHAFT 5 58 TIP Align the punch mark a on the shift shaft with the punch mark b in the shift pedal 1 1 2 2 a b...
Страница 265: ...OIL PUMP 5 64 A Primary drive gear side B Crankcase cover side 5 7 mm 0 02 0 28 in 5 c d 6 8 b 8 6 7 E...
Страница 278: ...TRANSMISSION 5 77...
Страница 288: ...WATER PUMP 6 9...
Страница 298: ...THROTTLE BODY 7 9...
Страница 301: ......
Страница 302: ...IGNITION SYSTEM 8 1 EAM20142 IGNITION SYSTEM EAM30277 CIRCUIT DIAGRAM...
Страница 306: ...ELECTRIC STARTING SYSTEM 8 5 EAM20143 ELECTRIC STARTING SYSTEM EAM30279 CIRCUIT DIAGRAM...
Страница 312: ...CHARGING SYSTEM 8 11 EAM20144 CHARGING SYSTEM EAM30282 CIRCUIT DIAGRAM...
Страница 315: ...CHARGING SYSTEM 8 14...
Страница 316: ...SIGNALING SYSTEM 8 15 EAM20154 SIGNALING SYSTEM EAM30348 CIRCUIT DIAGRAM...
Страница 320: ...LIGHTING SYSTEM 8 19 EAM20153 LIGHTING SYSTEM EAM30346 CIRCUIT DIAGRAM...
Страница 323: ...LIGHTING SYSTEM 8 22...
Страница 324: ...COOLING SYSTEM 8 23 EAM20155 COOLING SYSTEM EAM30350 CIRCUIT DIAGRAM...
Страница 327: ...COOLING SYSTEM 8 26...
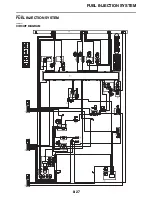
Страница 328: ...FUEL INJECTION SYSTEM 8 27 EAM20145 FUEL INJECTION SYSTEM EAM30284 CIRCUIT DIAGRAM...
Страница 353: ...FUEL INJECTION SYSTEM 8 52...
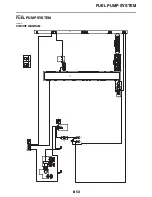
Страница 354: ...FUEL PUMP SYSTEM 8 53 EAM20146 FUEL PUMP SYSTEM EAM30287 CIRCUIT DIAGRAM...
Страница 388: ...SELF DIAGNOSTIC FUNCTION AND DIAGNOSTIC CODE TABLE 9 15...
Страница 398: ...CHASSIS 10 9...
Страница 400: ......
Страница 402: ......


