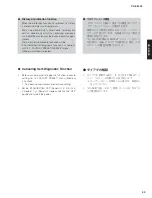
When the following parts are replaced, the firmware must
be updated to the latest version.
DIGITAL P.C.B.
Main microprocessor: IC404 on DIGITAL P.C.B.
●
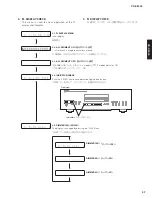
Confirmation of firmware version and checksum
Before and after updating the firmware, check the
firmware version and checksum by using the self-
diagnostic function menu.
Start up the self-diagnostic function and select “1. ROM
VERSION/CHECKSUM” menu.
Using the sub-menu, have the firmware version and
checksum displayed, and note them down.
(For details, refer to “SELF-DIAGNOSTIC FUNCTION”)
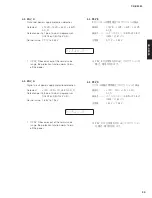
*
When the firmware version is different from
written one after updating, perform the updating
procedure again from the beginning.
下記の部品を交換した場合、ファームウェアを最新バー
ジョンにアップデートする必要があります。
DIGITAL P.C.B.
メインマイコン:DIGITAL P.C.B. の IC404
● ファームウェアのバージョンとチェックサムの確認
ファームウェアのアップデートの前後に、ファーム
ウェアのバージョンとチェックサムをダイアグで確
認します。
ダイアグを起動し、“1. ROM VERSION/CHECKSUM” メ
ニューを選択します。
サ ブ メ ニ ュ ー で フ ァ ー ム ウ ェ ア の バ ー ジ ョ ン と
チェックサムを表示し、それらを書きとめます。
(詳細は “ダイアグ” を参照してください。)
※ アップデート後、ファームウェアのバージョンが
書き込まれたものと異なる場合、アップデートの
操作を最初からやり直してください。
■
UPDATING FIRMWARE /
ファームウェアのアップデート
●
Initializing the Back-up Data
● バックアップデータの初期化
After updating the firmware, the back-up data MUST
be initialized by the following procedure to store/
hold the setting information properly.
When a part has been replaced
Start up the self-diagnostic function and select “4.
FACTORY PRESET” menu.
(For details, refer to “SELF-DIAGNOSTIC FUNCTION”)
Select “4-1. PRESET RESERVE”, set the “STANDBY/
ON / OFF” (Power) (U, K, A, B, G, L, V models) / “ ”
(Power) (T model) switch to the “OFF” position to turn
off the power once and turn it on again. Then, the
back-up data will be initialized.
部品を交換した場合
本機のダイアグを起動し、“4. FACTORY PRESET” メ
ニューを選択します。
(詳細は “ダイアグ” を参照してください。)
“4-1. PRESET RESERVE” を選択し、“STANDBY/ON /
OFF”(電源)スイッチを “OFF” にして電源を一度きっ
てから、もう一度電源を入れるとバックアップデー
タが初期化されます。
ファームウェアのアップデート後、設定情報を正常
に保存/保持するために、下記の方法でバックアッ
プデータを初期化する必要があります。
When writing the latest firmware data to the
instrument whose firmware version if 1.10 or before
without replacing any part
No initialization is necessary. Just turn on the Auto
Power Stand-by function only according to the following
procedure.
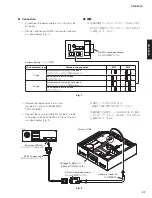
1. Press the “SOURCE” key and select “DISC” for
audio reproduction.
2. Press the “
” (Open/Close) key to open the disc
tray and take out the disc.
ファームウェアのバージョンが 1.10 以前の機器に対
し、部品交換をせずに最新ファームウェアを書き込
む場合
初期化は行わず、以下の操作によりオートパワース
タンバイ機能のみをオンします。
1. “SOURCE” キーを押して、再生音声を “DISC” に
します。
2. “
”(開閉)キーを押してディスクトレイを開き、
ディスクを取り出します。
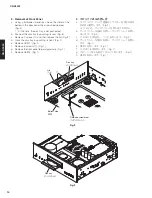
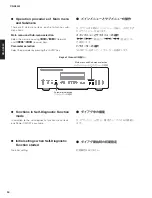
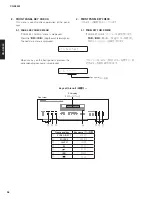
“SOURCE” key
SOURCE キー
“ ” (Open/Close) key
(開閉)キー
Front view
Disc tray
ディスクトレイ
25
CD-S3000
CD-S30
0
0
Содержание CD-S3000
Страница 6: ... FRONT PANELS U K A B G L V J models T model 6 CD S3000 CD S3000 ...
Страница 7: ... REAR PANELS U V models U model V model Bottom view 7 CD S3000 CD S3000 ...
Страница 8: ...A B G L models K model T model A model B G models 8 CD S3000 CD S3000 ...
Страница 9: ...J model 9 CD S3000 CD S3000 ...
Страница 86: ...86 CD S3000 CD S3000 ...
Страница 87: ...MEMO 87 CD S3000 CD S3000 87 ...
Страница 88: ...CD S3000 ...

