Appendix
202
Installing the Logic preference file
1
Start up Logic.
2
In the menu bar, click [Option]
→
[Settings]
→
[Key Commands...].
3
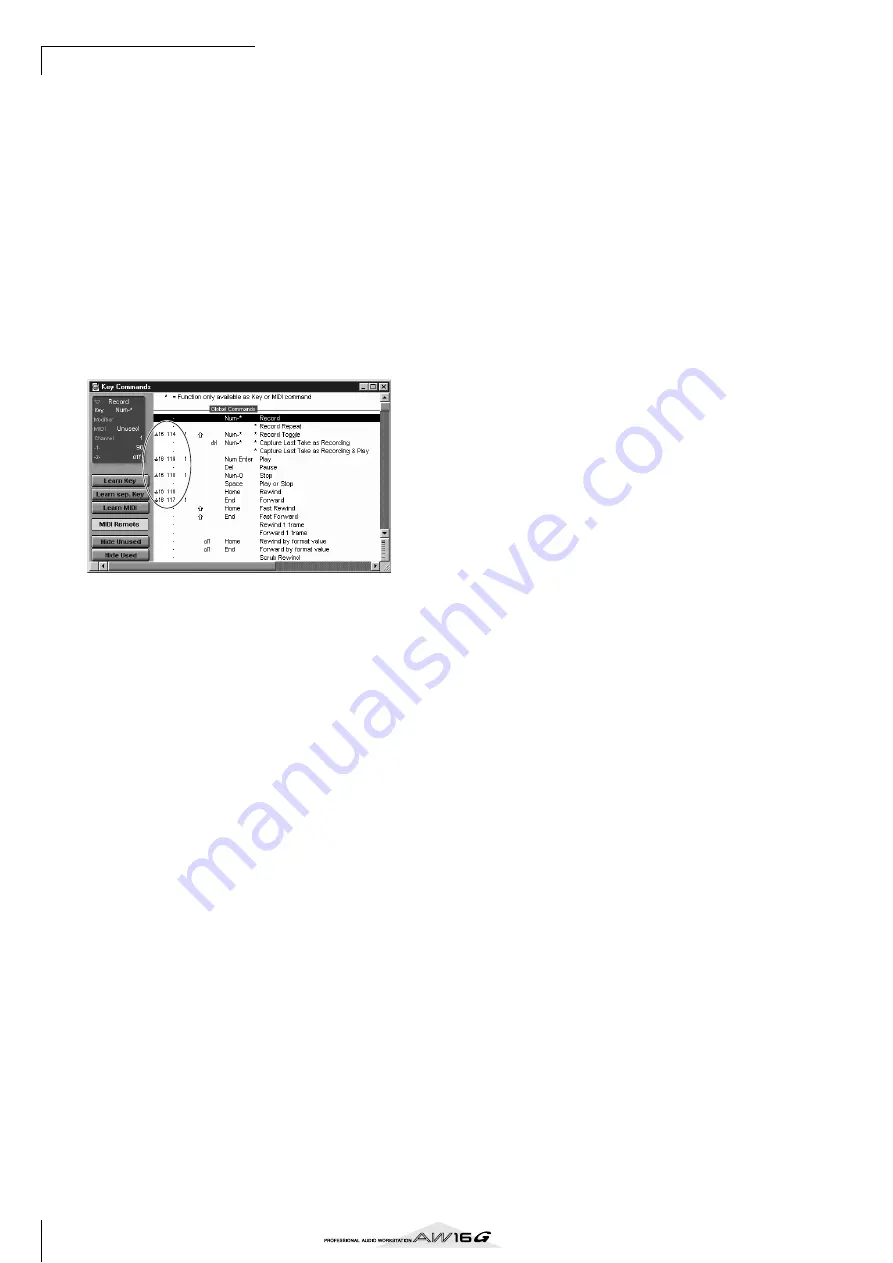
The Key Commands window will open. In
the menu bar, click [Option]
→
[Import Key
Commands...].
4
A dialog box will appear. Select the Logic
preference file (Logic32.prf) from the
included CD-ROM, and click the [Open] but-
ton.
When you import the file, the following settings will
be made.
Please note that all the previously-specified key
commands will be initialized. If you do not want to
change your existing user key command settings,
you can manually make the MIDI channel and CC#
settings shown above.
SONAR 2/CakewalkProAudio template (Installation/set-
tings)
1
Copy the template to the folder in which
SONAR 2/CakewalkProAudio is installed.
2
Start up SONAR 2/CakewalkProAudio.
3
In the menu bar, click [Option]
→
[Audio].
4
The Cakewalk DirectShow Audio dialog box
will appear. Change the “Number of Aux
Busses” (from the default value of 2) to [3],
and click the [OK] button.
This completes preparations for the template.
SONAR 2/CakewalkProAudio template (Loading the
template)
1
Start up SONAR 2/CakewalkProAudio.
2
If you are using SONAR 2:
In the menu bar, click [File]
→
[Open].
If you are using Cakewalk:
In the menu bar, click [File]
→
[New].
3
If you are using SONAR 2:
The “Open file” dialog box will appear. Choose
Cakewalk template files as the type of file to be
loaded. From the list in the dialog box, choose
Yamaha AW16G Remote and click the [OK] button.
If you are using Cakewalk:
The “New Project File” dialog box will appear.
From the list in the dialog box, choose Yamaha
AW16G Remote, and click the [OK] button.
The template will be loaded, and three windows
will appear; the Track window, Control window,
and Panel window.
4
In the menu bar, click [Option]
→
[MIDI
Devices].
5
The MIDI Ports window will open. In the
Input Ports field, assign the MIDI device that
you are using.
This completes preparations for controlling SONAR 2/
CakewalkProAudio from the AW16G.
●
If you changed the track structure from the default
settings of the template ...
With the Yamaha AW16G Remote template started,
click the [CONFIG] button in the panel window.
A cluster will open at the right.
Drag the [SET MIDI First Track] knob to the first track
number of the MIDI tracks.
* If you use this template, you will not be able to con-
trol the tracks correctly from the AW16G unless the
MIDI tracks are continuous from 1—16.
* If you set the value to an invalid track (an unused
track), the panel knobs, buttons, or sliders may be
shaded. If this occurs, set the value back to the correct
track.
Pro Tools software
You can remotely control the Pro Tools software from the
AW16G. No special setting file is required. The setting
procedure is the same as for the Mac version.
Refer to “Macintosh users”
→
“Pro Tools software” (
Содержание AW 16G
Страница 1: ...E Owner s Manual Owner s Manual Owner s Manual Keep This Manual For Future Reference ...
Страница 8: ...Contents 8 ...
Страница 26: ...Introducing the AW16G 26 ...
Страница 32: ...Listening to the demo song 32 ...
Страница 38: ...Recording to a sound clip 38 ...
Страница 54: ...Track recording 54 ...
Страница 136: ...Track editing 136 ...
Страница 218: ...Appendix 218 Block diagram ...


