


34
Selection Play
Track Selection
Available for VCD, SVCD
CD, etc.
1. In the play control bar menu, select the Track item.
2. Press the
SELECT
button to enter the input
mode.
3. Press the number buttons to enter the track number
to be selected.
4. Press the
SELECT
button to start playing.
While the PBC is on, the track cannot be selected
for SVCD and VCD discs.
If the
SELECT
button is not pressed for a few seconds, the system will automatically play the selected track.
Track Selection Play for Audio or MPEG4 Discs
For audio or video discs like MUSIC or MPEG4, you can
select a track from the Disc Content List and play it.
1.Press the or button to move the cursor to the
Disc Content List box, as shown in the right chart.
2.Press the or button to select a track, press
the
SELECT
button, and the system will start
playing the selected track.
VCD
MODE: Normal
Trick mode:
TRACK: 01/01
AUDIO: Stereo
PBC: ON
TIME: 00:02:48-00:51:25
Time Selection
1.In the play control bar menu, select the
Track Time
item.
The time shown u nder the icon is the time played of the current chapter (for DVD discs) or the current track
(non-DVD discs).
The Time Selection function is not available for some discs. In this case, this icon cannot be selected. Press the
SELECT
button to enter the Edit Mode. Press the number buttons to enter the time and press the
SELECT
button to confirm. If the input time is valid (less than
the total length of the current chapter or track), the
system will start playing from the input time.
You can only select a time point in the current
chapter or disc for playing.
If the input time exceeds the total length of the
current chapter or disc, the system will remain in its
previous play mode.
VCD
MODE: Normal
Trick mode:
TRACK: 01/01
AUDIO: Stereo
PBC: ON
TIME: 00:02:48-00:51:25
Play Mode
25
Introduction
The Disc Operation means operations done to recordable discs in the drive, including browsing disc information,
finalizing a disc, removing disc content, deleting the last title, setting compatibility and write protection, etc.
Enter the Disc Operation Mode
Press DVD button, the unit read out the title menu for DVD
R/RW disc press the button move cursor
to top of title menu, than press the button to display the disc operation menu by the remote controller.
,
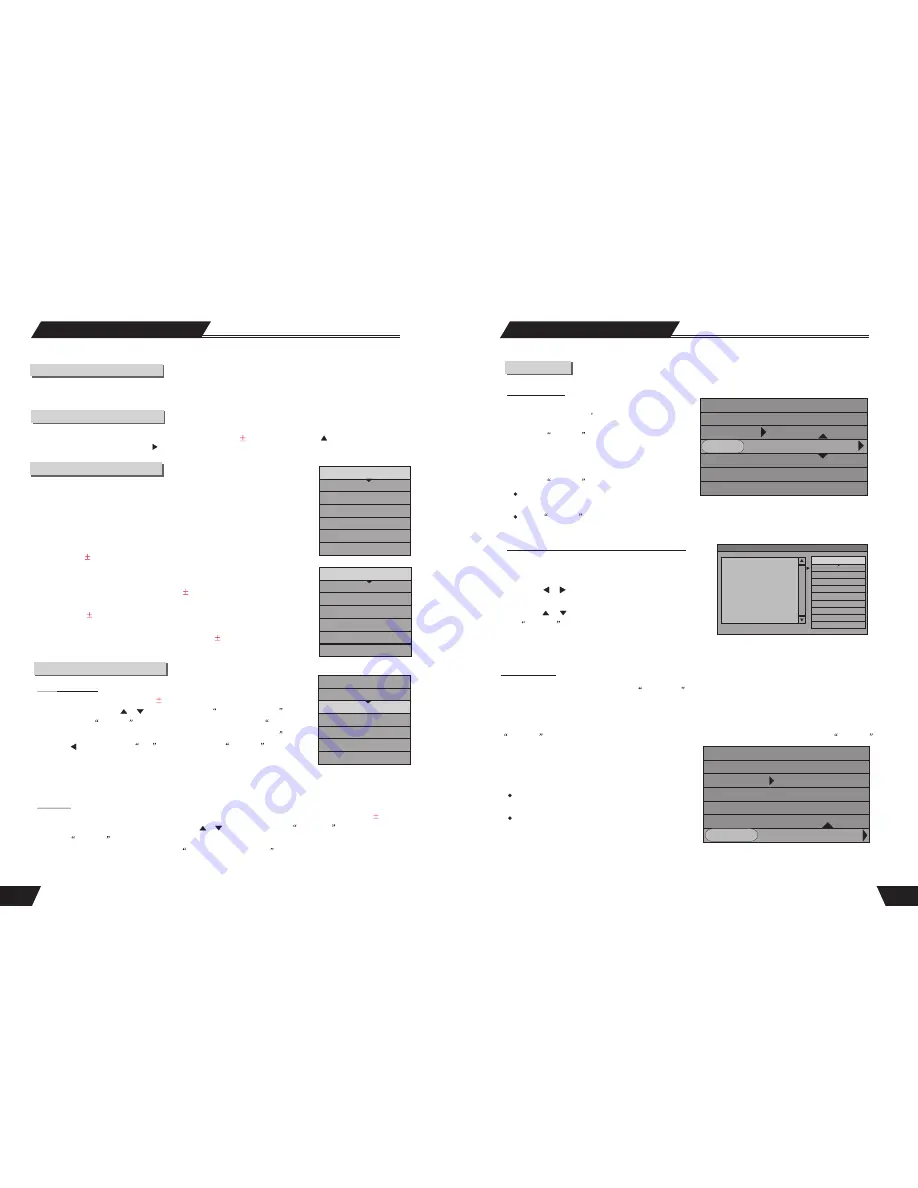
Menu Description
The control bar menu under this mode is as shown in the chart.
The meanings for the icons are as follows.
1. Play: Play the content of the current disc.
2. Rename Disc: Rename the disc (default name: MY DVD).
3. Erase Optical Disc: Once this operation is done, all content in the disc will
be removed completely. The disc index will appear as blank on the screen
.
4. Record a new title: Add a new title to record.
5. Overwrite Disc: An operation on a recorded DVD+RW disc to
overwrite its previous content
6. Lock Disc:. This function prevents the deletion of recorded content
(Only for DVD
RW disc)
(Only for DVD
RW disc)
(Only for DVD
RW disc)
.Finalize Disc:This operation enables the recorded DVD
R/-RW discs to
be played in
other DVD players. You cannot add new content to such discs.
.
.
.
7. Copy All: This function is select all subtitle.
8
Operation Steps
Erase Optical Disc
This operation is effective for
discs. In the Disc Operation
control bar menu, use the or button to select the
Erase Optical Disc
option, press the
SELECT
button and a warning message pops up, This
operation will erase all data on the disc. Are you sure you want to continue
.
Press the button to select
Yes
, and then press the
SELECT
button
to confirm. Then the system will start erasing the disc.
The Erase Disc operation may take some time. During the operation, do not conduct any other operation,
including standby; once the operation starts, it cannot be cancelled midway. Never switch off the power
dur ing th e operation; otherwise the disc may be damaged.
Lock Disc
This operation will cancel the write protection of a locked disc. This function is available only for
discs.
1. In the Disc Operation control bar menu, use the or button to select the
Lock Disc
item, and then
press the
SELECT
button.
To judge if a disc is write-protected, try the
Browse Disc Information
operation. A write-protected disc
cannot be recorded, erased or edited unless the write protection is canceled.
DVD
RW
DVD
RW
Play
Rename Disc
Erase Optical Disc
Record a New Title
Overwrite Disc
Lock Disc
Copy All
Disc Operation
DVD+RW:
File Manager PIC
1. FOE/
2. 042.jpeg
3. 046.jpeg
4. 048.jpeg
Play the current file
Play
Copy
Delete
Move
Rename
Create Dir
Select all
UnSelect all
Add to favorite list
Favorite list
Play
Rename Disc
Erase Optical Disc
Record a New Title
Overwrite Disc
Lock Disc
Copy All
DVD+RW:
1
2
3
4
5
6
7
Play
Rename Disc
Erase Optical Disc
Record a New Title
Overwrite Disc
Finalize Disc
Lock Disc
DVD-RW:
8