Page 61
7.0 ADVANCED SETTINGS
7.1 Manually entering TCP/IP Settings for a Camera
In most cases, this is not required as the router will assign the correct settings to the camera. It is however useful if you
want to setup the TCP/IP settings of the camera before you connect to it, if DHCP is disabled across your network, or if
you have subnet network problems.
Assigning an IP address to the Camera with Y-cam Setup utility
1.
Launch Y-cam Setup to detect the camera on your local network.
2.
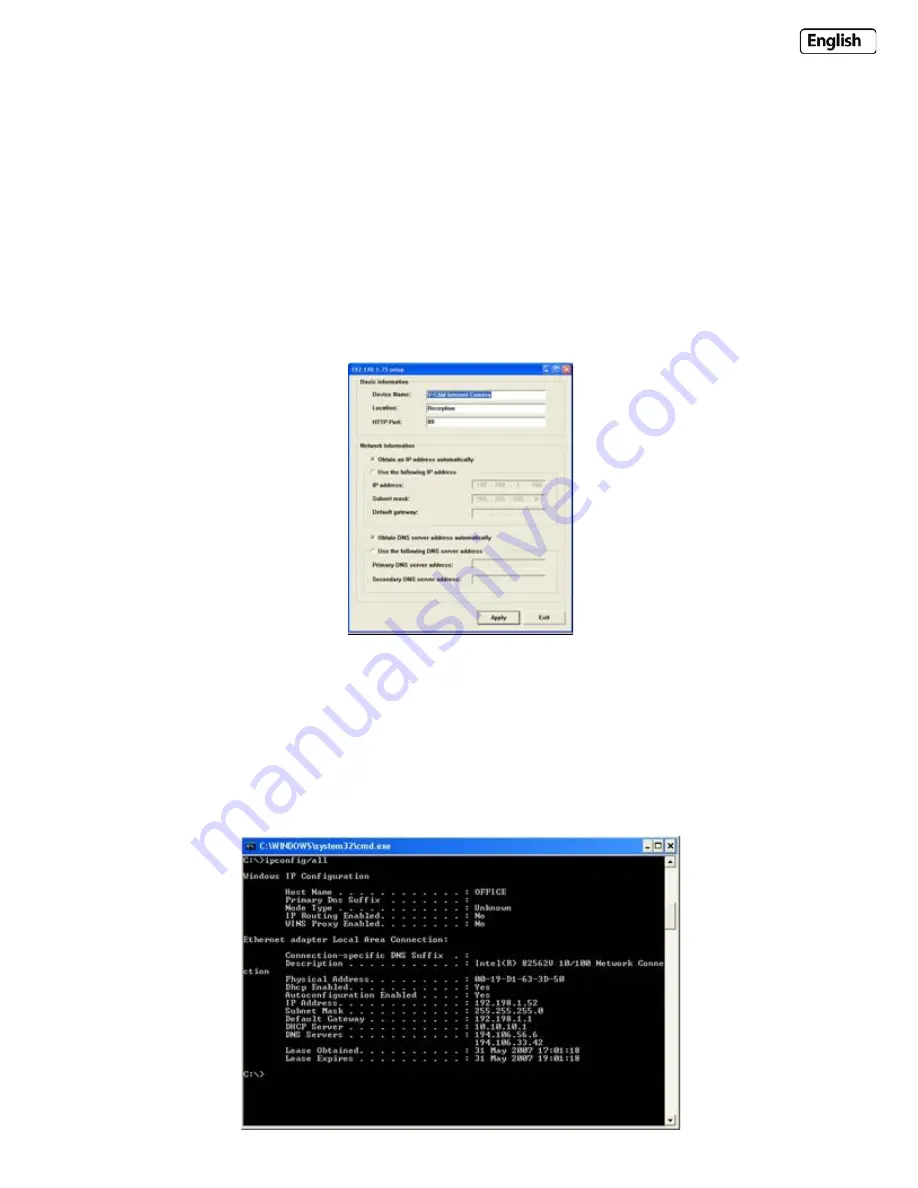
Select a camera, click on “Setup” and the following setup interface will pop up.
4.
Enter a unique name for the camera, the location (optional) and leave the default port number as 80. “Obtain an IP
address automatically” and “Obtain DNS server address automatically” are selected by default, if you are confident
enough to enter your own settings, you can do so by selecting “Use the following IP address” and follow the
guidelines on the next page.
5.
To obtain the IP addresses specific to your network, click “Start” then “Run” and type “cmd” in the text box and click
“Ok”. This will bring up the MS-DOS prompt. In this window type “ipconfig/all” and press enter. A screen similar to
the one below will be displayed.


