background image


31

Troubleshooting

Q


I plugged in the power and turned on the module, but 

the LED screen has not lit up and there is no sound.

A


Please check if there is electricity in the power outlet, 

and that the plug is inserted well. Also, check to see if 

the power jack is contacting well, or if the positive and 

negative poles may have been reversed.

Q


Why is the LED light on, but I can’t hear anything 

through the speaker?

A


Please check to see if the main volume is adjusted too 

low to hear any sound.

Содержание NX1

Страница 1: ...X M E n t e r p r i s e C o L t d User Manual NX1 ...

Страница 2: ...ection Diagram of Module and External Equipment Connections Diagram of Module and Cable Connections Basic Operation Operating the Module Home Page Editing Drum Values Editing the Value of the Metronome Quick Recording Training Mode Settings AUX IN MIDI Troubleshooting P03 P07 P08 P09 P10 P09 P10 P10 P11 P16 P11 P11 P12 P13 P16 P17 P18 P29 P18 P19 P19 P20 P21 P26 P27 P28 P29 P29 P30 P31 ...

Страница 3: ...meaning of each symbol is determined by the design contained within its In the case of the symbol shown to the left this is used for general cautions warnings or alerts to danger The symbol alerts users to items that must never be carried out forbidden actions Specific actions that must not be done are indicated by the design contained within the circle icon In the case of the symbol shown to the ...

Страница 4: ...o rain Dusty or sandy areas Locations subject to high levels of vibration and or shaking When using the unit with a stand recommended by XM eDrum the stand must be carefully placed so it is level and will remain stable If not using a stand you still need to make sure any location you choose to place the unit provides a level surface to support the module properly and keep it from being unstable Be...

Страница 5: ...E G flammable material coins pins or liquids of any kind water soft drinks etc to penetrate the unit Immediately turn the power off remove the AC adaptor from the outlet and request servicing by your retailer the nearest XM eDrum Service Center or an authorized XM distributor when The AC adaptor the power supply cord or the plug has been damaged Smoke or unusual odors are emitted from the unit Obj...

Страница 6: ...tal power used by all devices connected to the extension cord outlet must never exceed the power rating watts amperes for the extension cord Excessive loads can cause the insulation on the cord to heat up and eventually melt through Before using the unit in a foreign country consult with your retailer the nearest XM eDrum Service Center or an authorized XM eDrum distributor WARNING ...

Страница 7: ...f time Any accumulation of dust between the power plug and the power outlet can result in poor insulation and lead to fire Try to prevent cords and cables from becoming entangled Also all cords and cables should be placed so that they are out of the reach of children Never climb on top of nor place heavy objects on the unit Never handle the AC adaptor or its plugs with wet hands when plugging into...

Страница 8: ...plug when pulling it out Do not pull the cable hard as it can damage the cable and its plug 4 Before connecting the module to other electrical appliances E G computer speaker etc please turn the power of each appliance to OFF Also turn all volume controls down to 0 before turning these appliances ON OFF 5 Please stop using the module if there is any problem with the power cable so as to avoid any ...

Страница 9: ...olume of the MAIN OUT jack ENTER Knob Rotate the knob to switch between pages and edit values Press the knob to confirm a selection or to enter other screens CLICK Button Press to quick start the metronome Do a long press of the button to enter exit the metronome and or adjust the screen REC Button Press to enter the recording screen 1 2 3 4 5 6 1 2 3 4 5 6 C ...

Страница 10: ...AW software MAIN OUT Port This is the main volume output signal for the system Connect this to a speaker MIX IN Port Use a 3 5mm stereo cable to connect with a music player or other source of music PHONE OUT Port Used for stereo headphones 1 2 3 4 5 1 2 3 4 5 DC IN Port Please use the XM power supply TRIGGER INPUT Connect to enable all drum components AUX IN Port To expand your kit with additional...

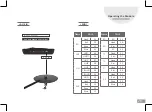
Страница 11: ...Module and Cables Module and Rack Bracket Connection Module and External Equipment Connections Take three screws out of the Module box and connect the Module to the Module Rack by using a cross point screwdriver as shown here Right Side Panel ...

Страница 12: ...12 PC XMP10 HEADPHONE SPEAKER MP3 CD PLAYER IPAD Assembly Instructions for Module and Cables POWER USB MAIN OUT MIX IN PHONE OUT Left Side Panel Module and External Equipment Connections ...

Страница 13: ...tructions for Module and Cables Module and External Equipment Connections BD Blue SD Brown FT White T2 Yellow T1 Gray RD Red CR Green HH Black HHC Pink CR Green HH Black T1 Gray T2 Yellow RD Red HHC Pink SD Brown BD Blue FT White ...

Страница 14: ...embly Instructions for Module and Cables BD Blue SD Brown T1 Gray RD Red HH Black HHC Pink HH Black T1 Gray RD Red HHC Pink SD Brown BD Blue FT White T2 Yellow CR Green Do not use Module and External Equipment Connections ...

Страница 15: ...ructions for Module and Cables BD Blue SD Brown FT White T2 Yellow T1 Gray RD Red CR Green HH Black HHC Pink CR Green HH Black T1 Gray T2 Yellow RD Red HHC Pink SD Brown BD Blue FT White Module and External Equipment Connections ...

Страница 16: ...External Equipment Connections Assembly Instructions for Module and Cables BD Blue SD Brown FT White T2 Yellow T1 Gray RD Red CR Green HH Black HHC Pink CR Green HH Black T1 Gray T2 Yellow RD Red HHC Pink SD Brown BD Blue FT White ...

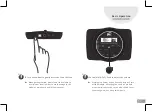
Страница 17: ...minimum level in order to avoid damage to the module s main board and or your speaker Use the MAIN OUT Knob to adjust the volume Pressing the Power button a second time will turn off the module All settings on the NX 1 module are automatically saved so you won t need to set them up again when using this module Step Step 1 2 ...

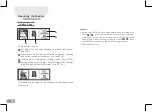
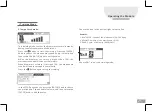
Страница 18: ...ode Factory Reset Drum Settings RIM Settings HHP Settings and Mixer Settings see P 27 28 The speed can be adjusted showing the current speed at the time of use Remarks 1 Rotate the ENTER Knob to move between the four modes In modes press the ENTER Knob to confirm a selection press again to exit and do a long press of the ENTER Knob to enter the mode s Settings screen In modes press the ENTER Knob ...

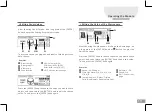
Страница 19: ...ge do a long press of the ENTER Knob or Button to enter the Edit Value screen Press the ENTER Knob to choose the value you would like to adjust and then rotate the ENTER Knob to edit this value To exit press the ENTER Knob again Remarks Drum section Drum graphic Drum name Save location Remarks Speed 30 240 bpm Time Signature 2 4 3 4 4 4 5 4 3 8 6 8 Tempo Duplets Triplets Triplets Split Quadruplets...

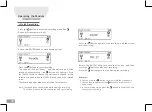
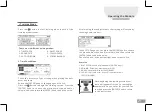
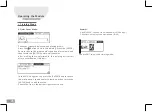
Страница 20: ...n show how long you ve been recording Press the Button to enter the recording mode The Button will then remain lit up Rotate the ENTER Knob to move between icons C Remarks 1 You can press the Button to turn On Off the metronome 2 You can do a long press of the Button to enter the Edit Value screen 3 In the recording mode press the Button to Start Stop and to play your recording C C Press the Butto...

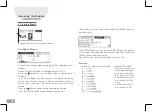
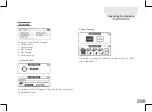
Страница 21: ...After making these adjustments the training will restart by counting down two bars In the SETUP page you can press the ENTER Knob to choose the metronome s speed and or volume and then rotate the ENTER Knob to edit the value Choose the icon in the bottom right hand corner to Exit 4 QUIET COUNT 5 TEMPO CHECK 6 STROKE BALANCE Remarks 1 BEAT SPEED Speed of metronome 30 240 bpm 2 VOLUME Volume of metr...

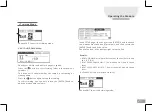
Страница 22: ... countdown of two bars The note will appear on the center of the screen reminding you of the next note to play as well as near the arrow icon which shows the next four beats before they are to be played Press the Button again to stop the training session Press the ENTER Knob to choose the metronome s 2 CHANGE UP Mode speed and or volume and then rotate the ENTER Knob to edit the value C C Remarks ...

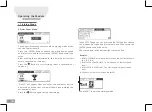
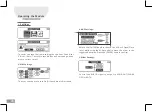
Страница 23: ...UTO UP DOWN Mode In the SETUP page you can press the ENTER Knob to choose the metronome s speed and or volume and then rotate the ENTER Knob to edit the value Choose the icon in the bottom right corner to Exit Training Mode Choose EXIT to exit this training mode Choose EXIT to exit this training mode C C Remarks 1 BEAT UP DOWN Accelerate Decrease by the number of beats B 1 B 2 B 4 2 BEAT SPEED LOW...

Страница 24: ...mber of bars to be muted and then your score will show upon reaching this set number of bars Press the Button again to stop the training 4 Quiet Count Mode C C In the SETUP page you can press the ENTER Knob to choose the metronome s speed and or volume and then rotate the ENTER Knob to edit the value Choose the icon in the bottom right corner to Exit Remarks 1 BEAT UP DOWN Accelerate Decrease by t...

Страница 25: ...ut completely When drummer s accuracy is less than 75 the metronome sound will fade in to support your efforts Press the Button again to stop the training In the SETUP page you can press the ENTER Knob to choose the metronome s speed and or volume and then rotate the ENTER Knob to edit the value C C Training Mode 5 Tempo Check mode Choose the icon in the bottom right corner to Exit Choose EXIT to ...

Страница 26: ...ing these adjustments the training will restart after a countdown of two bars In the SETUP page you can press the ENTER Knob to choose the metronome s speed and or volume and then rotate the ENTER Knob to edit the value Choose the icon in the bottom right corner to Exit C Training Mode 6 Quiet Count Mode Remarks 1 BEAT SPEED Speed of the metronome 30 240 bpm 2 VOLUME Volume of the metronome 0 50 C...

Страница 27: ...ctory Reset 2 Drum Settings 3 RIM Settings 4 HHP Settings 5 Mixer Settings A warning screen will appear to double confirm you wish to undertakethe reset 1 Factory Reset 2 Drum Settings The default settings are different between E drums XED and E pads XEP Settings ...

Страница 28: ...ry reset The user can choose to turn On Off each drum s Rim sound 3 RIM Settings 4 HHP Settings 5 Mixer Settings Rotate the ENTER Knob to choose the Hi Hat s Open Close level while using the Hi Hat pedal to move the arrow to the suggested position Press the ENTER Knob to confirm Control the MIX IN signal to output to MAIN OUT PHONE OUT or BOTH Settings ...

Страница 29: ... BD BD 35 SD Head 38 Rim 37 RS 40 T1 Head 45 Rim 47 T2 Head 43 Rim 39 FT Head 48 Rim 48 CR Head 49 Bell 49 Edge 49 Mute 78 Name Midi RD Head 51 Bell 53 Edge 62 Mute 63 HHP HHPC 44 HHPO 59 HH HHC 42 HHB 58 HHE 22 1 4HHO 54 1 2HHO 55 HHO 46 AUX Head 52 Bell 52 Edge 52 Mute 52 AUX IN MIDI ...

Страница 30: ...ease use stereo cables http store pchome com tw xm world M02135920 htm Q Why is there no sound when I beat the eDrums eCymbals A 1 Please make sure you are using the AC adapter provided by XM eDrum If you don t use the AC adapter provided by the original manufacturer and have since caused damage to the product these issues cannot be included in the warranty 2 Please check if the PHONE OUT and MAIN...

Страница 31: ... there is electricity in the power outlet and that the plug is inserted well Also check to see if the power jack is contacting well or if the positive and negative poles may have been reversed Q Why is the LED light on but I can t hear anything through the speaker A Please check to see if the main volume is adjusted too low to hear any sound ...

Страница 32: ...x in Pho ne out Click REC Main out Enter Contact Us No 100 Ln 511 Taiping Rd Hemei Township Changhua County 508 Taiwan R O C Email info xm world com Phone 886 4 7567749 Fax 886 4 7567708 http xmedrum com ...

Отзывы: