background image

3

Copy 

Xerox WorkCentre 4250/4260 User Guide

43

The 

Details

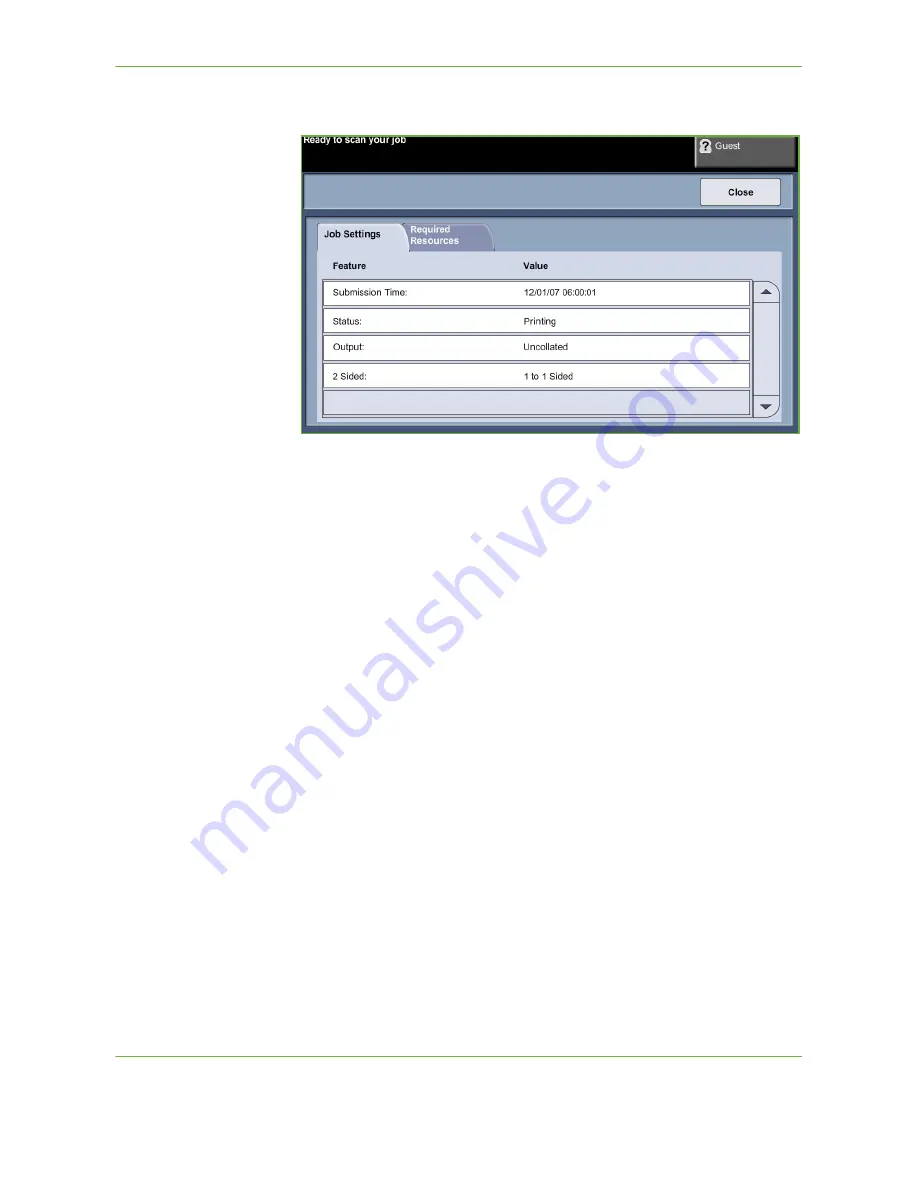
 button displays information such as owner, status, job type, time 

submitted, etc.

4.

Select 

Close

 to return to the 

Progress of Your Job

 screen.

5.

Select 

Close

 to return to the 

Job Status

 screen.

6.

Select 

Screen Default

 to return to the preset default job queue screen. For 

information on how to set the Default View, refer to 

Job Status Default in the 

Setups chapter on page 179.

6 Stop the Copy Job

Follow the steps below to manually cancel an activated copy job.

1) Press the 

Stop

 button on the control panel to cancel the current copy job.

2) To cancel a queued job press the 

Job Status

 button on the control panel 

to display the 

Incomplete


Printing Jobs

 screen.

3) Select the appropriate job from the queue to view the 

Progress of your Job


screen.

Содержание WorkCentre 4250C

Страница 1: ...Xerox WorkCentre 4250 4260 User Guide...

Страница 2: ...by statutory or judicial law or hereinafter granted including without limitations material generated from the software programs which are displayed on the screen such as icons screen displays looks et...

Страница 3: ......

Страница 4: ......

Страница 5: ...gging On Logging Off 29 Machine Information 30 Customizing Your Machine 35 For Further Assistance 36 Copy 37 Copy Procedure 38 Copy 45 Image Quality 48 Layout Adjustment 50 Output Format 54 ID Card Co...

Страница 6: ...148 Paper Output 149 Layout Watermark 151 Advanced 152 Paper and other Media 153 Loading Paper 155 Setting the Paper Size 160 Media Specifications 161 Setups 163 Accessing Tools 164 Tools Menu Overvie...

Страница 7: ...erox WorkCentre 4250 4260 User Guide iii Specifications 203 Machine Specifications 204 Electrical Specifications 207 Feature Specifications 208 Troubleshooting 211 Fault Clearance 212 Error and Fault...

Страница 8: ...Table of Contents iv Xerox WorkCentre 4250 4260 User Guide...

Страница 9: ...ize yourself with your new machine please refer to Chapter 2 Getting Started Chapter 11 Setups Further chapters within this guide offer additional information on the features and options available For...

Страница 10: ...printing faxing e mailing and scanning The device supports scanning to and printing from a USB thumb drive and has the capability of storing print and copy files on the device It copies and prints at...

Страница 11: ...Trays and a Bypass Tray are also provided and 2 sided copying and printing are supported Additional Paper Trays Stand Finisher High Capacity Feeder and Memory Upgrade are available as options Xerox Wo...

Страница 12: ...to the previous screen Convention Description Example Italic TypeFace Used to denote screen or tab titles In addition references to other publications are displayed in Italic typeface Basic Copy Feat...

Страница 13: ...entre 4250 4260 User Guide 5 Related Information Sources Information on this family of products can be found in 1 This User Guide 2 The Quick Use Guide 3 The System Administration CD 4 The Xerox websi...

Страница 14: ...Use the space below to make a note of the machine serial number ____________________________________________ To access the serial number open the side cover using the release latch and then open the f...

Страница 15: ...NG mark alerts users to heated surfaces WARNING This symbol indicates a Laser is being used in the equipment and alerts the user to refer to the appropriate safety information WARNING This product mus...

Страница 16: ...e when used on electromechanical equipment Always exercise care when moving or relocating equipment Please contact your local Xerox Service Department to arrange relocation of the copier to a location...

Страница 17: ...cable that is supplied with your machine Do not use an extension cord or remove or modify the power cord plug 4 Plug the power cable directly into a correctly grounded electrical outlet If you are no...

Страница 18: ...esentative to correct the problem The equipment emits unusual odours or makes unusual noises The power cable is damaged or frayed A wall panel circuit breaker fuse or other safety device has been trip...

Страница 19: ...roviding the correct environmental parameters as specified in the Xerox installation procedure will ensure that the concentration levels meet safe limits If you need additional information about ozone...

Страница 20: ...in proximity to Industrial Scientific and Medical ISM equipment the external radiation from the ISM equipment may have to be limited or special mitigation measures taken NOTE Changes or modifications...

Страница 21: ...C rules and the requirements adopted by the Administrative Council for Terminal Attachments ACTA On the rear of this equipment is a label that contains among other information a product identifier in...

Страница 22: ...e during or after the service warranty period If unauthorized repair is performed the remainder of the warranty period is null and void This equipment must not be used on party lines Connection to par...

Страница 23: ...e public switched telephone network PSTN in accordance with Directive 1999 5 EC The product has been designed to work with the national PSTNs and compatible PBXs of the following countries In the even...

Страница 24: ...ificates Treasure Notes Fractional Notes Paper money Bonds and obligations of certain agencies of the government such as FHA Bonds US Savings Bonds may be photographed only for publicity purposes in c...

Страница 25: ...g information Registrant s earnings or income Registrant s dependency status Registrant s court record Registrant s previous military service Registrant s physical or mental condition NOTE Exception U...

Страница 26: ...n and Japanese governments and the office equipment industry to promote energy efficient copiers printers fax multifunction machine personal computers and monitors Reducing product energy consumption...

Страница 27: ...aste handling For more information about collection and recycling of old products and batteries please contact your local municipality your waste disposal service or the point of sale where you purcha...

Страница 28: ...ct was placed on the market For recycling and disposal information contact your local authorities In the United States you may also refer to the Electronic Industries Alliance web site http www eiae o...

Страница 29: ...Xerox WorkCentre 4250 4260 User Guide 21 2Getting Started Before you use your machine take some time to familiarize yourself with the various features and options...

Страница 30: ...ays 1 2 High Capacity Feeder and Finisher Document Glass User Interface and Control Panel Document Feeder Control Panel USB Port Finisher Paper Tray 1 Paper Tray 2 Bypass Tray High Capacity Feeder tra...

Страница 31: ...Fax Optional Optional Standard Standard Paper Tray 1 Bypass Standard Standard Standard Standard Paper Tray 2 Optional Optional Optional Standard High Capacity Feeder Optional Optional Optional Optiona...

Страница 32: ...ble features on the touch screen Job Status Displays job progress information Machine Status Displays the current status of the machine Display and Touch Screen Displays and selects all the available...

Страница 33: ...any button or the touch screen to wake up the machine Touching the power button will bring up energy saver options on the touch screen The Power button allows a user to instantly go into Energy Saver...

Страница 34: ...3 Position the side guide by squeezing the lever and sliding it towards the stack of paper until it gently touches the side of the stack Do not allow the guide to press against the edge of the paper t...

Страница 35: ...he locking pins on both side guides 3 Position the side guides by sliding Align the arrow to the required paper size 4 Replace the locking pins in the appropriate paper size hole turn the locking pins...

Страница 36: ...the paper and insert it into the tray Do not fill above the Maximum Fill Line 7 Close the paper tray 8 Follow the instructions on the Touch Screen to confirm the stock size type and color NOTE For mo...

Страница 37: ...rs to authenticate themselves before using the device If authentication has been enabled 1 Use the keypad and or keyboard to enter your user credentials and then select Enter 2 Complete your job 3 To...

Страница 38: ...ss the Machine Information button to the left of the User Interface Machine Information The Machine Information tab displays the following information General Information This section includes the ser...

Страница 39: ...Xerox asset tag number System Software Version For information on how to set up this screen refer to Customer Support and Supplies Numbers in the Setups chapter on page 192 The Machine Details screen...

Страница 40: ...ress Book All Above Reports Prints all the reports listed above Fax Phone Book Displays stored numbers in the Speed Dial List the Group Dial List and Mailboxes Fax Transmission Displays the last 50 fa...

Страница 41: ...on on machine errors and faults All Faults Displays the fault description and instructions on how to resolve the fault Active Messages Displays the list of active error messages Event Log Displays all...

Страница 42: ...er of images made with the current toner Fuser Displays the number of images made with the current fuser Tray s Feed Roller Displays the number of images made with the current tray rollers Bias Transf...

Страница 43: ...ut button on the control panel Some of the settings within Tools are critical to the operation of the machine therefore the screens are password protected so they cannot be accidentally changed or cor...

Страница 44: ...any additional help on using your machine you can 1 Refer to the Quick Use Guide or the System Administration CD contained in the CD Pack delivered with your machine 2 Contact your System and or Machi...

Страница 45: ...Xerox WorkCentre 4250 4260 User Guide 37 3Copy This chapter contains information on the copy screen and the copy features available...

Страница 46: ...Trays in the Setups chapter on page 175 Document Feeder The following steps explain how to load documents using the document feeder 1 Before loading the documents into the document feeder ensure they...

Страница 47: ...feeder 2 Select the Features By default the Copy screen is the first screen displayed on the machine If the screen displays Job Status or Machine Status press the Services Home button If the touch sc...

Страница 48: ...e 50 Output Format page 54 3 Enter the Quantity The maximum copy quantity is 999 Use the numeric keypad on the control panel to enter the number of copies required The number entered is displayed in t...

Страница 49: ...the Copy Job Press the Start button Each document is scanned only once The number of copies requested is displayed in the upper right hand corner of the screen 5 Job Status Screen 1 Press the Job Sta...

Страница 50: ...screen displays the number of originals scanned and the number of images completed so far The Delete button allows the user to delete the selected job from the active job queue Queue Description All J...

Страница 51: ...fault job queue screen For information on how to set the Default View refer to Job Status Default in the Setups chapter on page 179 6 Stop the Copy Job Follow the steps below to manually cancel an act...

Страница 52: ...3 Copy 44 Xerox WorkCentre 4250 4260 User Guide 4 Select Delete from the Job Commands list 5 Select Confirm to delete the job or Cancel to return to previous screen...

Страница 53: ...py job The options can be selected by touching the appropriate button in each column To view all the choices for each option select the More button Reduce Enlarge Using this option originals can be re...

Страница 54: ...High Capacity Feeder holds 2100 sheets of 20lb paper Weight ranges from 60 105 g sm Sizes range from A4 SEF to Legal and includes envelopes max 50 Bypass Tray Use this option when feeding individual t...

Страница 55: ...ery second side image The read orientation for this option varies depending on the input originals For example if head to head orientation originals are scanned the output will be head to toe If head...

Страница 56: ...copy job if required Original Type Use this feature to enhance the quality of your output The Original Type option is used to enhance the copy quality of the output based on the type of original bein...

Страница 57: ...3 Copy Xerox WorkCentre 4250 4260 User Guide 49 Background Suppression Use to automatically reduce or eliminate the dark background resulting from copying colored paper or newspaper originals...

Страница 58: ...t of the copy output Original Size Select this feature to specify how the device determines the size of the original document Auto Detect Use this option to allow the machine to automatically recogniz...

Страница 59: ...ining mixed size originals The originals must be the same width for example 8 5 x 11 and 8 5 x 14 Load documents in the document feeder when using this feature Book Copying Use when copying bound docu...

Страница 60: ...paper Margin Shift Creates a binding edge for the document The image can be adjusted up or down on the page and or shifted to the right or left Use the up down and left right scroll buttons to adjust...

Страница 61: ...on all edges of the copies minimum 0 04 All Edges maximum Erases equal amounts on all edges of the copies maximum 0 24 Small Original Erase Use to erase 0 25 6 mm from the edge of the document Hole P...

Страница 62: ...ial set of either single sided or double sided originals The machine prints 2 sided automatically which when folded produces a booklet with all the pages in the correct sequence The machine will also...

Страница 63: ...Off The feature is switched off Front and Back Use this option to add both a front and back cover to the copies Front Only Use this option to add a front cover to the copies Back Only Use this option...

Страница 64: ...een each transparency Then choose the appropriate transparency and separator stock Transparency Supply Select this button to specify the tray from which the machine needs to use the transparency stock...

Страница 65: ...als onto one sheet of paper NOTE For landscape originals place the top of the document at the back of the feeder For portrait originals place the top of the document to the left Store Job Use this fea...

Страница 66: ...upply Use the Paper Supply options to select a paper tray for the copy job Lighten Darken Adjusts the lightness or darkness of the output Background Suppression Use to automatically reduce or eliminat...

Страница 67: ...x travels over normal telephone lines and will therefore be charged at telephone rates LAN Fax LAN Local Area Network Fax enables you to send documents to fax machines directly from your computer Once...

Страница 68: ...ed Rotate Side 2 Yes Yes Original Type Photo and Text Text Photo Yes Yes Resolution Standard Fine Superfine Yes Standard and Fine only Dialling Characters Yes Yes Address Book Yes Fax Directory Tab 2...

Страница 69: ...olling Poll a Remote Fax Poll a Remote Mailbox Yes Delay Send Off Specific Time Yes Yes Send Header Text Off On Yes Mailboxes Send to Remote Mailbox Store to Mailbox Print Mailbox Documents Delete Mai...

Страница 70: ...or more information contact the System Administrator Embedded Fax and Server Fax Procedure 1 Load the Documents You can load the documents to be faxed either on the Document Glass or through the Docum...

Страница 71: ...ent glass 1 Raise the document feeder 2 Place the document face down on the document glass aligned with the tip of the registration arrow near the top left of the document glass 3 Lower the document f...

Страница 72: ...any previous selections if needed The control panel returns to the default Entry screen 4 Select the button for the feature required Embedded Fax Services Home button Feature Description Fax Use this...

Страница 73: ...is only available with Embedded Fax Follow the steps below to send a color fax job 1 For color faxing select Color Mode on the Image Quality tab 2 Select Full Color then Save to confirm the settings...

Страница 74: ...e fax machine Once connected the local machine sends the fax job To print a confirmation or error report refer to Fax Report in the Setups chapter on page 174 Option Description Keypad Dial Use this o...

Страница 75: ...utton on the control panel to cancel the current fax job 2 To cancel a queued job press the Job Status button on the control panel to display the Active Jobs screen 3 Select the appropriate job from t...

Страница 76: ...a recipient 6 Click OK to confirm your recipient selection 7 Click OK to confirm your selections in the Printing Preferences window 8 Click Print to print your document 9 The Fax Confirmation box wil...

Страница 77: ...which have been previously set up and stored Individual numbers can also be accessed from the Address Book using the Speed Dial function NOTE There are no transmission preferences per user Keypad Dial...

Страница 78: ...entry To send a fax to multiple destinations the Group Dial option is used Destination numbers for the fax can be added to the Current Group Dial list using any of the dialing methods available Dialin...

Страница 79: ...time when sending faxes to frequently used destinations Address Book Setup From the Fax tab select the Address Book button to create a new Address Book entry or to edit an existing one 1 From the Addr...

Страница 80: ...1 Sided Use this option for originals that are printed on one side only 2 Sided Use this option for originals that are printed on both sides 2 Sided Rotate Side 2 Use this option for originals that a...

Страница 81: ...produces the largest image file size but delivers the best image quality Image Quality The Image Quality tab contains options that help you to enhance the appearance and style of your faxed document...

Страница 82: ...ng fed through the document feeder Presets Use this option to specify the dimensions of the document scanning region when scanning from the document glass There are several standard size dimensions th...

Страница 83: ...fax machine or to poll a remote fax machine or mailbox to retrieve information Store for Polling This option allows users to scan documents and store them When remote machines poll the device they ar...

Страница 84: ...mailbox To use this option you need to know the remote mailbox number and passcode Enter the remote machine s fax number using the control panel or select the Group Dial button to select the required...

Страница 85: ...ocuments Stored documents are placed in the local mailbox by the user standing at the device received documents are placed in the local mailbox by a remote fax device The local mailbox may be password...

Страница 86: ...e available when the remote machine has mailbox capability and when the user sending the document knows the mailbox number of the recipient Enter the recipient s fax number using the control panel or...

Страница 87: ...ut this feature consult the System Administrator Guide or contact your System Administrator Forward to Fax This feature allows incoming or outgoing faxes to be automatically forwarded to an anonymous...

Страница 88: ...options available on the Fax tab to enter the recipient telephone number and to select the standard features for your fax job Dialing Options Use the Dialing Options to enter the destination fax numbe...

Страница 89: ...n 4 When the fax number is complete select Add Fax Directory The Fax Directory contains a list of numbers that are relevant to your company and or you Use the up down scroll buttons to locate the reci...

Страница 90: ...o specify whether the originals are single sided or two sided 1 Sided Use this option for originals that are printed on one side only 2 Sided Use this option for originals that are printed on both sid...

Страница 91: ...on time but does not produce the best image quality for graphics and photos Fine 200 x 200 dpi Recommended for line art and photos This is the default resolution and the best choice in most cases Imag...

Страница 92: ...chine to automatically recognize the size of the originals being fed through the document feeder Presets Use this option to specify the dimensions of the document scanning region when scanning from th...

Страница 93: ...when transmitting faxes Delay Send Enables you to specify the time of a fax transmission or poll This option can be used to delay transmission of a fax job for a maximum period of 23hrs 59mins by spec...

Страница 94: ...4 Fax 86 Xerox WorkCentre 4250 4260 User Guide...

Страница 95: ...anning Network Scanning is a standard feature on the WorkCentre 4250S 4260S 4250X 4260X and 4250XF 4260XF Network Scanning enables the creation of an electronic image file If Network Scanning has been...

Страница 96: ...for more information contact the System Administrator Load the Documents You can load the documents to be scanned either on the Document Glass or through the Document Feeder Document Feeder The follo...

Страница 97: ...er 2 Place the document face down on the document glass aligned with the tip of the registration arrow near the top left of the document glass 3 Lower the document feeder 1 Select Network Scanning Pre...

Страница 98: ...buttons located to the right of the Template List on the Network Scanning tab to move through the list and select a Template For more information on Network Scanning templates refer to Network Scannin...

Страница 99: ...l to display the Job Status screen The default Job Status screen displays all incomplete jobs including the queued network scan job If there are no incomplete jobs in progress the message No Active Jo...

Страница 100: ...g job 1 Press the Stop button on the control panel to cancel the current scanning job 2 To cancel a queued job press the Job Status button on the control panel to display the Active Jobs screen 3 Sele...

Страница 101: ...dded to the machine s scanning capabilities FreeFlow SMARTsend Server based scanning and routing software that supports multiple Xerox multifunction devices Convert paper documents into electronic for...

Страница 102: ...in upper case displays in the template list The default template appears at the top of the list and is selected automatically All other templates follow in alpha numeric order There is a maximum of 25...

Страница 103: ...on creating templates Selecting a template Select a template based on where the file is required to be sent Normally the System Administrator will have established a template for use by each user Cha...

Страница 104: ...is option for originals that are printed on one side only 2 Sided Use this option for originals that are printed on both sides 2 Sided Rotate Side 2 Use this option for originals that are printed on b...

Страница 105: ...um quality photos and graphics This is the default resolution and the best choice for most documents 400 x 400 dpi Recommended for average quality photos and graphics It produces good quality images a...

Страница 106: ...e Lighten Darken Adjusts the lightness or darkness of the output Background Suppression Use to automatically reduce or eliminate the dark background resulting from copying colored paper or newspaper o...

Страница 107: ...Use this feature if you want to refresh the Network templates and cannot wait until the system automatically updates the system Local template updates are immediate and automatic NOTE The template up...

Страница 108: ...feature to refresh the quality of an original that has become torn or frayed at the edges or that has hole punch staple or other marks Option Description Auto Detect Use this option to allow the machi...

Страница 109: ...4260 User Guide 101 When Scan to Edge is set to On the device will scan the image to the edges of the original When Scan to Edge is set to Off a small blank border will be added around the scan edges...

Страница 110: ...r folder with a unique name Append to Existing File Use this option to add the newly created scanned image file to an existing document with the same name as the document being scanned This option is...

Страница 111: ...can add any of these destinations to their existing template Option Description PDF Portable Document Format Given the right software the recipient of the scanned image can view or print the file no...

Страница 112: ...5 Network Scanning 104 Xerox WorkCentre 4250 4260 User Guide...

Страница 113: ...the options available within E mail When enabled scanned images can be sent as an e mail attachment to a specified e mail recipient or recipients Access to the E mail features is gained using the Serv...

Страница 114: ...To get an account or for more information contact the System Administrator Load the Documents You can load the documents to be e mailed either on the Document Glass or through the Document Feeder For...

Страница 115: ...tion the guides to just touch the edge of the documents Document Glass The following steps explain how to load documents using the document glass 1 Raise the document feeder 2 Place the document face...

Страница 116: ...ation contact the System Administrator 3 Press the Clear All button on the control panel to cancel any previous selections The control panel returns to the default Entry screen 4 Select the From field...

Страница 117: ...he full name and can search the address book on the first few letters Use the com key on the e mail keypad NOTE The instructions for programming the com key are in the System Administrator Guide Featu...

Страница 118: ...pients repeat the previous step 4 To enter recipient address es as Copy Cc or Blind Copy Bcc addresses select the To button Select either Cc or Bcc from the drop down menu options 5 When all recipient...

Страница 119: ...ect the Address Book button to search the other address book If one or more matches are found based on the search criteria the matches display on the touch screen 2 Use the up down scroll buttons to l...

Страница 120: ...lt Job Status screen displays all incomplete jobs including the queued scan to e mail job If there are no incomplete jobs in progress the message No Active Jobs is displayed For more information on th...

Страница 121: ...der including the sender s e mail address Select the From button to display the e mail keypad to enter an e mail address NOTE If E mail is accessed via Authentication Mode the information contained wi...

Страница 122: ...text contained within the e mail The subject line can contain up to 50 characters and displays on the touch screen under the Subject button Output Color Use this option to scan Black and White Graysc...

Страница 123: ...quality printed half tone originals Text Use for originals containing text or line art Resolution Description 72 x 72 dpi Produces the smallest image file size and is recommended for documents which...

Страница 124: ...colored paper or newspaper originals Resolution Resolution affects the appearance of the scanned image The higher the scanning resolution the better the image quality The current resolution setting i...

Страница 125: ...nd graphics This is the default resolution and the best choice for most documents 400 x 400 dpi Recommended for average quality photos and graphics It produces good quality images and a smaller file s...

Страница 126: ...e the size of the originals being fed through the document feeder Manual Size Input Use this option to specify the dimensions of the document scanning region when scanning from the document glass Ther...

Страница 127: ...the scanned image can view or print the file no matter what their computer platform PDF files usually open with Adobe Acrobat Readers Multi Page TIFF Tagged Image File Format A graphic file that can...

Страница 128: ...6 E mail 120 Xerox WorkCentre 4250 4260 User Guide Message Use this option to add new body text The body text can contain up to 80 characters and displays on the touch screen under the Message field...

Страница 129: ...ardcopy documents as an electronic file and place them into a folder located on a USB thumb drive The stored job can then be retrieved at a later date for printing and sharing from the USB thumb drive...

Страница 130: ...ting from copying colored paper or newspaper originals Resolution Resolution affects the appearance of the scanned image The higher the scanning resolution dpi dots per inch the better the image quali...

Страница 131: ...os and graphics This is the default resolution and the best choice for most documents 400 x 400 dpi Recommended for average quality photos and graphics It produces good quality images and a smaller fi...

Страница 132: ...refresh the quality of an original that has become torn or frayed at the edges or that has hole punch staple or other marks Option Description Auto Detect Use this option to allow the machine to deter...

Страница 133: ...0 User Guide 125 When Scan to Edge is set to On the device will scan the image to the edges of the original When Scan to Edge is set to Off a small blank border will be added around the scan edges to...

Страница 134: ...and folders stored on the USB thumb drive Choose one of the following options Option Description Open Use this option to open a selected file or folder New Folder Use this option to create a new fold...

Страница 135: ...tion and remove all staples and paper clips 2 Insert the documents neatly into the document feeder face up 3 Place the stack in the middle of the guides aligning the left edge with the document feeder...

Страница 136: ...the front of the machine 2 Press the Services Home button on the Control Panel 3 Select the Store to USB button 4 The root directory on the USB is displayed 5 Select the required folder where you want...

Страница 137: ...ty of graphic software packages across a variety of computer platforms JPEG 1 File per Page JPEG formats are graphic files that can be accessed with all graphics or image editing applications NOTE JPE...

Страница 138: ...or originals containing text or line art Photo Use for continuous tone photographs or high quality printed half tone originals Resolution Description 72 x 72 dpi Produces the smallest image file size...

Страница 139: ...is feature stores copies of the original documents on the device and stores them in a device specific format 1 Press the Services Home button and select Copy on the touch screen Ensure that the Copy s...

Страница 140: ...tabs for the feature required 3 Store the Job Press the Start button Feature Description Copy Use this tab to select the standard options for a copy job e g reduce enlarge 2 sided copying etc Image Qu...

Страница 141: ...nformation on the Job Status screen refer to Job Status Screen in the Copy chapter on page 41 5 Stop the Job Follow the steps below to manually cancel an activated job 1 Press the Stop button on the c...

Страница 142: ...lick on the Properties or Preferences button 5 Click on the Job Type drop down menu 6 Click the Saved Job option 7 Click one of the following options Save save your job into a folder to be printed lat...

Страница 143: ...rox WorkCentre 4250 4260 User Guide 135 8Print Files The Print Files feature allows you to select and output pre stored jobs as many times as you need Jobs can be stored on the device or on a USB driv...

Страница 144: ...nt Files 1 Select the Features 1 Press the Services Home button and select Print Files to display the Print Files feature 2 Select the folder or file that you wish to print If you have touched a folde...

Страница 145: ...displayed 4 Select Add to add the job to the print list 5 Repeat the above steps to add more jobs 6 Select Done when the required jobs have been added to the print list 7 Select the Job Quantity numbe...

Страница 146: ...8 Xerox WorkCentre 4250 4260 User Guide Print from USB 1 Insert the USB drive 1 Insert the USB drive into the USB port on the front of the device 2 Select the Print from USB button on the USB Options...

Страница 147: ...title to add the document to the print list A pop up menu is displayed 5 Select Add to add the job to the print list A tick will appear next to the file name 6 Repeat the above steps to add more jobs...

Страница 148: ...lays all incomplete jobs If there are no incomplete jobs in progress the message No Active Jobs is displayed For more information on the Job Status screen refer to Job Status Screen in the Copy chapte...

Страница 149: ...8 PrintFiles Xerox WorkCentre 4250 4260 User Guide 141 4 Select Delete from the Job Commands list 5 Select Confirm to delete the job or Cancel to return to previous screen...

Страница 150: ...8 Print Files 142 Xerox WorkCentre 4250 4260 User Guide...

Страница 151: ...mation about printing is contained either in the printer driver screens or in the electronic user guides that accompany the printer drivers To access the many printer drivers which can be used with yo...

Страница 152: ...ments can be printed from your PC using the print drivers supplied The print driver must be loaded on each PC which uses the machine for printing Select Print from Your PC 1 Click Print in your applic...

Страница 153: ...9 Print Xerox WorkCentre 4250 4260 User Guide 145 2 Click OK to confirm your selections 3 Click OK to print your document...

Страница 154: ...e it as the printer Select the Custom Size 1 Click on Properties to make your print selections 2 Click on the Paper Output tab and click on the Paper drop down menu 3 Click on Other Size 4 From the Or...

Страница 155: ...9 Print Xerox WorkCentre 4250 4260 User Guide 147 Print Your Document 1 Click OK to confirm your selections 2 Click OK to print your document...

Страница 156: ...ings in the tabs to the values that were in place before the dialog was opened Any changes made are lost Help Click Help in the bottom right of the printer driver screen or F1 on the PC keyboard for i...

Страница 157: ...the choices displayed Choose from the following job types Queue Description Normal Print Prints the job immediately without requiring a passcode Secure Print Prints the job only after you enter your p...

Страница 158: ...the printer s hard drive so that it can then be printed on demand from the printer s control panel When you select this job type the Saved Job dialog box appears so you can assign a job name and if de...

Страница 159: ...ut of a document and add watermarks Multiple documents can be printed on one page from 2 Up to 16 Up Booklets can also be created Use the Watermark option to display for example the word DRAFT or CONF...

Страница 160: ...uide Advanced Click this tab to access the options compatible with Adobe PostScript 3TM and advanced programming features for your print job Use the scroll arrows to move through the options Clicking...

Страница 161: ...er Guide 153 10Paper and other Media In this chapter you will learn about the different types of stock and stock sizes that can be used on your machine available paper trays and the types of stock and...

Страница 162: ...WorkCentre 4250X 4260X WorkCentre 4250XF 4260XF Bypass Tray Standard Standard Standard Standard Tray 1 Standard Standard Standard Standard Tray 2 Option Option Option Standard High Capacity Feeder Op...

Страница 163: ...until required Loading the Paper Trays Using the instructions provided below load paper into the machine Up to three paper trays are available depending on your machine configuration 1 To load paper...

Страница 164: ...guide by squeezing the lever and sliding it towards the stack of paper until it gently touches the side of the stack Do not allow the guide to press against the edge of the paper tightly 5 Close the...

Страница 165: ...re not currently loaded in the paper tray Acceptable print media is plain paper from 3 9 x 5 8 to 8 5 x 14 98 mm x 148 mm to 216 mm x 356 mm and weighing between 16 lb and 43 lb 60 g m and 163 g m Loa...

Страница 166: ...Type and or Color buttons if necessary to change the settings If the settings are correct select the Confirm button Please refer to Setting the Paper Size in the Paper and other Media chapter on page...

Страница 167: ...ed too much print media The stack should be under the Max Fill Line The UI screen shows the current paper supply settings for the Bypass Tray on the right hand side Select the Size Type and or Color b...

Страница 168: ...your selection to return to the Tray Information screen Change Type Select up arrow to choose from the list of paper type options Save your selection to return to the Tray Information screen Change C...

Страница 169: ...d envelopes with sharp well creased folds DO NOT use envelopes with clasps and snaps DO NOT use envelopes with windows coated lining self adhesive seals or other synthetic materials DO NOT use damaged...

Страница 170: ...ting which can cause paper jams Exposed adhesive can also cause damage to machine components Do not feed a sheet of labels through the machine more than once The adhesive backing is designed for one p...

Страница 171: ...tups This chapter identifies some of the key settings that you can customize to meet your requirements It is aimed primarily at the System Administrator of the machine Changing these settings is easy...

Страница 172: ...ontrol panel 1 Press the Log In Out button on the control panel 2 Use the number keypad to enter the default password 1111 Select Enter on the touch screen 3 Press the Machine Status button 4 Select t...

Страница 173: ...face Button Test Audio Tone Test LED Indicator Test Touch Area Test Display Pixel Test Video Memory Test Reset User Interface Application Checksum Verification Software Reset Timers System Timeout Inc...

Страница 174: ...set Basic Copy Preset Fax Service Settings Fax Country Setting Line Configuration Incoming Fax Defaults Transmission Defaults Mailbox Setup Documents Received in Mailbox Fax Report Error Correction Mo...

Страница 175: ...nge the local date and time on the machine Tools Device Settings General Set Date Time Set the date in either mm dd yy or dd mm yy or yy mm dd format and enter the correct date Set the correct time us...

Страница 176: ...be set to either inches or mm You can also set the decimal point Numeric Separator to either a period e g 12 3 or a comma e g 12 3 Tools User Interface General Measurements Set Default Paper Size The...

Страница 177: ...machine to make prints is affected by air pressure Air pressure is determined by the height of the machine above sea level The machine will automatically compensate for differences in air pressure if...

Страница 178: ...llows a user to listen to the call progress and hear the number dialed and the beginning of the handshake This is often known as listen to dial If you want to hear the fax audio monitor select the On...

Страница 179: ...e you to customize the way faxed documents are received Tools User Interface Fax Service Settings Incoming Fax Defaults Auto Answer Delay This tool enables the machine administrator to set a delay tim...

Страница 180: ...e mail More Fax Forward features are available via CentreWare Internet Services Forward to E mail Select either Forward Transmitted Faxes Forward Received Faxes or Forward All Select either Output For...

Страница 181: ...elephone Answering Machine Fax and Fax receive options Telephone Use to operate in manual mode When a call is received pick up the external phone handset If a fax tone can be heard press Start and rep...

Страница 182: ...Settings Line Configuration Fax Report This facility allows you to enable the Always Print and Print on Error features for the reports below An Auto Print feature can be used for the Transmission Rec...

Страница 183: ...bles the machine to automatically substitute common US and metric paper sizes when printing If the feature has been turned off the machine will hold the job and indicate that the appropriate paper siz...

Страница 184: ...anually selecting the required tray When the Off button is selected the Auto Tray button is disabled on the Copy screen The tray selection defaults to Tray 1 Tray Confirmation Messages This feature en...

Страница 185: ...re enables the machine administrator to set the 6 default reduction or enlargement ratios When the Reduce Enlarge Presets window opens the default reduction and enlargement ratios are displayed These...

Страница 186: ...11 Setups 178 Xerox WorkCentre 4250 4260 User Guide Tools User Interface Copy Service Settings Reduce Enlarge Preset...

Страница 187: ...to set which screen the user sees first The Entry Screen appears when the machine resets selections after a user has completed a job or after the Clear All button is pressed The available options are...

Страница 188: ...ble or disable one of the following audio tones When enabled the tones can be set to either low medium or high Select the Test button to test the tone volume Select Save to confirm the settings Tools...

Страница 189: ...witching on the machine Tools Device Settings Tests Resets Software Reset This facility allows you to reset the System Software Select the Reset System Software button A pop up window will appear warn...

Страница 190: ...yze the toner usage to predict the percentage of toner remaining and display the information on the Machine Status Service Information screen When the percentage of toner remaining equals the number s...

Страница 191: ...e as a measure of their life expectancy These include Fuser Counter Bias Transfer Roller Counter Feed Rollers Counter Document Feeder Friction Pad Counter At the end of life these units continue runni...

Страница 192: ...per job per account Users must enter their User ID and Account ID to access the machine and information about the jobs performed are stored in a job log Copy Print inbound and outbound Embedded Fax ou...

Страница 193: ...ccounting At the Machine 1 Press the Services Home button on the Control Panel 2 The Xerox Standard Accounting Login User ID screen will show Enter your XSA User ID 3 Touch Enter 4 The Validation in P...

Страница 194: ...ng Inhibit Services Choosing Copy Only will require credits at the foreign device for copying but allow access to other services Inhibiting All Services will require credits to access any service that...

Страница 195: ...The Immediate Image Overwrite feature erases all residual image data from the machine immediately after each job has been processed without requiring the machine to be taken offline When the Network...

Страница 196: ...the memory of the machine The standard overwrite process takes approximately 30 minutes A full overwrite process takes approximately 160 minutes Press Start to begin the overwrite All existing jobs wi...

Страница 197: ...enabled refer to Audio Tones in the Setups chapter on page 180 2 Select Start Test to begin the test 3 Press each button on the panel to the right of the touch screen A short audio tone will be genera...

Страница 198: ...terface changed color from black to white otherwise select the Failed button LED Indicator Test The LED Indicator test verifies that all of the lights on the control panel are functioning properly 1 S...

Страница 199: ...e Application Checksum Verification checks that the UI software is up to date and running correctly Select Start Test to begin the test A message will be displayed indicating that the test in progress...

Страница 200: ...users access to numbers and details vital to maintain the machine uptime Tools Device Settings General Xerox Customer Support This utility allows you to set the following numbers Customer Support Tel...

Страница 201: ...Accounting For more information please refer to the System Administration CD Foreign Device Interface The Foreign Interface Device is a card that is fitted inside the machine to allow a third party d...

Страница 202: ...11 Setups 194 Xerox WorkCentre 4250 4260 User Guide On Demand Image Overwrite For information on the On Demand Image Overwrite feature refer to On Demand Image Overwrite on page 187...

Страница 203: ...4260 User Guide 195 12Maintenance Performing routine maintenance tasks enables your machine to continue running at optimum performance levels Instructions are provided in this chapter for all the main...

Страница 204: ...h screen when it needs to be reordered This message is a warning that the unit is nearing the end of its life Only replace the unit when a message actually instructs you to do so To replace a CRU foll...

Страница 205: ...the front cover Open the front cover 2 Move the orange lock to the right 3 Gently lift up the orange handle slightly then carefully remove the Toner Cartridge The instructions that are packed with the...

Страница 206: ...ner Cartridge as described in Toner Cartridge on page 196 2 Move the green lock to the left and carefully pull out the SMart Drum Cartridge When the green handle becomesavailable use it to help you re...

Страница 207: ...Staple Cartridge 3 Remove the used Staple Cartridge from the cartridge holder 4 Dispose of the used Staple Cartridge 5 Remove the new Staple Cartridge from its packaging 6 Make sure that the staple st...

Страница 208: ...any maintenance procedure that is NOT specifically described in the documentation supplied with your machine Document Glass and Constant Velocity Transport CVT Glass 1 Use a soft lint free cloth ligh...

Страница 209: ...ay Regular cleaning keeps the document feeder and output tray free from dust and dirt 1 Use a soft lint free cloth lightly dampened with water 2 Wipe clean the document feeder and output tray includin...

Страница 210: ...12 Maintenance 202 Xerox WorkCentre 4250 4260 User Guide...

Страница 211: ...The machine adheres to strict specifications approvals and certifications These specifications are designed to provide for the safety of users and to ensure that the machine operates in a fully functi...

Страница 212: ...ith Tray 2 Access From the front From the front Copier Speed From paper tray 1 45 cpm one sided Letter 43 cpm A4 From paper tray 1 55 cpm one sided Letter 53 cpm A4 First Copy Out Time Document Glass...

Страница 213: ...max 8 5 98 mm 216 mm Feature Specification WorkCentre 4250 Series Specification WorkCentre 4260 Series Capacity Approximately 100 sheets of 20 lb 80 g m bond paper Approximately 100 sheets of 20 lb 8...

Страница 214: ...orkCentre 4250 4260 User Guide Output Modules Output Tray Finishing Feature Specification Capacity 500 sheets of 20 lb 80 g m bond paper Feature Specification Staples 1500 staples per cartridge 50 she...

Страница 215: ...orkCentre 4260 Series Frequency 50 60 Hz 50 60 Hz Electrical Voltage 110 127 VAC 220 240 VAC 110 127 VAC 220 240 VAC Average Power Consumption Power Save mode 20 Watts Stand By mode 120 Watts Printing...

Страница 216: ...2 208 mm Maximum Print Width 8 5 216 mm Connection Approvals EU EEA certified to TBR21 USA approved to FCC Pt 68 Canada approved to DOC CS 03 Other countries certified to national PTT standards Featur...

Страница 217: ...ature Feature Specification Max scan width 8 5 216 mm Effective scan width 8 2 208 mm Maximum Resolution 600 x 600 dpi TWAIN ISIS Compatible Network Twain WIA Image Compression MH MMR LZW JPEG Flate S...

Страница 218: ...13 Specifications 210 Xerox WorkCentre 4250 4260 User Guide...

Страница 219: ...hine When a change occurs allow the machine at least two hours to adjust to its new environment depending on the extent of the change Follow routine maintenance schedules for cleaning areas such as th...

Страница 220: ...w on screen instructions to clear the fault NOTE Any printed sheets removed will automatically be reprinted once the paper jam is cleared Paper Jams The display screen will indicate the location of th...

Страница 221: ...led automatically to recover the job integrity Document Glass Area Duplex Jams 1 Open the document feeder 2 Pull down the Lower Jam Clearance Cover handle to open the Lower Jam Clearance Cover 3 Remov...

Страница 222: ...s area and avoid touching any metallic surfaces 2 Close the rear cover door Finisher Area Jams 1 Open the Finisher cover 2 Lower handles 1a and 1b and remove any jammed paper If no jammed paper is fou...

Страница 223: ...WorkCentre 4250 4260 User Guide 215 NOTE If you are unable to clear the fault contact your local Xerox Welcome and Support Centre for assistance refer to Customer Support and Supplies Numbers in the S...

Страница 224: ...copy paper in the bypass tray has run out Load paper in the bypass tray Tray Cassette Out Paper tray is not securely closed Close the paper tray until it locks into place Jam from Tray Copy paper has...

Страница 225: ...ove printed material from Output tray Staple Cartridge Not Installed Staple cartridge not installed Install staple cartridge Stapler Fault Stapler unit does not work Open stapler door and check the st...

Страница 226: ...14 Troubleshooting 218 Xerox WorkCentre 4250 4260 User Guide...

Страница 227: ...and Output Tray 201 Document Glass 200 Color Mode Faxing 73 Color Scanning E mail 114 Constant Velocity Transport 200 Control Options Print 148 Reduce Enlarge 45 Country Setting 171 Covers Copy 55 D...

Страница 228: ...tion 191 Audio Tone 190 Communications Self Test 190 Display Pixel 190 LED Indicator 190 Reset UI 190 Touch Area 189 UI Button 189 Video Memory 190 User Interface 189 Manual Size Input E mail 118 Marg...

Страница 229: ...Drum Cartridge 198 Software Resets 181 Staple Cartridge 199 Store Files 121 Store for Polling Faxing 75 Store Job 57 Store to Mailbox Faxing 77 Support and Supplies Numbers 192 T Toll Save Fax Setup 1...

Страница 230: ...Index 222 Xerox WorkCentre 4250 4260 User Guide...

Отзывы: