background image

SquareFold

®

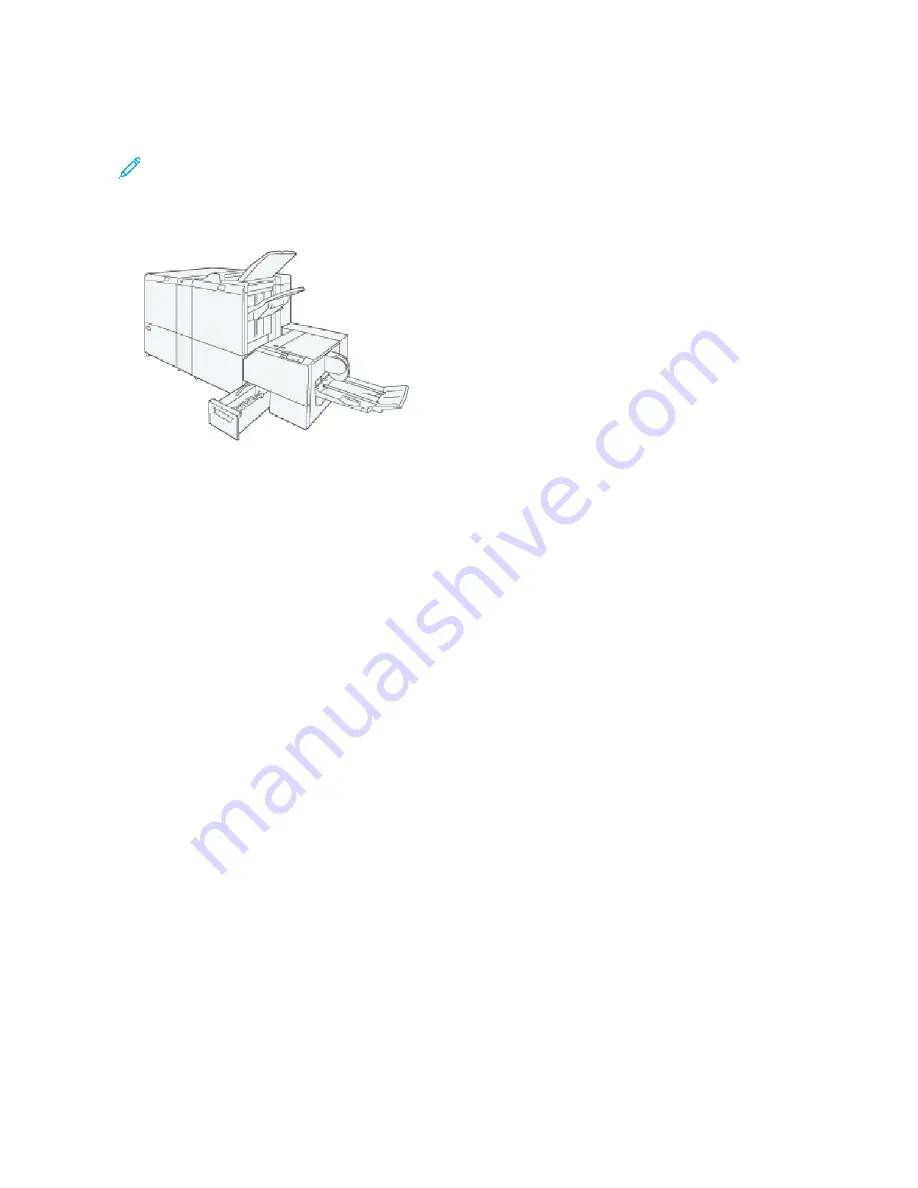
Trimmer Module Overview

Note: This optional finishing device requires a Production Ready Booklet Maker Finisher.

The SquareFold

®

Trimmer is an optional finishing device that flattens the spine of a booklet and performs face trim

of the booklet.

The SquareFold

®

Trimmer performs the following tasks:

• Receives the booklet from the Booklet Marker area of the Finisher.

• Flattens the booklet spine to reduce the booklet thickness and to provide the appearance of a perfect-bound

book.

• Trims and cuts away the face, that is the edge, of the booklet, which results in a neatly finished edge.

The booklet area of the finisher assembles and staples the booklet. The booklet enters the SquareFold

®

Trimmer

already assembled. Ensure that you set any adjustments to the original image and its placement on the booklet
page at the printer server.

466

Xerox

®

PrimeLink

®

B9100/B9110/B9125/B9136 Copier/Printer User Guide

SquareFold

®

Trimmer Module

Содержание PrimeLink B9100

Страница 1: ...VERSION 3 0 FEBRUARY 2023 702P08989 Xerox PrimeLink B9100 B9110 B9125 B9136 Copier Printer User Guide...

Страница 2: ...ountries Elements of Apple Technical User Documentation used by permission from Apple Inc Adobe the Adobe logo Acrobat the Acrobat logo Acrobat Reader Distiller Adobe PDF logo Adobe PDF JobReady Illus...

Страница 3: ...y 25 European Union Laser Safety 25 Battery Safety 26 Telephone Line Cord Safety 27 Maintenance Safety 28 Consumable Information 29 Environmental Health and Safety Contact Information 30 Getting Start...

Страница 4: ...ten 58 Image Quality 59 Original Type 59 Image Options 59 Background Suppression 60 Layout Adjustment 61 Book Copying 61 2 Sided Book Copying 61 Original Size 62 Edge Erase 62 Image Shift 63 Image Rot...

Страница 5: ...ation 95 Store to Folder 97 Saving the Scanned Data Using the Embedded Web Server 97 Store to USB 99 Guidelines for Using a USB Storage Device 99 Saving Scan Data to a USB Memory Device 99 Removing th...

Страница 6: ...42 Deleting a Group 143 Using Chain Dial 143 Creating Fax Comments 144 Stored Programming 145 Stored Programming Overview 146 Storing a Program 147 Storing a Program for Build Job 148 Naming or Renami...

Страница 7: ...ying on Labels 178 Printing or Copying on Glossy Paper 178 Paper Storage Guidelines 179 Loading Media 180 Loading Paper in Trays 1 and 2 180 Loading Paper in Trays 3 and 4 180 Loading Tab Stock in Tra...

Страница 8: ...anned Document to the Computer 231 Unable to Send the Scanned Document Over the Network FTP SMB 232 Problems with Sending Email 233 Paper Jams 234 Information About Paper Jams 234 Document Feeder Jams...

Страница 9: ...nion 278 Disposal Outside of the European Union 278 Other Countries 279 Tray 5 Bypass 281 Tray 5 Bypass Overview 282 Loading Media in Tray 5 Bypass 283 Loading Media in the Standard Bypass Tray 283 Lo...

Страница 10: ...ents 334 Control Panel on the Interface Decurler Module 335 Curl Correction on the Interface Decurler Module 336 Curl Correction Modes and Functions on the Interface Decurler Module 336 Interface Decu...

Страница 11: ...ase and Two Sided Trimmer Specifications 401 C Z Folder 403 C Z Folder Overview 404 C Z Fold Types 405 C Z Folder Components 406 C Z Fold Output 406 C Z Folder Troubleshooting 407 C Z Folder Paper Jam...

Страница 12: ...t Messages 458 PR Finisher Specifications 460 Staple Output Capacity 463 Booklet Capacities by Paper Weight and Type 463 SquareFold Trimmer Module 465 SquareFold Trimmer Module Overview 466 SquareFold...

Страница 13: ...e caution to avoid personal injury Pinch Hazard This warning symbol alerts users to areas where there is the possibility of personal injury Caution Indicates a mandatory action to take to avoid damage...

Страница 14: ...ples or any form of binding clip Do not use folded creased curled or wrinkled paper Do not load or use inkjet paper Do not reload paper previously printed on or used Do not use postcards Do not use en...

Страница 15: ...n 1 Sided Original Hole punched Paper Indicates the direction to feed paper Envelope print side up flap down and closed Heavy weight paper is equal to or greater than 117 g m2 Toner Waste Container Xe...

Страница 16: ...eight Start Button Stop Button Pause Printing Button Log In Out Button Help Button Services Home Button Services Button Job Status Button Printer Status Button Language Button Power Saver Button 16 Xe...

Страница 17: ...I IP PT TI IO ON N Sleep Mode Clear All Button Dial Pause Button This item can be recycled Xerox PrimeLink B9100 B9110 B9125 B9136 Copier Printer User Guide 17 Product Symbols for Xerox PrimeLink B910...

Страница 18: ...18 Xerox PrimeLink B9100 B9110 B9125 B9136 Copier Printer User Guide Product Symbols for Xerox PrimeLink B9100 B9110 B9125 B9136 Copier Printer...

Страница 19: ...19 Safety This chapter contains Notices and Safety 20 Electrical Safety 21 Operational Safety 23 Laser Safety 25 Battery Safety 26 Telephone Line Cord Safety 27 Maintenance Safety 28 Consumable Infor...

Страница 20: ...evaluation and certification and compliance with electromagnetic regulations and established environmental standards The safety and environment testing and performance of this product have been verif...

Страница 21: ...into the printer The printer is exposed to water The printer emits smoke or the surface is unusually hot The printer emits unusual noise or odors The printer causes a circuit breaker fuse or other sa...

Страница 22: ...n Do not place the printer in an area where people can step on the power cord Do not place objects on the power cord Do not plug or unplug the power cord while the power switch is in the On position I...

Страница 23: ...zard do not push or move the device with all of the paper trays extended Do not place containers of coffee or other liquid on the Production Press OZONE INFORMATION This printer produces ozone during...

Страница 24: ...kage or container Keep all consumables away from the reach of children Never throw toner toner cartridges drum cartridges or waste cartridges into an open flame W Wa ar rn niin ng g When handling cart...

Страница 25: ...s laser warning labels These labels are intended for use by the Xerox Service Representative and are placed on or near panels or shields that require special tools for removal Do not remove any of the...

Страница 26: ...ive to correct the problem W Wa ar rn niin ng g If the battery on a circuit board is installed incorrectly there is a risk of explosion The lithium battery in the printer contains Perchlorate Material...

Страница 27: ...Cord Safety W Wa ar rn niin ng g To reduce the risk of fire use only No 26 American Wire Gauge AWG or larger telecommunication line cord Xerox PrimeLink B9100 B9110 B9125 B9136 Copier Printer User Gu...

Страница 28: ...t cloth to wipe off spilled dry ink or toner Sweep slowly to minimize generation of dust during clean up Avoid using a vacuum If a vacuum must be used the unit should be designed for combustible dusts...

Страница 29: ...ich can increase the risk of skin or eye contact Store all consumables in accordance with the instructions given on the package or container Keep all consumables away from the reach of children Never...

Страница 30: ...lies contact United States and Canada 1 800 ASK XEROX 1 800 275 9376 Europe EHS Europe xerox com For product safety information in the United States and Canada go to www xerox com environment For prod...

Страница 31: ...Xerox PrimeLink B9100 B9110 B9125 B9136 Copier Printer User Guide 31 Getting Started This chapter contains Parts of the Printer 32 Accessories 36 Power Options 43 More Information 45...

Страница 32: ...Control Panel 7 Optional Production Ready Finisher 8 Front cover 9 Left cover for toner 10 Trays 1 4 11 Waste cartridge cover 12 Front cover on optional HCF 13 Lower left cover 14 Interface Decurler M...

Страница 33: ...Document feeder tray 6 Document output tray 7 Document stopper 8 Main power switch 9 Waste toner container cover 10 Waste toner container 11 Fusing unit 12 Handle 13 Transfer module 14 Toner cartridge...

Страница 34: ...anel and touch screen where you can select options view printer information and do selected tasks N NU UM MB BE ER R C CO OM MP PO ON NE EN NT T F FU UN NC CT TI IO ON N 1 Touch screen Displays messag...

Страница 35: ...such as scanning a document 12 Stop Press this button to pause the current job or communication 13 Clear All Press this button to return all selections to the default values The printer returns to th...

Страница 36: ...ds 2000 sheets from 16 lb Bond to 80 lb Cover or 52 216 g m2 The High Capacity Feeder HCF has four fixed Long Edge Feed LEF positions which are marked on the tray B5 10 5 in 11 in A4 The High Capacity...

Страница 37: ...ies are compatible with your printer Interface Module The Interface Decurler Module provides the following functions Communication between the press and the attached finishing device An aligned paper...

Страница 38: ...inating the labor intensive steps of manual punching The compact AdvancedPunch Pro requires minimal space and accepts various optional multiple hole punch die sets The GBC AdvancedPunch Pro can be con...

Страница 39: ...output to a stacker tray and cart The stacker provides a top tray that is convenient for short stack runs Note The High Capacity Stacker requires the Interface Decurler Module Crease and Two Sided Tri...

Страница 40: ...lder is available only with the Production Ready PR Finisher Production Ready Finisher Plus and the Production Ready Booklet Maker Finisher Production Ready Finishers Three Production Ready PR Finishe...

Страница 41: ...e Production Ready PR Finisher Plus includes the same features and functions as the PR Finisher In addition the PR Finisher Plus serves as an interface to transfer paper between the press and any thir...

Страница 42: ...The SquareFold Trimmer module is available only with the Production Ready Booklet Maker Finisher 42 Xerox PrimeLink B9100 B9110 B9125 B9136 Copier Printer User Guide Getting Started...

Страница 43: ...ower off the device ensure that all job processing copying and printing is completed Ensure that the Data indicator is not illuminated 1 Press the power switch on top of the printer The printer powers...

Страница 44: ...the Sleep mode is set to 20 minutes the Sleep mode activates 5 minutes after the Low Power mode begins To set the time periods for Low Power mode and Sleep mode from the control panel log in as the s...

Страница 45: ...bedded Web Server click S Su up pp po or rt t then on the Online Support screen click C Co on nn ne ec ct t Order supplies for your printer Go to www xerox com office PLB91XXsupplies then select your...

Страница 46: ...46 Xerox PrimeLink B9100 B9110 B9125 B9136 Copier Printer User Guide Getting Started...

Страница 47: ...Xerox PrimeLink B9100 B9110 B9125 B9136 Copier Printer User Guide 47 Printing This chapter contains Network Printing 48 Network Printing on Tabs 50...

Страница 48: ...ns s tab then select the appropriate settings for Page Layout Special Pages Watermark and Orientation 9 Click the A Ad dv va an nc ce ed d tab then select the appropriate settings for Advanced Settin...

Страница 49: ...fferent in PostScript and PCL print drivers 10 To save and close the Properties window click O OK K 11 Select the needed copies then click P Pr riin nt t Note For additional information in the print d...

Страница 50: ...in Sequence field In the Tab Margin Shift field select a margin measurement 9 To save and close the Pre Cut Tab window click O OK K 10 If Tray 3 or Tray 4 is used for the tab stock select P Pr riin n...

Страница 51: ...hapter contains Copying Using the Duplex Automatic Document Feeder 52 Copying Using the Document Glass 54 Selecting Copy Options for a DFA Finishing Device 55 Copying on Tab Stock 56 Using the Copy Op...

Страница 52: ...illuminates 3 Press the S Se er rv viic ce es s H Ho om me e button 4 On the Services Home screen select C Co op py y 5 From the Copy screen select the needed features or options Reduce Enlarge Paper...

Страница 53: ...7 Press the S St ta ar rt t button Xerox PrimeLink B9100 B9110 B9125 B9136 Copier Printer User Guide 53 Copying...

Страница 54: ...op py y 5 From the Copy screen select the required options Reduce Enlarge Paper Supply 2 Sided Copying Copy Output Image Shift Original Type Darken Lighten The features that appear on the main Copy s...

Страница 55: ...document feeder or on the document glass 2 Press the S Se er rv viic ce es s H Ho om me e button 3 On the Services Home screen touch C Co op py y 4 Touch C Co op py y O Ou ut tp pu ut t then touch O O...

Страница 56: ...5 x x 1 11 1 iin n 4 Touch S Sa av ve e then touch C Co on nf fiir rm m until you return to the Copy screen 5 On the Copy screen touch the O Ou ut tp pu ut t F Fo or rm ma at t tab 6 Touch F Fa ac ce...

Страница 57: ...the text box PAPER SUPPLY You can select a paper tray that does not appear in the Paper Supply area of the Copy screen 1 On the Services Home screen touch C Co op py y 2 For the Paper Supply feature...

Страница 58: ...right up or down arrows 4 Touch O Or riig giin na all O Or riie en nt ta at tiio on n Select U Up pr riig gh ht t I Im ma ag ge es s or S Siid de ew wa ay ys s I Im ma ag ge es s To save the image or...

Страница 59: ...ption for text that requires enhancement such as handwritten pencil text T Te ex xt t o on n S Se ee e T Th hr ro ou ug gh h P Pa ap pe er r Select this option to reduce blurs on tracing paper documen...

Страница 60: ...n feature is not functional 1 From the Copy screen touch the I Im ma ag ge e Q Qu ua alliit ty y option 2 Touch B Ba ac ck kg gr ro ou un nd d S Su up pp pr re es ss siio on n 3 For no background supp...

Страница 61: ...a as se e This option erases the shadow from the center section of the document You can set the binding edge erase width in the range 0 50 mm 0 1 96 in in 1 mm 0 039 in increments 5 Touch S Sa av ve e...

Страница 62: ...e e E Er ra as se e 3 To erase all the edges by the same amount a Touch A Allll E Ed dg ge es s b Touch the Plus or Minus icons 4 To specify different amounts for the edges a Touch I In nd diiv viid d...

Страница 63: ...giin na all O Or riie en nt ta at tiio on n Touch U Up pr riig gh ht t I Im ma ag ge es s or S Siid de ew wa ay ys s I Im ma ag ge es s Touch S Sa av ve e If the Preset values are not saved select S...

Страница 64: ...ation to indicate the top of the document 1 At the control panel on the Services Home screen touch C Co op py y then touch the L La ay yo ou ut t A Ad dj ju us st tm me en nt t tab 2 Touch O Or riig g...

Страница 65: ...et Maker Finisher is installed touch F Fo olld d S St ta ap plle e then select an option F Fo olld d O On nlly y C Cr re ea as se e O On nlly y F Fo olld d S St ta ap plle e 5 To add margins in the ce...

Страница 66: ...ys with heavier stock color or pre printed paper The covers can be blank or printed The paper used for the covers must be the same size as the paper used for the rest of the document 1 On the S Se er...

Страница 67: ...a ay yo ou ut t R Re ep pe ea at t I Im ma ag ge e 4 Select the required Repeat Image option a For the number of times to repeat the same image on a page touch 2 2 T Tiim me es s 4 4 T Tiim me es s or...

Страница 68: ...ur changes touch S Sa av ve e Tip Access the Scan Options screen Confirm that the Original Orientation setting and the orientation of the document are the same FOLDING If the Xerox device is equipped...

Страница 69: ...lus or Minus icons c To select the pages on which the page number appears touch A Ap pp plly y T To o then touch A Allll P Pa ag ge es s or A Allll P Pa ag ge es s E Ex xc ce ep pt t F Fiir rs st t To...

Страница 70: ...or re ed d W Wa at te er rm ma ar rk ks s then touch O On n From the list select a stored watermark then touch S Sa av ve e 5 To print the current date and time on the copies touch D Da at te e T Tii...

Страница 71: ...x 297 mm and 8 5 x 11 in tabbed paper 1 At the control panel on the Services Home screen touch C Co op py y then touch the O Ou ut tp pu ut t F Fo or rm ma at t tab 2 Touch T Ta ab b M Ma ar rg giin...

Страница 72: ...ARD COPY The identification card copying feature allows you to copy both sides of a small original document such as an identification card onto the same side of a page 1 Open the Automatic document fe...

Страница 73: ...rt button 3 Program and scan the additional segments a Place the original documents in the automatic document feeder or on the document glass then touch N Ne ex xt t O Or riig giin na all b When print...

Страница 74: ...required settings then touch S Sa av ve e 1 1 S Siid de ed d S Siid de e 2 2 O On nlly y The first page of the loaded document copies on the back side of a separator Select the required settings then...

Страница 75: ...cuments on the document glass 5 Press the green S St ta ar rt t button on the control panel Copying begins 6 Scan additional sets a Use the automatic document feeder or the document glass to copy the...

Страница 76: ...ter the Q Qu ua an nt tiit ty y then press the green S St ta ar rt t button STORED PROGRAMMING You can save frequently used features and job settings as Stored Programming then access the settings usi...

Страница 77: ...s stored if you change the password to the folder that is used in the stored program the stored program becomes invalid The following options cannot be used with the Stored Programming feature System...

Страница 78: ...78 Xerox PrimeLink B9100 B9110 B9125 B9136 Copier Printer User Guide Copying...

Страница 79: ...Settings 83 Network Scanning 94 Scan to PC 95 Store to Folder 97 Store to USB 99 Web Services on Devices WSD 101 Email 102 Send from Folder 105 Job Flow 122 Features for the Scanning device are expla...

Страница 80: ...de er r S St to or re e t to o W WS SD D Note For details on these scan features refer to Scan Methods 4 Press the S St ta ar rt t button LOADING DOCUMENTS There are two methods to load documents Docu...

Страница 81: ...cument then saves the scanned data to a USB memory device Store to USB is an optional feature Refer to Store to USB S St to or re e t to o W We eb b S Se er rv viic ce es s o on n D De ev viic ce es s...

Страница 82: ...ttings 1 At the control panel touch N Ne ex xt t O Or riig giin na all 2 Touch C Ch ha an ng ge e S Se et tt tiin ng gs s 3 Select the appropriate section then adjust the settings as needed You can ad...

Страница 83: ...es Home screen the name of this tab is Network Scanning Options on this tab include Color Scanning 2 Sided Scanning Original Type Scan Presets A Ad dv va an nc ce ed d S Se et tt tiin ng gs s Options...

Страница 84: ...ions as needed C Co ollo or r S Sc ca an nn niin ng g 2 2 S Siid de ed d S Sc ca an nn niin ng g O Or riig giin na all T Ty yp pe e S Sc ca an n P Pr re es se et ts s Preview Scanned Images of a Job T...

Страница 85: ...1 sided or 2 sided document 1 At the control panel on the main tab for the selected scan method touch 2 2 S Siid de ed d S Sc ca an nn niin ng g 2 From the list select an option 1 1 S Siid de ed d To...

Страница 86: ...ig gh h Q Qu ua alliit ty y P Pr riin nt tiin ng g This setting is best used for documents that contain detailed graphics and photos This setting results in large file sizes and maximum image quality...

Страница 87: ...n and Contrast set options as needed For Background Suppression select an option O Of ff f Scans the document backgrounds with no filtering A Au ut to o S Su up pp pr re es ss siio on n When Color Sca...

Страница 88: ...t to Full Color 3 Select S Sa av ve e Note When Enhance Photographs is selected the Shadow Suppression and Background Suppression features are not available Shadow Suppression You can use the Shadow S...

Страница 89: ...enter the document size Edge Erase When you scan using the document feeder in the open position or from a book you can remove the black shadows along the edges using the Edge Erase feature 1 From the...

Страница 90: ...ned document 1 From the Layout Adjustments tab select R Re ed du uc ce e E En nlla ar rg ge e 2 Select the appropriate options for your job a Proportional is the default setting In the Variable area t...

Страница 91: ...ts X XP PS S S Siig gn na at tu ur re e When you select XPS you can select XPS Signature A digital signature is a feature that allows a sender to add a digital fingerprint that is used to confirm that...

Страница 92: ...O Ov ve er rw wr riit te e E Ex xiis st tiin ng g F Fiille e This option deletes the existing file with the duplicate file name then saves the new file with the specified file name in the same directo...

Страница 93: ...to load in the background This action can increase the overall file size The Optimize for Quick Web View feature restructures an Adobe PDF document for page at a time downloading from web servers With...

Страница 94: ...CAN JOB 1 Load the original document into the document feeder 2 At the control panel press the S Se er rv viic ce es s H Ho om me e button 3 Touch N Ne et tw wo or rk k S Sc ca an nn niin ng g 4 From...

Страница 95: ...ct a forwarding protocol F FT TP P This option transfers files using the FTP protocol S SM MB B This option transfers files using the SMB protocol S SM MB B U UN NC C F Fo or rm ma at t This option tr...

Страница 96: ...selected destination folder to the server address book touch A Ad dd d t to o A Ad dd dr re es ss s B Bo oo ok k 3 Touch S Sa av ve e The information for the selected destination populates the fields...

Страница 97: ...an n tab 4 In the Scan navigation pane at the left of the page click F Fo olld de er r 5 In the Folder list select a folder If necessary enter the folder password then click A Ap pp plly y The Folder...

Страница 98: ...ext PDF or XPS file For Searchable Text select E En na ab blle ed d From the Language of the Original menu select the language To apply text compression from the Text Compression menu select E En na a...

Страница 99: ...e screen that indicates that data is being transferred is not displayed If you remove the USB memory device while the data is being stored the data in the device can become damaged You can also confir...

Страница 100: ...nel on the Services Home screen touch S St to or re e t to o U US SB B 2 Touch D De et ta aiills s The folder and file names to be saved appear 3 Touch C Cllo os se e 100 Xerox PrimeLink B9100 B9110 B...

Страница 101: ...ructions using the application you choose 3 After you scan the document the scanned data transmits to the specified computer STORING TO WSD 1 At the control panel press the S Se er rv viic ce es s H H...

Страница 102: ...tab then set and save the advanced settings Refer to Advanced Settings Tab Select the L La ay yo ou ut t A Ad dj ju us st tm me en nt t tab then set and save the layout adjustments Refer to Layout Adj...

Страница 103: ...CT The email subject can contain up to 128 characters 1 On the Email tab touch S Su ub bj je ec ct t 2 In the text box type the email subject 3 Touch S Sa av ve e MESSAGE CONTENTS The email message ca...

Страница 104: ...ssword protected PDFs The number of files that you can attach to an email depends on the file size limit allowed on the server 2 For the email recipient enter the email address of the Xerox printer No...

Страница 105: ...a Folder The following describes how to select a folder on the Copy Print Jobs tab Access to some folders can be restricted depending on authentication settings 1 At the control panel press the S Se e...

Страница 106: ...d d f fr ro om m F Fo olld de er r 3 Select the C Co op py y P Pr riin nt t J Jo ob bs s tab From the list select a folder 4 Select a file then touch D De elle et te e 5 To confirm the deletion touch...

Страница 107: ...the destination folder for the file then touch S Sa av ve e Editing Files 1 At the control panel press the S Se er rv viic ce es s H Ho om me e button 2 Touch S Se en nd d f fr ro om m F Fo olld de er...

Страница 108: ...lder that contains the file to be inserted 4 Select a file then touch I In ns se er rt t F Fiille e 5 Select the file that you want to insert then touch S Sa av ve e Add to Delete List 1 At the contro...

Страница 109: ...Select the C Co op py y P Pr riin nt t J Jo ob bs s tab then select a folder 4 Select a file 5 Touch R Re ev viie ew w The file settings appear Merge 1 At the control panel press the S Se er rv viic...

Страница 110: ...C Co op py y P Pr riin nt t J Jo ob bs s tab From the list select a folder 4 Select a file then touch C Ch ha an ng ge e S Se et tt tiin ng gs s P Pr riin nt t 5 Touch C Co ov ve er rs s 6 Select L L...

Страница 111: ...s option Touch A Ad dd d then touch S Sa av ve e W Wa at te er rm ma ar rk k E Ef ff fe ec ct t To print a watermark on the output select this option Select E Em mb bo os ss se ed d or O Ou ut tlliin...

Страница 112: ...riin nt t 5 Touch A An nn no ot ta at tiio on ns s 6 Touch L La as st t S Sa av ve ed d S Se et tt tiin ng gs s or C Ch ha an ng ge e S Se et tt tiin ng gs s 7 If you selected Change Settings select a...

Страница 113: ...select C Ch ha an ng ge e S Se et tt tiin ng gs s P Pr riin nt t 5 Select any option then use the numeric keypad to specify the needed number of prints 6 Select one of the following options S Sa av ve...

Страница 114: ...ancels the front cover settings for the source files and reprograms the front cover settings for the newly merged file B Ba ac ck k C Co ov ve er r This option cancels the back cover settings for the...

Страница 115: ...h he ee et t D Do ou ub blle e G Ga at te e F Fo olld d D Do ou ub blle e P Pa ar ra alllle ell F Fo olld d 3 3F Fo olld d A Ac cc co or rd diio on n F Fo olld d 4 4F Fo olld d A Ac cc co or rd diio o...

Страница 116: ...select a folder 4 Select a file then touch C Ch ha an ng ge e S Se et tt tiin ng gs s P Pr riin nt t 5 Touch I Im ma ag ge e S Sh hiif ft t 6 Select one of the following options L La as st t S Sa av v...

Страница 117: ...g ge e S Se et tt tiin ng gs s P Pr riin nt t 5 Touch A An nn no ot ta at tiio on ns s 6 Touch L La as st t S Sa av ve ed d S Se et tt tiin ng gs s or C Ch ha an ng ge e S Se et tt tiin ng gs s 7 If y...

Страница 118: ...ess the S Se er rv viic ce es s H Ho om me e button 2 Touch S Se en nd d f fr ro om m F Fo olld de er r 3 Select the C Co op py y P Pr riin nt t J Jo ob bs s tab then select a folder 4 Select a file t...

Страница 119: ...t all files select S Se elle ec ct t A Allll 6 Select options as needed R Re ef fr re es sh h Refreshes the list of folders R Re ev viie ew w Displays the settings of the selected file D De elle et te...

Страница 120: ...g to the target One type of job flow sheet targets files stored in folders and the other type of job flow targets scan files This section describes the first type of job flow sheet targeting files sto...

Страница 121: ...n ng gs s 5 Touch C Cr re ea at te e C Ch ha an ng ge e L Liin nk k 6 Select a job flow sheet to link to the folder 7 Touch S Sa av ve e Job Flow Restrictions A job flow sheet can be used by only one...

Страница 122: ...email Specifying multiple destinations and batch processing Printing The document processing types that you can register in a job flow sheet depend on how the documents are stored in a private folder...

Страница 123: ...type the keyword then touch S Sa av ve e Touch S Se elle ec ct t K Ke ey yw wo or rd d From the list select a keyword Touch C Cllo os se e then touch S Sa av ve e Note The administrator defines the ke...

Страница 124: ...s include P PD DF F S Se ec cu ur riit ty y P PD DF F S Siig gn na at tu ur re e and O Op pt tiim miiz za at tiio on n F Fo or r Q Qu uiic ck k W We eb b V Viie ew w P PD DF F A A X XP PS S Options in...

Страница 125: ...tification Editing or Deleting Settings for a Job Flow Sheet 1 At the control panel press the M Ma ac ch hiin ne e S St ta at tu us s button 2 On the Tools tab touch S Se et tu up p S Se et tu up p C...

Страница 126: ...S Sh he ee et t 3 On the Create New Job Flow Sheet screen select the job flow sheet that you want to delete 4 Touch E Ed diit t D De elle et te e 5 On the Details screen touch D De elle et te e At th...

Страница 127: ...on 2 On the Tools tab touch S Se et tu up p S Se et tu up p C Cr re ea at te e J Jo ob b F Fllo ow w S Sh he ee et t 3 Touch S Sh he ee et t F Fiillt te er riin ng g 4 On the Sheet Filtering screen se...

Страница 128: ...ted from the folder after they are printed or retrieved or after they are transferred and printed through a job flow sheet D De elle et te e E Ex xp piir re ed d F Fiille es s This option specifies if...

Страница 129: ...nk k 6 To confirm the link cut at the prompt touch Y Ye es s The link between the folder and the job flow sheet is removed 7 Touch C Cllo os se e Deleting a Folder Note When deleting a folder all file...

Страница 130: ...job flow sheet from the folder touch C Cu ut t L Liin nk k To link a different job flow sheet to the folder touch C Cr re ea at te e C Ch ha an ng ge e L Liin nk k select a job flow sheet or create a...

Страница 131: ...Guide 131 Faxing This chapter contains Fax Overview 132 Loading Documents 133 Sending a Fax 134 Sending an Internet Fax 135 Faxing from Your Computer 136 Receiving Faxes 137 Selecting Fax Settings 13...

Страница 132: ...t directly to a fax machine I In nt te er rn ne et t F Fa ax x A document is scanned at the multi function printer and emailed to a recipient F Fa ax xiin ng g f fr ro om m y yo ou ur r C Co om mp pu...

Страница 133: ...t remove any paper clips and staples 2 Load the document using the appropriate method Document feeder Load the document face up then adjust the document guides to match the size of the document that y...

Страница 134: ...performed when viewing the list of individual addresses in the Address Book For details refer to Using Chain Dial 6 To include a cover page a Touch C Co ov ve er r P Pa ag ge e then touch P Pr riin nt...

Страница 135: ...touch screen touch S Se er rv viic ce es s H Ho om me e then touch I In nt te er rn ne et t F Fa ax x 3 Touch N Ne ew w R Re ec ciip piie en nt t 4 To enter the recipient email address do one of the f...

Страница 136: ...printer features Windows Click the P Pa ap pe er r O Ou ut tp pu ut t tab Macintosh Click C Co op piie es s a an nd d P Pa ag ge es s then click X Xe er ro ox x F Fe ea at tu ur re es s 5 Click the J...

Страница 137: ...sing the Embedded Fax and Internet Fax For system configuration contact your system administrator For more information refer to the Xerox PrimeLink B9100 B9110 B9125 B9136 Copier Printer System Admini...

Страница 138: ...i S Su up pe er r F Fiin ne e 6 60 00 0 d dp pii Note For Server Fax touch S St ta an nd da ar rd d or F Fiin ne e ADJUSTING LAYOUT Layout settings allow you to adjust the original size set page scann...

Страница 139: ...y a variable percentage 4 Touch S Sa av ve e Lighten Darken 1 Touch F Fa ax x on the touch screen 2 Touch the Layout Adjustment tab then touch L Liig gh ht te en n D Da ar rk ke en n 3 Adjust the sett...

Страница 140: ...UE ES S Remote Polling Off poll a Remote Device retrieve files stored on a remote fax machine by using the Remote Folder feature Store for Polling Off Store for Free Polling and Store for Secure Polli...

Страница 141: ...s server must support the MDN standard Internet Fax Profile TIFF S use for A4 210 x 297mm 8 5 x 11 in originals with Standard or Fine Resolution TIFF F or TIFF J use for A3 297x420mm 11 x 17 in origin...

Страница 142: ...ete the address book entry DELETING AN INDIVIDUAL ADDRESS 1 On the control panel press the M Ma ac ch hiin ne e S St ta at tu us s button 2 On the touch screen touch the T To oo olls s tab 3 Touch S S...

Страница 143: ...ent telephone number by adding two or more fax numbers together into a single number For example an area code or extension number could be stored separately from the rest of the telephone number Acces...

Страница 144: ...ch S Se et tu up p then touch A Ad dd d F Fa ax x C Co om mm me en nt t 4 On the next screen touch an available comment in the scroll list 5 On the touch screen keyboard enter up to an 18 character co...

Страница 145: ...is chapter contains Stored Programming Overview 146 Storing a Program 147 Storing a Program for Build Job 148 Naming or Renaming a Stored Program 149 Notes and Restrictions on Registering Stored Progr...

Страница 146: ...lt values or paper tray settings in the system If buttons are added or removed from the touch screen since stored programming only remembers the location of a button on the screen It does not remember...

Страница 147: ...he next screen touch the up and down arrows A tone is generated while registering the program to job memory To change the tone volume refer to Setting the Audio Tones for Stored Programming Registrati...

Страница 148: ...m Administrator Guide When storing a program for Tray 5 to ensure that the program does not become corrupted store both the paper size and the paper type If the program becomes corrupted you cannot se...

Страница 149: ...ro og gr ra am mm miin ng g 3 Touch E En nt te er r C Ch ha an ng ge e N Na am me e 4 Select the stored program that you want to rename Note To return to the previous screen or to advance to the next...

Страница 150: ...s If the selection is made from a list of the Address Book or Job Flow Sheet If any optional components installed on the printer such as a finisher are changed and the associated buttons are no longe...

Страница 151: ...iie en nt t s s or F Fr ro om m The P Po ow we er r S Sa av ve er r button A stored program registration is canceled in the following cases When the I In nt te er rr ru up pt t button is pressed When...

Страница 152: ...nal document into the document feeder or onto the document glass 2 Press the S Se er rv viic ce es s H Ho om me e button then touch C Co op py y 3 Set the feature options as needed After changing sett...

Страница 153: ...or re ed d P Pr ro og gr ra am mm miin ng g 3 Touch D De elle et te e 4 Select the stored program that you want to delete 5 To confirm the deletion touch D De elle et te e 6 Touch C Cllo os se e Note...

Страница 154: ...siig gn n C Ch ha an ng ge e I Ic co on n 4 Select the stored program for which you want to add or change the icon Note To return to the previous screen or to advance to the next screen touch the up a...

Страница 155: ...Media Print Text This chapter contains Media Print Text Overview 156 Supported File Formats 157 Notes and Restrictions 158 Selecting Media Files from a USB Memory Device 159 Configuring the Device to...

Страница 156: ...stored in text format The feature includes index printing that prints a list of files retrieved in the mode Ensure that you back up data onto media Data stored on media can be lost or damaged for the...

Страница 157: ...tains more than 900 files the printer recognizes the first 900 files which includes all files inside and outside of folders PDF files that are saved on a Mac OS do not appear onscreen and you cannot p...

Страница 158: ...ers Do not connect multiple USB memory devices to the printer simultaneously The printer does not support some types of USB memory devices such as those with an encryption function or with multiple pa...

Страница 159: ...ex numbers assigned automatically The Index Print option is enabled when certain paper supplies are selected Note If Paper Supply is set to Auto Select you cannot activate the Index Print option 5 Sel...

Страница 160: ...O Ot th he er rs s P Pr riin nt t M Mo od de e P PD DF F P Pa as ss sw wo or rd d The Print Mode option is set to Online by default 3 Type a password then touch S Sa av ve e If prompted to confirm ty...

Страница 161: ...mm 5 8 x 8 3 in SEF When you select Auto a paper tray that matches the size of the document is selected automatically and the document is printed at the original document size When the tray that you w...

Страница 162: ...ximum of five lines and 240 characters The dates that you stored the documents on the USB memory device The total file quantity You can select maximum of 32 files If more than 32 files are selected th...

Страница 163: ...Xerox PrimeLink B9100 B9110 B9125 B9136 Copier Printer User Guide 163 Job and Machine Status This chapter contains Job Status 164 Machine Status 168...

Страница 164: ...Cu um mu ulla at tiiv ve e T Tiim me e This column shows the estimated time required to complete the entire job P Pr ro og gr re es ss s This column shows the number of pages completed and the total...

Страница 165: ...r your print job Before the job is released for printing the printer prompts you to type the passcode 1 At the control panel press the J Jo ob b S St ta at tu us s button 2 Touch the S Se ec cu ur re...

Страница 166: ...the user ID 5 Touch J Jo ob b L Liis st t 6 Select the job to print You can select up to 100 jobs Jobs are printed in the order in which they are selected To select all jobs for the selected user ID t...

Страница 167: ...tored for each billing user ID 1 At the control panel press the J Jo ob b S St ta at tu us s 2 Select the S Se ec cu ur re e P Pr riin nt t J Jo ob bs s M Mo or re e tab Touch C Ch ha ar rg ge e P Pr...

Страница 168: ...r r T Tr ra ay y S St ta at tu us s button to view the current status information for each paper tray D De ev viic ce e C Co on nf fiig gu ur ra at tiio on n You can select the D De ev viic ce e C Co...

Страница 169: ...om Settings P Pr ro og gr ra am mm miin ng g You can type an item number using the numeric keypad or you can select the current value S St to or re e D De elle et te e P Pr ro og gr ra am mm miin ng g...

Страница 170: ...printer Black Large Impressions The total number of large monochrome prints and copies made on the printer The U Us sa ag ge e C Co ou un nt te er rs s button Usage Counters To view usage counters on...

Страница 171: ...button appears on the Billing Information screen When you select the User Account Billing Information button the following information appears The billing information of the currently logged in user i...

Страница 172: ...y P Pa ap pe er r T Tr ra ay y A At tt tr riib bu ut te es s The Paper Tray Attributes feature allows you to change the attributes of a paper tray including size type and weight Note The Paper Tray At...

Страница 173: ...nk B9100 B9110 B9125 B9136 Copier Printer User Guide 173 Paper and Media This chapter contains Supported Media 174 Guidelines for Loading Printing and Storing Media 178 Loading Media 180 Printing on E...

Страница 174: ...o use Note Media weight for the paper type that appears on the user interface is limited The administrator can set up an additional 40 custom paper types The Oversize High Capacity Feeder OHCF provide...

Страница 175: ...ard 106 216 g m Trays 3 and 4 All items for Trays 1 and 2 Tab Stock 106 216 g m Note For paper types and weights for Tray 5 Bypass refer to Tray 5 Bypass Specifications For paper types and weights for...

Страница 176: ...only Letter 216 x 279 mm 8 5 x 11 in US Folio 215 9 x 330 2 mm 8 5 x 13 in Legal 216 x 356 mm 8 5 x 14 in Ledger 279 4 x 431 8 mm 11 x 17 in Special A4 226 x 310 mm 8 9 x 12 2 in DT Special A3 310 x 4...

Страница 177: ...in B5 182 x 257 mm 7 26 x 10 12 in Executive 184 2 x 266 7 mm 7 25 x 10 5 in Trays 1 and 2 can accommodate media loaded only in the Long Edge Feed LEF orientation T Tr ra ay ys s 3 3 a an nd d 4 4 Tr...

Страница 178: ...e labels to curl and jam in the printer Use labels designed for laser printing Do not use vinyl labels Do not use dry gum labels Print only on one side of the sheet of labels Do not use any sheet wher...

Страница 179: ...susceptible to damage from ultraviolet and visible light Ultraviolet light emitted by the sun and fluorescent bulbs is damaging to paper Reduce the exposure of paper to strong lights or to visible li...

Страница 180: ...he paper tray touch C Ch ha an ng ge e S Se et tt tiin ng gs s then correct the information If you have not made any changes proceed to the next step a For Paper Type Paper Weight Paper Size and Paper...

Страница 181: ...to the paper tray touch C Ch ha an ng ge e S Se et tt tiin ng gs s then correct the information If you did not make any changes proceed to the next step a For Paper Type Paper Weight Paper Size and Pa...

Страница 182: ...av ve e on each screen until you return to the tray settings window 8 Touch C Co on nf fiir rm m LOADING HOLE PUNCH PAPER IN TRAYS 1 2 3 AND 4 1 Select the appropriate paper for your print job 2 Pull...

Страница 183: ...r rm m LOADING MEDIA IN OPTIONAL FEEDING DEVICES For information and instructions on loading media in the optional feeding devices refer to the appropriate chapter LOADING POST PROCESS MEDIA IN OPTION...

Страница 184: ...ome cases the composition and construction of the envelope can limit one or both of the following Based on the envelope construction the positioning of any printed content on the envelope Based on the...

Страница 185: ...s that you select are compatible with laser printing C Ca au ut tiio on n Printing on envelopes with windows that cannot withstand the high temperature of the fuser results in damage to the fuser Peel...

Страница 186: ...ayers of media in multiple locations The illustration below shows two different envelope designs The blue circles indicate the locations where four layers of media overlap In most cases the printer is...

Страница 187: ...d and create a new document 2 To change the paper size to match your envelope click L La ay yo ou ut t S Siiz ze e then select the size of the envelope to be used To specify a custom size select M Mo...

Страница 188: ...s section on the ribbon click S Sh ha ap pe e O Ou ut tlliin ne e N No o O Ou ut tlliin ne e The test file setup is complete 7 To evaluate the results print a few samples of the test file onto the en...

Страница 189: ...gned This misalignment causes creasing at the edges of the envelope as shown in the image below If you do not print near the edges of the envelope you can avoid the toner related issues shown below Ho...

Страница 190: ...pecific envelope style In some cases to optimize image transfer along the edge of the envelope or where the envelope transitions from two layers to three layers of media requires that you adjust the p...

Страница 191: ...r the 2 Tray Oversize High Capacity Feeder that can provide support for higher stacks of small media For more information regarding the setup of the Oversize High Capacity Feeder for use with envelope...

Страница 192: ...cting paper in the print driver To access the print driver menu for your device open the document you want to print then click F Fiille e P Pr riin nt t Select your device from the list of available p...

Страница 193: ...m dimensions for height and width To create a custom size in the print driver for Paper select O Ot th he er r S Siiz ze e F Fiit t t to o N Ne ew w P Pa ap pe er r S Siiz ze e N Ne ew w Specify the d...

Страница 194: ...es are loaded If required in the driver dialog specify the custom size that you selected on the device control panel touch screen When you specify the size in the driver dialog ensure that you use the...

Страница 195: ...Xerox PrimeLink B9100 B9110 B9125 B9136 Copier Printer User Guide 195 Paper and Media...

Страница 196: ...196 Xerox PrimeLink B9100 B9110 B9125 B9136 Copier Printer User Guide Paper and Media...

Страница 197: ...Xerox PrimeLink B9100 B9110 B9125 B9136 Copier Printer User Guide 197 Maintenance This chapter contains Cleaning the Printer 198 Replacing Consumable Supplies 203...

Страница 198: ...ning lens assembly To provide the best image quality possible on your printed or copy output clean the document cover and document glass regularly If the document cover and document glass are dirty sp...

Страница 199: ...ocument glass become soiled Smudges can appear on copies or scanned documents The printer cannot detect document sizes Clean the document cover and the document glass once a month with the cloth provi...

Страница 200: ...ng with a soft cloth moistened with a small amount of neutral detergent C Ca au ut tiio on n To avoid damaging the glass surface do not press heavily on the document glass 3 Gently close the document...

Страница 201: ...treaks use Xerox Glass Cleaner 5 Wipe the white underside of the document cover until it is clean and dry 6 Close the document cover CLEANING THE DOCUMENT FEEDER ROLLERS 1 Gently lift the latch of the...

Страница 202: ...ter on internal components can cause a printer malfunction If dirt is difficult to remove try gently wiping the rollers with a soft cloth moistened with a small amount of neutral detergent 3 Close the...

Страница 203: ...he control panel touch the S Su up pp plliie es s tab The status message for consumable printer supplies indicates Ready Order New Replace Now or other indications For the remaining amount of toner th...

Страница 204: ...the paper 3 Grasp the handle of the toner cartridge 4 Pull out the toner cartridge slowly while holding the bottom of the cartridge 5 Dispose of the used toner cartridge as normal office waste or recy...

Страница 205: ...t close completely ensure that the cartridge is locked and is installed in the appropriate orientation C Ca au ut tiio on n Never use a vacuum cleaner to remove spilled toner Sparks inside the vacuum...

Страница 206: ...stops after copying or printing approximately 18 000 sheets 1 Ensure that the printer has stopped copying or printing Open the front cover on the printer 2 Open the waste toner container cover then pu...

Страница 207: ...th the new waste toner container Close the bag then dispose of the container according to your local regulations 6 Remove the new waste toner container from the packaging 7 Do not grip the waste toner...

Страница 208: ...front cover If the front cover is open even slightly a message appears on the printer touch screen and the printer cannot operate 208 Xerox PrimeLink B9100 B9110 B9125 B9136 Copier Printer User Guide...

Страница 209: ...nter User Guide 209 Troubleshooting This chapter contains General Troubleshooting 210 Image Quality Troubleshooting 214 Copy Troubleshooting 222 Print Troubleshooting 226 Scan Troubleshooting 230 Pape...

Страница 210: ...h the specified maximum power consumption of the printer 2 8 3 1 KVA The display is dark Is power saver mode on The printer is in power saver mode To cancel power saver mode press the P Po ow we er r...

Страница 211: ...or close trays Did you open a cover or power off the printer during printing Power off the printer without closing or opening a paper tray Wait several seconds then press the power switch to the on po...

Страница 212: ...d in the tray Replace with paper that meets printer specifications Is the paper tray loaded past the maximum fill line Load paper in the paper tray so that it does not exceed the maximum fill line Is...

Страница 213: ...als of different sizes is Mixed Size Originals set to ON Set Mixed Size Originals to ON Is an A5 size document loaded horizontally on the document feeder when the Mixed Size Originals feature is in us...

Страница 214: ...film under the document then retry copying The copy has black lines Is the document glass on the feeder dirty Clean the document glass The copy is too dark Is the copy density set to Dark Adjust the c...

Страница 215: ...ent ratios can cause stripes Adjust the copy enlargement ratio Printing is faint smudged or unclear Is the paper damp Replace with paper from a new ream The drum cartridge is depleted or damaged Conta...

Страница 216: ...lled areas The paper in use is unsuitable Load suitable paper The drum cartridge is depleted or damaged Contact Xerox Technical Customer Support Printed toner smudges when rubbed with your finger Tone...

Страница 217: ...Contact Xerox Technical Customer Support White areas or stripes appear Is the paper damp Replace with paper from a new ream The paper in use is unsuitable Load suitable paper The printing on the enti...

Страница 218: ...N N Paper becomes wrinkled Text is blurred The paper in use is unsuitable Replace with paper from a new ream Paper is being added while it is being fed Is the paper damp 218 Xerox PrimeLink B9100 B911...

Страница 219: ...es Cause The document glass or the document cover is dirty Action Clean the document glass or the document cover If the problem is not solved go to the next Cause and Action Cause The document is made...

Страница 220: ...ed together or folded in Action It is possible that the folded in or pasted part of the document is not touching the document glass Place a stack of white sheets on the document to hold the document f...

Страница 221: ...he document is a non standard size Action Enter the document size then scan If the problem is not solved go to the next Cause and Action Cause The document is folded or bent Action Straighten and rese...

Страница 222: ...s with tags paper clips and cellophane tape cannot be used If the problem is not solved go to the next Cause and Action Cause The document guides are set incorrectly Action Set the document guides to...

Страница 223: ...quality or specify a background suppression color then retry copying If the problem is not solved go to the next Cause and Action Cause Glossy paper is being used Action Glossy paper easily sticks to...

Страница 224: ...ent glass Stripes appear in the copy If No go to the next symptom Yes Cause The document enlargement ratio is too large Action Stripes can appear at some enlargement ratios Adjust the copy enlargement...

Страница 225: ...t solved go to the next Cause and Action Cause The document is misaligned Action Load the document correctly If the problem is not solved go to the next Cause and Action Cause The document guides are...

Страница 226: ...etwork cable to the printer For information about network settings refer to Xerox PrimeLink B9100 B9110 B9125 B9136 Copier Printer System Administrator Guide If the problem is not solved go to the nex...

Страница 227: ...solved go to the next Cause and Action Cause There is insufficient space on the hard drive Action To increase the free space delete unnecessary data If the problem is not solved go to the next Cause a...

Страница 228: ...D S SY YM MP PT TO OM MS S Y YE ES S N NO O C CA AU US SE E A AN ND D A AC CT TI IO ON N Printing performed with a different paper size If No go to the next symptom Yes Cause The paper size provided i...

Страница 229: ...r print options do not take effect If No go to the next symptom Yes Cause A print driver for another model is in use Action Install the print driver for this printer model If the problem is not solved...

Страница 230: ...sparencies or thin documents In addition you cannot load documents with tags paper clips or cellophane tape If the problem is not solved go to the next Cause and Action Cause The document guides are i...

Страница 231: ...inter System Administrator Guide If the problem is not solved go to the next Cause and Action Cause The Salutation port is not enabled Action Enable the Salutation port For information about network s...

Страница 232: ...ON N Unable to forward scanned documents over the network Yes Cause Is the server information entered correctly in the printer Action Verify that you have entered the server information correctly in t...

Страница 233: ...d correctly in the printer PROBLEMS WITH SENDING EMAIL S SY YM MP PT TO OM MS S Y YE ES S N NO O C CA AU US SE E A AN ND D A AC CT TI IO ON N Unable to send email Yes Cause The email address is incorr...

Страница 234: ...tored to the memory of the printer is erased Do not touch components inside the printer This action can cause print defects After you clear a paper jam printing resumes automatically from the state be...

Страница 235: ...he jammed paper Note If paper is stuck in the document feeder to avoid damage to the document do not pull on the paper forcefully 5 If the paper jam is inside the left cover remove the jammed paper 6...

Страница 236: ...After you remove the jammed document follow the onscreen instructions to reload the document set into the document feeder Note Ensure that there is no torn wrinkled or folded paper in the document set...

Страница 237: ...he instructions to reload the entire document set into the document feeder Note Ensure that there are no torn wrinkled or folded documents in the document set To scan torn wrinkled or folded documents...

Страница 238: ...ray review where the paper jam occurred Torn paper that remains inside the printer can cause printer malfunction 2 Remove the jammed paper and any torn pieces 3 Push in the tray gently until it comes...

Страница 239: ...d paper and any paper that is loaded from the Bypass Tray Note If paper is torn check inside the printer and remove it 3 Open the tray cover then remove the jammed paper Xerox PrimeLink B9100 B9110 B9...

Страница 240: ...re that the bypass tray guides are against the edges of the envelopes Verify that the attributes of the paper tray are set correctly Some wrinkle is expected on the back of the fed envelope PAPER JAMS...

Страница 241: ...remove it 5 Return lever 4 4a a to the original position 6 Push in Tray 2 gently until it comes to a stop Transport Unit 4 is inserted simultaneously 7 Push in Tray 1 gently until it comes to a stop...

Страница 242: ...High Temperature and Caution Contact can lead to burns 1 Before you open the front cover ensure that the device has stopped printing 2 Rotate the green lever at the center of the transfer module to t...

Страница 243: ...remove it If you cannot remove the paper lift lever 2 2c c then try to remove the paper 5 Lift lever 2 2c c as necessary move lever 2 2d d then remove the jammed paper 6 Rotate knob 2 2f f as necessa...

Страница 244: ...d paper 8 Lower the handle under the center of the transfer module then remove the jammed paper 9 Insert the transfer module completely then rotate the green lever 2 2 to the left Note If the lever ca...

Страница 245: ...move the jammed paper Note If paper is torn check inside the printer then remove it 3 Close the lower left cover Note If the lower left cover is open a message appears on the user interface and the pr...

Страница 246: ...heck inside the printer then remove it 4 Close the bottom right door Note If the bottom right cover is open a message appears on the user interface and the printer cannot operate 5 Close the front doo...

Страница 247: ...ent glass is dirty Clean the document glass The text in the document is too faint Adjust the resolution Adjust the contrast There may be a problem with the telephone connection Check the telephone lin...

Страница 248: ...es available memory The received fax size is reduced The paper supply in the printer may not match the document size sent Confirm the original size of the documents Documents might be reduced based on...

Страница 249: ...pieces of paper To avoid possible print defects do not touch components inside the printer Gently remove the paper and take care not to tear it If paper is torn ensure that you remove all torn pieces...

Страница 250: ...250 Xerox PrimeLink B9100 B9110 B9125 B9136 Copier Printer User Guide Troubleshooting...

Страница 251: ...00 B9110 B9125 B9136 Copier Printer User Guide 251 Specifications This appendix contains Copy Specifications 252 Print Specifications 254 Scan Specifications 257 Duplex Automatic Document Feeder DADF...

Страница 252: ...idth for paper larger than A3 leading edge 28 0 mm 1 10 in trailing edge 28 0 mm 1 10 in left and right edges 16 5 mm 649 in First Copy Output Time Values can differ depending on the printer configura...

Страница 253: ...in 1 sided 136 ppm 2 sided 136 ppm A3 297 x 420 mm 11 x 17 in 1 sided 68 ppm 2 sided 68 ppm Continuous Copy Pages 9999 sheets The printer can pause temporarily to perform an image stabilization IEC IS...

Страница 254: ...ppm 2 sided 68 ppm When continuously printing a single document of A4 210 x 297 mm 8 5 x 11 in speed can be reduced during the following image quality adjustments When High Precision is specified for...

Страница 255: ...ws 8 1 32 bit Windows 8 1 64 bit Windows 7 32 bit Windows 7 64 bit Windows Server 2016 64 bit Windows Server 2012 R2 64 bit Windows Server 2012 64 bit Windows Server 2008 R2 64 bit Windows Server 2008...

Страница 256: ...bit Windows 7 64 bit Windows Server 2016 64 bit Windows Server 2012 R2 64 bit Windows Server 2012 64 bit Windows Server 2008 R2 64 bit Windows Server 2008 32 bit Windows Server 2008 64 bit macOS 10 12...

Страница 257: ...to Folder option for A4 documents the scan speed is 200 dpi Note 1 sided 135 ppm 2 sided 270 ppm Scan to Mailbox Scans the data to TIFF JPEG PDF DocuWorks or XPS XML Paper Specification then sends the...

Страница 258: ...x 8 3 in 216 x 356 mm short edge feed SEF 8 5 x 14 in SEF 297 x 432 mm SEF 11 x 17 in SEF Paper Capacity 250 sheets Note Maximum sheet capacity for each tray is based on 80 g m2 paper Document Feeding...

Страница 259: ...nk B9100 B9110 B9125 B9136 Copier Printer User Guide 259 Regulatory Information This appendix contains Basic Regulations 260 Safety Certification 265 Safety Data Sheets 266 Copy Regulations 267 Fax Re...

Страница 260: ...eration with non approved equipment or unshielded cables is likely to result in interference to radio and TV reception This device complies with Part 15 of the FCC Rules Operation is subject to the fo...

Страница 261: ...k applied to this product indicates compliance to applicable EU Directives The full text of the EU Declaration of Conformity is located at www xerox com en us about ehs European Union Lot 4 Imaging Eq...

Страница 262: ...abled on your device to reduce energy consumption After the last print the device transitions to Ready mode In this mode the device can print again immediately If the device is not used for a specifie...

Страница 263: ...eep mode enablement In Sleep mode the printer uses less than 1 Watt of power To learn more about Xerox participation in sustainability initiatives go to www xerox com about xerox environment enus html...

Страница 264: ...liance with the EEE regulation EEE y netmeli ine uygundur UKRAINE ROHS COMPLIANCE 3 2008 1057 The equipment complies with requirements of the Technical Regulation approved by the Resolution of Cabinet...

Страница 265: ...on This device is compliant with IEC and EN product safety standards certified by a National Regulatory Test Laboratory NRTL Xerox PrimeLink B9100 B9110 B9125 B9136 Copier Printer User Guide 265 Regul...

Страница 266: ...ter go to Web address https safetysheets business xerox com en us United States and Canada 1 800 ASK XEROX 1 800 275 9376 Other markets send an email request to EHS Europe xerox com 266 Xerox PrimeLin...

Страница 267: ...rovided the reproduction of the document is performed for lawful purposes Postage Stamps canceled or uncanceled For philatelic purposes Postage Stamps may be photographed provided the reproduction is...

Страница 268: ...ore information about these provisions contact the Copyright Office Library of Congress Washington D C 20559 Ask for Circular R21 CANADA Parliament by stature has forbidden the reproduction of the fol...

Страница 269: ...sive and no liability is assumed for its completeness or accuracy In case of doubt consult your solicitor OTHER COUNTRIES Copying certain documents may be illegal in your country Penalties of fine or...

Страница 270: ...s provided with this product It connects to a compatible modular jack that is also compliant See installation instructions for details You can safely connect the printer to the following standard modu...

Страница 271: ...ate public utility commission public service commission or corporation commission for information Your office could have specially wired alarm equipment connected to the telephone line Make sure that...

Страница 272: ...in France Luxembourg Sweden Germany Malta United Kingdom This product has been tested to and is compliant with TBR21 OR ES 103 021 1 2 3 or ES 203 021 1 2 3 technical specifications for terminal equip...

Страница 273: ...lse answer condition If you encounter such problems do not contact the Telecom Faults Service 6 DTMF tones dialing is the preferred method because it is faster than pulse decadic dialing and is readil...

Страница 274: ...274 Xerox PrimeLink B9100 B9110 B9125 B9136 Copier Printer User Guide Regulatory Information...

Страница 275: ...Xerox PrimeLink B9100 B9110 B9125 B9136 Copier Printer User Guide 275 Recycling and Disposal This appendix contains All Countries 276 North America 277 European Union 278 Other Countries 279...

Страница 276: ...le at the time that the product was placed on the market For recycling and disposal information contact your local authorities Perchlorate Material This product may contain one or more Perchlorate con...

Страница 277: ...K XEROX to determine if this Xerox product is part of the program For more information about Xerox environmental programs go to www xerox com en us about ehs For recycling and disposal information con...

Страница 278: ...ou purchased the items In some member states when you purchase new equipment your local retailer may be required to take back your old equipment free of charge For more information contact your retail...

Страница 279: ...Other Countries Please contact your local waste management authority to request disposal guidance Xerox PrimeLink B9100 B9110 B9125 B9136 Copier Printer User Guide 279 Recycling and Disposal...

Страница 280: ...280 Xerox PrimeLink B9100 B9110 B9125 B9136 Copier Printer User Guide Recycling and Disposal...

Страница 281: ...erox PrimeLink B9100 B9110 B9125 B9136 Copier Printer User Guide 281 Tray 5 Bypass This appendix contains Tray 5 Bypass Overview 282 Loading Media in Tray 5 Bypass 283 Tray 5 Bypass Specifications 292...

Страница 282: ...is tray with any of the three mounting options Optional Extra Long Sheets XLS Bypass tray Use this tray with the 1 Tray or 2 Tray Oversized High Capacity Feeder only The supported paper types and weig...

Страница 283: ...the edges of the stack The Tray Properties window appears Note Do not load materials above the MAX line located on the guides 7 From the Tray Properties window verify that the correct paper informati...

Страница 284: ...aper size 3 Select the appropriate media for your print job 4 Open the media with the seam side facing up 5 Before loading paper into the XLS Bypass tray fan the sheets of paper 6 Insert the media int...

Страница 285: ...ize type and weight are selected and match the media that is loaded in the XLS Bypass tray 10 To save the information and close the Tray Properties window touch O OK K Adjusting the Skew on Long Paper...

Страница 286: ...des on the XLS Feeder so that the guides are as parallel to the printer as possible 4 Run the Auto Alignment Adjustment procedure Refer to the Xerox PrimeLink B9100 B9110 B9125 B9136 Copier Printer Sy...

Страница 287: ...E ED DG GE E G GU UI ID DE E A AD DJ JU US ST TM ME EN NT T Skew is oriented to the left Move the guides downward Right side is higher Left side is lower Skew is oriented to the right Move the guides...

Страница 288: ...Media in the Optional Extra Long Sheets XLS Bypass Tray Load the transparencies in the Long Edge Feed LEF direction and align the edge of the transparencies against the right edge of the tray with th...

Страница 289: ...llated tabs with the first blank tab cutout toward the rear of the tray LOADING POSTCARDS IN TRAY 5 BYPASS Important If you are using the XLS Bypass tray before proceeding loosen the four locking scre...

Страница 290: ...T Tr ra ay y 5 5 iin n t th he e S SE EF F D Diir re ec ct tiio on n When loading envelopes in the SEF direction ensure that the flaps are closed and face down Position the envelope flaps along the fr...

Страница 291: ...Xerox PrimeLink B9100 B9110 B9125 B9136 Copier Printer User Guide 291 Tray 5 Bypass...

Страница 292: ...5 x 13 in Legal 216 x 356 mm 8 5 x 14 in 279 4 x 381 mm 11 x 15 in Ledger 279 4 x 431 8 mm 11 x 17 in Special A4 226 x 310 mm 8 9 x 12 2 in DT Special A3 310 x 432 mm 12 2 x 17 in 304 8 x 457 2 mm 12...

Страница 293: ...ss Tray with HCF or OHCF All supported paper types for Trays 1 4 Heavyweight 2 217 253 g m Heavyweight Preprinted 2 217 253 g m Heavyweight Tab Stock 2 217 253 g m Label 1 106 216 g m Label 2 217 253...

Страница 294: ...294 Xerox PrimeLink B9100 B9110 B9125 B9136 Copier Printer User Guide Tray 5 Bypass...

Страница 295: ...Copier Printer User Guide 295 High Capacity Feeder This appendix contains High Capacity Feeder Trays 6 and 7 296 Loading Media in the High Capacity Feeder 297 High Capacity Feeder Troubleshooting 299...

Страница 296: ...lb Bond to 80 lb Cover or 52 216 g m2 The High Capacity Feeder HCF has four fixed Long Edge Feed LEF positions which are marked on the tray B5 10 5 in 11 in A4 The High Capacity Feeder HCF has one var...

Страница 297: ...ps a Remove any paper that is loaded in the tray b To move the paper guides loosen the two screws c Adjust the paper guides to fit the new paper size then retighten the two screws 4 Open the ream of p...

Страница 298: ...ng gs s If you did not make changes to the paper tray do the following a Select options for P Pa ap pe er r T Ty yp pe e P Pa ap pe er r W We eiig gh ht t P Pa ap pe er r S Siiz ze e and P Pa ap pe er...

Страница 299: ...alfunction 2 Remove the jammed paper Note If paper is torn check inside the printer then remove the torn paper 3 Gently push in the tray until it stops PAPER JAMS INSIDE THE HIGH CAPACITY FEEDER Tip B...

Страница 300: ...trol panel Paper Jams Inside the Lower Left Cover Tip Before proceeding with your copy and print jobs ensure that all paper jams are cleared and any small torn pieces of paper are removed 1 Open the f...

Страница 301: ...rate if the cover is open even slightly Paper Jams at Lever 1a and Knob 1c Tip Before proceeding with your copy and print jobs ensure that all paper jams are cleared and any small torn pieces of paper...

Страница 302: ...the original position 4 Close the front cover of the HCF Note The printer does not operate if the cover is open even slightly Paper Jams at Lever 1b and Knob 1c Tip Before proceeding with your copy a...

Страница 303: ...then remove the torn paper 3 Return lever 1 1b b to the original position 4 Close the front cover of the HCF Note The printer does not operate if the cover is open even slightly Paper Jams at Lever 1d...

Страница 304: ...the jammed paper Note If paper is torn check inside the printer then remove the torn paper 3 If the paper cannot be removed in step 2 do the following steps a Rotate knob 1 1c c clockwise b Remove the...

Страница 305: ...on the device where the fault occurred When you clear paper jams always refer to the following information When you remove paper jams do not power off the printer You can remove paper jams when the p...

Страница 306: ...of corrective actions to clear the fault If a fault occurs in more than one location the illustration changes to indicate the multiple locations and the required corrective actions Note For detailed...

Страница 307: ...e marked on the tray B B5 5 1 10 0 5 5 iin n 1 11 1 iin n A A4 4 The High Capacity Feeder HCF has one variable LEF custom position 297 330 2 mm 11 69 13 in The High Capacity Feeder supports Short Edge...

Страница 308: ...308 Xerox PrimeLink B9100 B9110 B9125 B9136 Copier Printer User Guide High Capacity Feeder...

Страница 309: ...Printer User Guide 309 Oversized High Capacity Feeder This appendix contains Oversized High Capacity Feeder Overview 310 Loading Media in the 1 Tray or 2 Tray OHCF 311 Oversized High Capacity Feeder O...

Страница 310: ...330 2 x 488 mm 13 x 19 2 in Each tray holds 2000 sheets Note The 2 Tray Oversized High Capacity Feeder OHCF is not available with Xerox PrimeLink B9100 Copier Printer configuration The 1 Tray Oversize...

Страница 311: ...o the following a Select options for P Pa ap pe er r T Ty yp pe e P Pa ap pe er r W We eiig gh ht t P Pa ap pe er r S Siiz ze e and P Pa ap pe er r C Co ollo or r b If needed make changes to Paper Cur...

Страница 312: ...ut to the farthest positions 3 To remove the postcard bracket loosen the screw on the left side of the tray then remove the bracket 4 To install the postcard bracket 312 Xerox PrimeLink B9100 B9110 B9...

Страница 313: ...edge feed and against the right side of the tray 6 Adjust the paper guides against the paper stock 7 Close the paper tray At the control panel touch screen confirm the new settings 8 Run your print jo...

Страница 314: ...pe Sizes Loading Envelopes in Trays 6 and 7 with the Optional Envelope Support Kit Note If available use the optional Envelope Support Kit to feed and print envelopes from Trays 6 or 7 The Envelope Su...

Страница 315: ...crew so that it locks the L shape envelope bracket in place 5 Locate the larger of the plastic pieces and place it in the bottom of the tray so that it fits around the ends of the inboard paper guide...

Страница 316: ...wn Note Always ensure that the flaps are down and positioned along the front of the tray 8 Adjust the paper guides against the stock 9 Close the paper tray and confirm the new settings at the print se...

Страница 317: ...Note If the optional GBC AdvancedPunch Pro is attached to your device for instructions on loading tab stock in the trays refer to the GBC AdvancedPunch Customer Documentation 1 Select the appropriate...

Страница 318: ...the job Loading Transparencies in the OHCF 1 or 2 Trays 1 Select the appropriate paper stock for your print job 2 Pull out the tray slowly until it stops 3 Before you load the transparencies into the...

Страница 319: ...n the tray Do not load paper above the MAX fill line on the rear edge guide 7 If necessary set the skew adjustment levers to the required position for your print job 8 Gently push in the tray until it...

Страница 320: ...he rear skew adjustment lever to the right 3 Gently push in the tray until it stops 4 From the Tray Properties window enter the correct paper information including size type weight and if necessary pa...

Страница 321: ...it stops 17 If you are still having skew adjustment problems refer to the Advanced Stock Setup information located in the Xerox PrimeLink B9100 B9110 B9125 B9136 Copier Printer System Administrator G...

Страница 322: ...stops OHCF Paper Jams at Lever 1a and Knob 1c 1 Open the front cover of the OHCF 2 To remove the jammed paper do the following steps a Pull the lever 1 1a a to the right b Rotate the knob 1 1c c to th...

Страница 323: ...is not closed completely a message appears on the printer touch screen and the printer cannot operate OHCF Paper Jams at Lever 1b and Knob 1c 1 Open the front cover of the OHCF 2 To remove the jammed...

Страница 324: ...the OHCF Note If the front cover of the OHCF is not closed completely a message appears on the printer touch screen and the printer cannot operate OHCF Paper Jams at Lever 1d and Knob 1c 1 Open the fr...

Страница 325: ...s a Rotate knob 1 1c c clockwise b Remove the jammed paper 4 Return lever 1 1d d to the original position 5 Close the front cover of the OHCF Note If the front cover of the OHCF is not closed complete...

Страница 326: ...f paper To avoid possible print defects do not touch components inside the printer Gently remove the paper and take care not to tear it If paper is torn ensure that you remove all torn pieces After yo...

Страница 327: ...mm 12 x 18 in SRA3 320 x 450 mm 12 6 x 17 7 in 320 x 488 mm 12 6 x 19 2 in 330 2 x 457 2 mm 13 x 18 in 330 2 x 482 6 mm 13 x 19 in Postcard 100 x 148 mm 3 94 x 5 83 in Postcard 101 6 x 152 4 mm 4 x 6...

Страница 328: ...nit 52 300 g m 16 lb Bond 110 lb Cover paper 2 Tray unit 52 350 g m 16 lb Bond 130 lb Cover paper Tray capacity 2000 sheets for each tray Important The capacity of 2000 sheets for each tray is valid w...

Страница 329: ...vyweight 3S1 254 300 g m Heavyweight 4S1 301 350 g m Recycled S1 64 105 g m Preprinted S1 64 105 g m Preprinted HW 1S1 106 216 g m Preprinted HW 2S1 217 253 g m Preprinted HW 3S1 254 300 g m Preprinte...

Страница 330: ...330 Xerox PrimeLink B9100 B9110 B9125 B9136 Copier Printer User Guide Oversized High Capacity Feeder...

Страница 331: ...curler Modules This appendix contains Interface Decurler Module Overview 332 Finishing Accessories Requiring an Interface Decurler Module 333 Interface Decurler Module Components 334 Curl Correction o...

Страница 332: ...ovides the following functions Communication between the press and the attached finishing device Alignment of the paper path between the press and the attached finishing device Cooling and decurling o...

Страница 333: ...face Decurler Module The following finishing accessories require the Interface Decurler Module GBC AdvancedPunch Pro High Capacity Stacker HCS Xerox PrimeLink B9100 B9110 B9125 B9136 Copier Printer Us...

Страница 334: ...ace Decurler Module Components 1 Paper Jam and Error Indicator Panel 2 Interface Decurler Module Front Cover 334 Xerox PrimeLink B9100 B9110 B9125 B9136 Copier Printer User Guide Interface Decurler Mo...

Страница 335: ...1 Paper Jam and Error Indicator 2 Curl Up and Curl Down Indicators 3 Manual Curl Up Button 4 Manual Curl Down Button 5 Auto Curl Button and Indicator Xerox PrimeLink B9100 B9110 B9125 B9136 Copier Pri...

Страница 336: ...Auto is on Manual selections made from the IDM control panel If you want to quickly adjust the media curl on the printed output use the manual curl up or curl down buttons If the printed output conta...

Страница 337: ...on is illuminated Auto mode has seven automated settings for controlling paper curl three up curl settings three down curl settings and off When using the Auto mode an indicator flashes momentarily on...

Страница 338: ...tput Manual Downward Curling When the printed output is curled down select the curl down button There are three downward curl correction values The top three indicators show which level of downward cu...

Страница 339: ...ormation Do not power off the printer when removing paper jams Paper jams can be removed with the printer still powered on When the printer is powered off all information stored to the system memory i...

Страница 340: ...e To ensure that the jammed paper exits the area turn the knob a minimum of 10 times c Remove the jammed paper Important Remove the jammed paper by carefully pulling it out of the area 3 Return lever...

Страница 341: ...tion of the fault and corrective actions for clearing the fault If a fault occurs in more than one location the illustration changes to indicate the multiple locations and the required corrective acti...

Страница 342: ...342 Xerox PrimeLink B9100 B9110 B9125 B9136 Copier Printer User Guide Interface Decurler Modules...

Страница 343: ...B9100 B9110 B9125 B9136 Copier Printer User Guide 343 Inserter Module This appendix contains Inserter Module Overview 344 Inserter Components 345 Paper and Media for Inserter Tray T1 347 Inserter Trou...

Страница 344: ...ors and covers for the finished output The printer does not print media fed from the inserter module Instead the printer places media into the printed output at selected locations When using 20 lb 75...

Страница 345: ...Inserter Components 1 Tray T1 or Inserter Tray 2 Inserter Control Panel 3 Inserter Front Cover Xerox PrimeLink B9100 B9110 B9125 B9136 Copier Printer User Guide 345 Inserter Module...

Страница 346: ...Top indicator Upward curl correction Bottom indicator Downward curl correction Middle indicator Off No curl correction Important If the system includes an Interface Decurler Module IDM the Inserter C...

Страница 347: ...orted Paper for Inserter Tray T1 Before using Tray T1 review the following guidelines Remove any remaining paper from the tray Load all the paper required for the job into the tray To use the saddle s...

Страница 348: ...between the guides is too long or short for the paper paper jams can occur If set by the system administrator the Tray Properties screen appears on the printer control panel 3 From the Tray Propertie...

Страница 349: ...a ab b S St to oc ck k Load tab stock paper in tray T1 LEF long egde feed and with the tabs on the left side as shown Xerox PrimeLink B9100 B9110 B9125 B9136 Copier Printer User Guide 349 Inserter Mod...

Страница 350: ...power off the printer when removing paper jams Paper jams can be removed with the printer still powered on When you power off the printer all information stored to the system memory is erased Before...

Страница 351: ...hat you removed and ensure that all four corners of the paper are aligned correctly 3 Reload the paper into the tray 4 Close the T1 cover Clearing Paper Jams from the Inserter E2 Area 1 Open the inser...

Страница 352: ...tion 4 If you have difficulty when you remove the jammed paper do the following steps a Push lever 1 1c c to the right b Rotate knob 1 1b b counterclockwise c Remove the jammed paper 352 Xerox PrimeLi...

Страница 353: ...erter E3 Area 1 Open the inserter front cover 2 To remove paper jams from the inserter E3 area Note The jammed paper can be hidden behind the upper left cover area a Push down lever 1 1d d b Rotate kn...

Страница 354: ...y when removing jammed paper do the following a Lift lever 1 1a a b Rotate knob 1 1e e counterclockwise c Remove any jammed paper 5 Return lever 1 1a a to the original position 6 Close the inserter fr...

Страница 355: ...e fault and detailed instructions for correcting the fault The E code on the upper left part of the Fault message displays which error indicator E1 E2 or E3 is illuminated on the inserter control pane...

Страница 356: ...356 Xerox PrimeLink B9100 B9110 B9125 B9136 Copier Printer User Guide Inserter Module...

Страница 357: ...he Interface Decurler Module The GBC AdvancedPunch Pro provides the following capabilities Punches a broad range of media sizes and types Trailing edge LEF Long Edge Feed and SEF Short Edge Feed hole...

Страница 358: ...358 Xerox PrimeLink B9100 B9110 B9125 B9136 Copier Printer User Guide GBC AdvancedPunch Pro...

Страница 359: ...B9110 B9125 B9136 Copier Printer User Guide 359 High Capacity Stacker HCS This appendix contains High Capacity Stacker Overview 360 High Capacity Stacker HCS Components 361 HCS Troubleshooting 365 HC...

Страница 360: ...Stacker is an optional finishing device that provides large capacity stacking and offsetting capabilities for production output to a stacker tray and cart The stacker provides a top tray that is conv...

Страница 361: ...sheets The top tray holds a maximum of 500 sheets 330 x 488 mm 13 x 19 2 in When another inline finishing device is installed this tray is used as a paper path for transporting media through the HCS t...

Страница 362: ...ically switches off to discontinue the electrical flow to the High Capacity Stacker HCS For electrical information refer to Safety OUTPUT TRAYS The High Capacity Stacker HCS has two output trays 1 Top...

Страница 363: ...n Press this button to output a sample sheet to the top tray 2 Unload button Press this button to stop printing then remove the paper Xerox PrimeLink B9100 B9110 B9125 B9136 Copier Printer User Guide...

Страница 364: ...the HCS front door 3 Position the securing bar on top of the stacked paper 4 Pull the stacker cart straight out of the HCS 5 Remove the securing bar 6 Remove the paper from the stacker tray 7 Push the...

Страница 365: ...When removing paper jams do not power off the printer Paper jams can be removed with the printer still powered on When the power is powered off all information stored to the system memory is erased B...

Страница 366: ...e jammed paper 3 Return lever 1 1b b to the original position 4 Close the HCS top cover 5 If the printer indicates that there are more paper jams follow the instructions to clear the paper jams and to...

Страница 367: ...ockwise c Remove the jammed paper 3 Return lever 1 1b b to the original position 4 Close the HCS top cover 5 If the printer indicates that there are more paper jams follow the instructions to clear th...

Страница 368: ...Do the following a Lift lever 1 1b b b Rotate knob 1 1a a counterclockwise c Remove the jammed paper 3 Return lever 1 1b b to the original position 4 Do the following 368 Xerox PrimeLink B9100 B9110...

Страница 369: ...position 6 Close the HCS top cover 7 If the printer indicates that there are more paper jams follow the instructions to clear the paper jams and to resume printing Clearing Paper Jams from HCS Area E4...

Страница 370: ...se the HCS top cover 5 If the printer control panel indicates that there are more paper jams follow the instructions to clear the paper jams and to resume printing Clearing Paper Jams from HCS Area E5...

Страница 371: ...er 3 Return lever 2 2b b to the original position 4 Close the HCS top cover 5 If the printer indicates that there are more paper jams follow the instructions to clear the paper jams and to resume prin...

Страница 372: ...acker cart slowly then remove any jammed paper 4 Push the stacker cart back into the original position 5 Close the HCS front door 6 If the printer indicates that there are more paper jams follow the i...

Страница 373: ...E7 1 Remove any output delivered to the top tray 2 Open the HCS top cover 3 Do the following a Lift lever 1 1b b b Remove the jammed paper Xerox PrimeLink B9100 B9110 B9125 B9136 Copier Printer User G...

Страница 374: ...med paper 6 Return lever 2 2a a to the original position 7 Close the HCS top cover 8 If the printer indicates that there are more paper jams follow the instructions to clear the paper jams and to resu...

Страница 375: ...2 Do the following a Lift lever 3 3b b b Rotate knob 3 3a a clockwise c Remove jammed papers 3 Return lever 3 3b b to the original position 4 Close the HCS top cover Xerox PrimeLink B9100 B9110 B9125...

Страница 376: ...on the printer stops printing and a message appears on the printer touch screen The touch screen displays a Faults button that provides information about the fault and detailed instructions for correc...

Страница 377: ...SRA3 330 x 487 mm 13 x 19 in Custom size Height 8 13 in 203 0 330 2 mm Width 7 2 19 2 in 148 0 488 0 mm Paper weight Top Tray 52 350 g m2 Stacker tray or cart 52 350 g m2 HIGH CAPACITY STACKER HCS ME...

Страница 378: ...han 305 mm 12 in in the feed direction require a 210 mm 8 3 in minimum measurement across the feed direction Non standard papers that are shorter than 254 mm 10 in in the cross feed direction require...

Страница 379: ...This appendix contains Crease and Two Sided Trimmer Overview 380 Crease and Two Sided Trimmer Components 381 Crease and Two Sided Trimmer Configuration 382 Crease and Two Sided Trimmer Maintenance 38...

Страница 380: ...he following tasks Trims 6 25 mm 0 24 0 99 in from the top and bottom of prints or booklets to produce an output with the required finished width and appearance Note If you crease the media within 62...

Страница 381: ...printing can resume clear the paper jam 2 Trimmer Waste Container Full indicator This indicator illuminates when it is time to empty the trimmer waste container The indicator blinks when the waste con...

Страница 382: ...Box stores trim waste 2 Trimmer The Trimmer trims the top and bottom edges in the process direction 3 Creaser The Creaser applies creases in the vertical direction 4 Registration The Registration adju...

Страница 383: ...e waste container when the printer is powered off the printer does not recognize that the container was emptied When the waste container reaches the full condition the following changes occur The indi...

Страница 384: ...ste and debris especially beneath the frame that is behind the waste container Use the cleaning rod to remove any remaining waste from inside the trimmer 5 Return the cleaning rod to its original posi...

Страница 385: ...rmation Do not power off the printer when removing paper jams Paper jams can be removed with the printer still powered on When you power off the printer all information stored to the system memory is...

Страница 386: ...er for any hidden jammed paper a Push down lever 1 1a a b Push down lever 1 1b b c Lift lever 1 1d d d Remove the jammed paper 3 If you have difficulty removing any paper jams perform the following st...

Страница 387: ...ntrol panel message indicates that there are more paper jams follow the instructions to clear the paper and to resume printing Clearing Paper Jams from Trimmer Area E2 1 Open the trimmer upper cover X...

Страница 388: ...med paper perform the following steps a Push down lever 1 1a a b Push down lever 1 1b b 4 If you cannot remove the jammed paper perform the following steps a Rotate knob 1 1c c clockwise b Remove the...

Страница 389: ...erform the following steps a Lift lever 1 1d d b Move lever 2 2a a to the left 7 To remove the jammed paper perform the following steps a Rotate knob 2 2b b counterclockwise b Remove the jammed paper...

Страница 390: ...and to resume printing Clearing Paper Jams from Trimmer Area E3 1 Open the trimmer upper cover 2 Rotate knob 2 2 counterclockwise and align the mark on the knob with the open padlock icon 3 To remove...

Страница 391: ...panel message indicates that there are more paper jams follow the instructions to remove the jammed paper and to resume printing Clearing Paper Jams from Trimmer Area E4 1 Open the trimmer upper cove...

Страница 392: ...ammed paper grasp the end of the paper then gently pull out the sheet a Rotate knob 2 2f f clockwise b Remove the jammed paper 4 If you have difficulty removing the jammed paper grasp the top edge at...

Страница 393: ...low the instructions to clear the paper jam and to resume printing Clearing Paper Jams from Trimmer Area E5 1 Open the trimmer upper cover 2 To remove the jammed paper perform the following steps a Mo...

Страница 394: ...knob 2 2f f counterclockwise b Remove the jammed paper 5 Return the levers to the original positions 6 Close the trimmer upper cover 7 If a printer control panel message indicates that there are more...

Страница 395: ...ve lever 3 3a a to the right b Push down lever 4 4b b c Move lever 4 4c c to the right d Remove the jammed paper 3 To remove the jammed paper perform the following steps a Rotate knob 4 4d d countercl...

Страница 396: ...counterclockwise c Remove the jammed paper 5 To remove the jammed paper perform the following steps a Rotate knob 3 3c c clockwise b Remove the jammed paper 6 Return the levers to the original positio...

Страница 397: ...g Clearing Paper Jams from Trimmer Area E7 1 Open the trimmer upper cover 2 Move lever 3 3a a to the right 3 Rotate knob 2 2f f counterclockwise five or more times 4 Pull out and push in the trimmer w...

Страница 398: ...ator E7 remains illuminated perform the following steps a Open the lower cover b From the location inside the lower cover remove the supplied cleaning rod 398 Xerox PrimeLink B9100 B9110 B9125 B9136 C...

Страница 399: ...waste then remove the waste by hand f Return the levers to the original positions 7 Ensure that all waste and debris is removed especially beneath the frame that is behind the waste container Use the...

Страница 400: ...a Faults button that provides information about the fault and detailed instructions to correct the fault The E code in the upper left part of the Fault message shows which error indicator E1 E7 is il...

Страница 401: ...m 330 0 x 488 0 mm 13 0 x 19 2 in Paper size for 2 sided booklet trim Minimum 194 0 x 257 0 mm 7 6 x 10 12 in Maximum 330 0 x 488 0 mm 13 0 x 19 2 in Paper Weight Trim 52 350 g m2 Crease 106 350 g m2...

Страница 402: ...402 Xerox PrimeLink B9100 B9110 B9125 B9136 Copier Printer User Guide Crease and Two Sided Trimmer...

Страница 403: ...9100 B9110 B9125 B9136 Copier Printer User Guide 403 C Z Folder This appendix contains C Z Folder Overview 404 C Z Fold Types 405 C Z Folder Components 406 C Z Folder Troubleshooting 407 C Z Folder Sp...

Страница 404: ...optional finishing device that provides C fold and Z fold output for the following paper sizes A4 210 x 297 mm or Letter 8 5 x 11 in A3 297 x 420 mm or Tabloid 11 x 17 in To produce folded output sele...

Страница 405: ...h ho olle e p pu un nc ch h As with a regular Z Fold the Z Fold Half Sheet has two folds that are folded in the opposite directions The difference between a regular Z Fold and a Z Fold Half Sheet is t...

Страница 406: ...N NU UM MB BE ER R C CO OM MP PO ON NE EN NT T D DE ES SC CR RI IP PT TI IO ON N 1 C Z fold output tray button When you press the button the indicator flashes When the output tray is unlocked and the...

Страница 407: ...oving paper jams Paper jams can be removed with the printer still powered on When you power off the printer all information stored to the system memory is erased Before resuming print jobs clear all t...

Страница 408: ...b 2 2b b to the left c Remove the jammed paper 3 Return levers 2 2a a and 2 2b b to their original positions 4 Close the folder front cover 5 If the printer indicates that there are more paper jams fo...

Страница 409: ...t b Rotate knob 2 2c c counterclockwise c Remove jammed paper 3 Return lever 2 2g g to its original position 4 Close the folder front cover 5 If the printer indicates that there are more paper jams fo...

Страница 410: ...ver 2 Pull open the C Z fold output tray 2 2d d 3 To remove jammed paper do the following a Pull lever 2 2e e to the right b Rotate knob 2 2c c counterclockwise c Remove the jammed paper 410 Xerox Pri...

Страница 411: ...ty removing any paper jams do the following a Pull lever 2 2f f to the right b Rotate knob 2 2c c counterclockwise c Remove the jammed paper 6 Return lever 2 2f f to the original position Xerox PrimeL...

Страница 412: ...ple locations and the required corrective actions The touch screen displays a Faults button that provides information about the fault and detailed instructions for correcting the fault The E code on t...

Страница 413: ...Xerox PrimeLink B9100 B9110 B9125 B9136 Copier Printer User Guide 413 C Z Folder...

Страница 414: ...coated 52 105 g m2 52 63 g m2 for thin paper 64 81 g m2 for plain paper 64 105 g m2 for recycled paper plain paper manual duplex drilled paper and preprinted papers Tri fold C or Z Paper size A4 Lette...

Страница 415: ...inter User Guide 415 Production Ready Finishers This appendix contains Overview of the Production Ready Finishers 416 Production Ready Finisher Components 418 PR Finisher Maintenance 423 PR Finisher T...

Страница 416: ...n Ready Finisher also includes an Inserter Module The Inserter Module allows you to insert pre printed or plain separator sheets into the printed output at specific locations The Production Ready Fini...

Страница 417: ...ng The PR Finisher consists of the following components Three output trays Top Tray Stacker Tray Booklet Output Tray Booklet Maker Unit Stapler Optional Basic Punch PRODUCTION READY PR FINISHER PLUS T...

Страница 418: ...y 4 Booklet Tray 5 Booklet Output Button 6 Front Cover 7 Staple Waste Container 8 Basic Staple Cartridge for Side Stitch 9 Two Booklet Staple Cartridges for Saddle Stitch 10 Hole Punch Waste Container...

Страница 419: ...ntly change the angle of the top tray To change the top tray angle refer to the following guidelines For normal usage keep the tray in the lower default position Important Continual usage of the tray...

Страница 420: ...R Booklet Maker Finisher 2 000 sheets Side stitch jobs are delivered to the stacker tray only Note When 2000 or more sheets of paper with excessive downward curl are delivered to the output tray the o...

Страница 421: ...use paper jams If either situation occurs on the Interface Decurler Module set the curl correction level to the highest setting On the Inserter change the setting to an upward curl For more informatio...

Страница 422: ...PR FINISHER PLUS COMPONENTS 1 Finisher Module 2 Finisher Module Paper Jam or Error Indicators 3 Finisher Top Tray 4 Finisher Stacker Tray 5 Finishing Transport 6 Finishing Transport Paper Jam or Error...

Страница 423: ...UP PP PL LY Y U UN NI IT T S SH HI IP PP PE ED D W WI IT TH H F FI IN NI IS SH HE ER R A AN ND D R RE EO OR RD DE ER R Q QU UA AN NT TI IT TY Y R RE EP PR RE ES SE EN NT TA AT TI IO ON N Staple Cartr...

Страница 424: ...ne e S St ta at tu us s button 2 Select the S Su up pp plliie es s tab The list of consumables appears according to type Finisher consumables such as staple cartridges and waste containers are listed...

Страница 425: ...original position in the printer 6 Close the finisher front cover REPLACING THE BOOKLET STAPLE CARTRIDGE FOR SADDLE STITCHING Note Before performing this procedure ensure that the printer is not prin...

Страница 426: ...e hold the tabs on the cartridge then pull the cartridge out of the printer Note There are two booklet staple cartridges provided The message on the printer control panel touch screen indicates which...

Страница 427: ...LACING THE STAPLE REFILL CASSETTE FOR SADDLE STITCHING When you run out of staples for the saddle stitcher you can replace the staple cassette without having to replace the entire staple cartridge To...

Страница 428: ...tridge The staple cartridge opens 3 To prepare the cartridge for the removal of the empty staple cassette position the top part of the cartridge under the lower part of the cartridge 428 Xerox PrimeLi...

Страница 429: ...NG G To avoid personal injury use care when removing the staple waste container When the staple waste container is full a message appears on the printer control panel When the message appears replace...

Страница 430: ...lock lever under R R5 5 toward the left to the opened lock icon 3 Pull out R R5 5 then remove the finisher staple waste container from the printer 430 Xerox PrimeLink B9100 B9110 B9125 B9136 Copier Pr...

Страница 431: ...Lower the new staple waste container into position then gently push in the container until it stops W WA AR RN NI IN NG G To prevent injury do not put your fingers on top of the container 6 Move the...

Страница 432: ...rforming this procedure ensure that the printer is not printing Ensure that the printer remains powered on when replacing the staple waste container If powered off the printer does not recognize the r...

Страница 433: ...r scraps remain in the waste container the container becomes full before a full message appears on the control panel causing a fault to occur 4 Return R R4 4 to the original position in the printer 5...

Страница 434: ...following information When you remove paper jams keep the printer powered on When you power off the printer all information stored to the system memory is erased To minimize print defects do not touch...

Страница 435: ...u clear paper jams always refer to the following information When you remove paper jams keep the printer powered on When you power off the printer all information stored to the system memory is erased...

Страница 436: ...ammed paper do the following Note Grasp the leading edge of the jammed sheet of paper then pull out the sheet a Push lever 1 1a a to the left b Remove the jammed paper 3 If you have difficulty removin...

Страница 437: ...Close the finisher front cover Clearing Paper Jams from Finisher Area E2 1 Open the finisher front cover 2 To remove the jammed paper do the following Note The jammed paper can be hidden behind the up...

Страница 438: ...r 1 1c c to the original position 4 Close the finisher front cover Clearing Paper Jams from Finisher Area E3 1 Pull out the jammed paper from the finisher top tray 2 Open and close the finisher front...

Страница 439: ...paper do the following steps a Pull lever 1 1d d to the right b Rotate knob 1 1e e clockwise c Remove the jammed paper 3 Return lever 1 1d d to the original position 4 Close the finisher front cover...

Страница 440: ...er do the following steps a Pull lever 1 1d d to the right b Rotate knob 1 1f f counterclockwise c Remove the jammed paper 3 Return lever 1 1d d to the original position 4 Close the finisher front cov...

Страница 441: ...stacker tray 2 Open and close the finisher front cover Clearing Paper Jams from Finisher Booklet Area E7 1 Open the finisher front cover 2 To remove the jammed paper do the following steps Xerox Prim...

Страница 442: ...y removing paper jam do the following steps a Pull out the S Sa ad dd dlle e S St tiit tc ch h U Un niit t 3 3 b Remove the jammed paper 4 Return lever 3 3a a to the original position 442 Xerox PrimeL...

Страница 443: ...klet Area E8 1 Open the finisher front cover 2 Release latch 3 3a a then check for a paper jam If there is no jammed paper pull out S Sa ad dd dlle e S St tiit tc ch h U Un niit t 3 3 toward you until...

Страница 444: ...it tc ch h U Un niit t 3 3 until it stops 5 Close the finisher front cover Clearing Paper Jams from Finisher Booklet Area E9 1 Open the finisher front cover 2 To remove the jammed paper do the followi...

Страница 445: ...r front cover CLEARING PAPER JAMS IN THE PR FINISHER PLUS Clearing Paper Jams in the Finisher Module Area E7 1 Open the finisher front cover 2 Remove any jammed paper 3 To clear paper jams from area E...

Страница 446: ...knob 1 1b b clockwise and remove the jammed paper c Return latches 3 3a a and 3 3b b to their original positions 4 Close the finisher front cover 446 Xerox PrimeLink B9100 B9110 B9125 B9136 Copier Pr...

Страница 447: ...pen the Finishing Transport front cover 2 To remove the jammed paper a Release latch 1 1 b Remove the jammed paper 3 Return latch 1 1 to the original position 4 Close the Finishing Transport front cov...

Страница 448: ...To remove the jammed paper a Release latch 2 2 b Rotate the knob counterclockwise c Remove the jammed paper 3 Return latch 2 2 to the original position 4 Close the Finishing Transport front cover 448...

Страница 449: ...er 2 To remove the jammed paper a Release latch 3 3 b Rotate the knob clockwise c Remove the jammed paper 3 Return latch 3 3 to the original position 4 Close the Finishing Transport front cover Xerox...

Страница 450: ...the jammed paper perform the following steps a Release latch 4 4 b Rotate the knob clockwise c Remove the jammed paper 3 Return latch 4 4 to the original position 4 Close the Finishing Transport fron...

Страница 451: ...LE E E EN NT TI IR RE E S ST TA AP PL LE E I IS S R RA AI IS SE ED D S ST TA AP PL LE E I IS S R RA AI IS SE ED D A AN ND D T TH HE E C CE EN NT TE ER R I IS S P PR RE ES SS SE ED D I IN N Important...

Страница 452: ...aple cartridge unit check the inside of the finisher for any remaining staples 3 Open the staple cartridge unit cover then remove the jammed staples W WA AR RN NI IN NG G To avoid personal injury use...

Страница 453: ...rtridge has been inserted incorrectly or removed accidentally perform the following procedure to reinsert the staple cartridge correctly into the cartridge unit 1 Open the finisher front cover 2 Pull...

Страница 454: ...4 Locate the lever on the back of the staple cartridge unit W WA AR RN NI IN NG G When you move the lever be careful not to hurt your fingers and fingernails 5 While holding the lever turn the staple...

Страница 455: ...o the staple cartridge unit 8 Reinsert the staple cartridge unit to the original position in the printer 9 Close the finisher front cover Clearing Staple Jams in the Booklet Stapler Note Before you pe...

Страница 456: ...itch Unit 3 pull the unit toward you then remove it from the printer 3 While holding the tabs on the staple cartridge pull the cartridge out of the staple unit 456 Xerox PrimeLink B9100 B9110 B9125 B9...

Страница 457: ...ing the tabs on the new staple cartridge push in the cartridge until it stops Note Ensure that the small arrows are aligned 6 Push the Saddle Stitch Unit 3 into the finisher until the unit stops 7 Clo...

Страница 458: ...t the fault and detailed instructions to correct the fault Tip Finisher faults are identified by the codes that start with the three digit numbers 012 013 024 041 112 and 124 PR FINISHER PLUS FAULT ME...

Страница 459: ...about the fault and detailed instructions to correct the fault Tip PR Finisher Plus faults are identified by the codes that start with the three digit numbers 013 and 051 Xerox PrimeLink B9100 B9110 B...

Страница 460: ...148 0 660 4 mm 5 83 26 in Stacker tray Standard size Minimum A5 148 x 210 mm 5 83 8 27 in Maximum 330 2 x 482 6 mm 13 x 19 in Custom size Height 148 0 330 2 mm 5 83 13 in Width 148 0 488 0 mm 5 83 19...

Страница 461: ...is a set of paper sheets where larger sheets are placed over smaller ones For example A4 over JIS B5 or JIS B4 over A4 The booklet tray capacity is 16 sets if one set consists of 17 or more sheets Sta...

Страница 462: ...oated 52 300 g m2 Coated 64 216 g m2 Number of Holes two holes four holes or US two holes or three holes Note The number of punch holes that you can choose depends on the paper size Saddle Stitch or B...

Страница 463: ...3 g m2 100 35 66 35 64 105 g m2 100 30 50 30 106 216 g m2 20 20 20 20 217 300 g m2 10 10 10 10 301 350 g m2 10 10 10 10 Stapling of 100 pages of 64 80 g m2 or 81 105 g m2 paper is possible but not gua...

Страница 464: ...ST TA AP PL LE ED D P PA AP PE ER R W WE EI IG GH HT T P PA AP PE ER R T TY YP PE E A AN ND D S SH HE EE ET T C CA AP PA AC CI IT TY Y U UN NC CO OA AT TE ED D C CO OA AT TE ED D 52 330 g m2 5 5 221...

Страница 465: ...SquareFold Trimmer Module This appendix contains SquareFold Trimmer Module Overview 466 SquareFold Trimmer Components 467 Square Fold and Trim Features 470 SquareFold Trimmer Maintenance 474 SquareFo...

Страница 466: ...inisher Flattens the booklet spine to reduce the booklet thickness and to provide the appearance of a perfect bound book Trims and cuts away the face that is the edge of the booklet which results in a...

Страница 467: ...the finisher 5 Square fold Adjustment Button To adjust the thickness of printed booklets press the square fold adjustment button 6 Paper Jam or Error Indicator When a paper jam occurs a paper jam or...

Страница 468: ...h bi fold and trim or square fold jobs are delivered only to this tray CONTROL PANEL N NU UM MB BE ER R D DE ES SC CR RI IP PT TI IO ON N 1 Fault indicators When a fault or jam occurs in a particular...

Страница 469: ...er the booklet is flattened and the spine is squared the booklet is moved to the trimmer area Based on the finished booklet size the booklet is moved until the trailing edge reaches the trimmer cutter...

Страница 470: ...e least amount of pressure that can be applied to the booklet is 2 2 When you want the least amount of pressure applied to the spine of the booklet select 1 1 L Lo ow w L Lo ow w 1 1 The less pressure...

Страница 471: ...R D DE ES SC CR RI IP PT TI IO ON N 1 5 Each time that you press the button the pressure changes When indicator 5 is illuminated the maximum amount of pressure is applied When indicator 1 is illumina...

Страница 472: ...or more test prints Trim settings cannot be adjusted to remove less than 2 mm 0 078 in or more than 20 mm 0 787 in of edge material from the booklet Adjustments less than 2 mm 0 078 in can produce po...

Страница 473: ...x 297 mm 8 5 x 11 in 90 g m2 24 lbs 200 mm 7 87 in 14 9 A3 297 x 420 mm 11 x 17 in A4 210 x 297 mm 8 5 x 11 in 216 g m2 80 lbs 205 mm 8 07 in 5 10 A3 297 x 420 mm 11 x 17 in A4 210 x 297 mm 8 5 x 11...

Страница 474: ...aste container is full When the message appears dispose of the paper scraps Note Keep the printer powered on when disposing of the waste If powered off the printer does not recognize that the waste co...

Страница 475: ...tainer is emptied completely If any paper waste or scraps remain the container becomes full before a control panel message appears causing the printer to malfunction 4 Reinsert the empty waste contain...

Страница 476: ...earing paper jams Do not power off the printer when removing paper jams Paper jams can be removed with the printer still powered on When you power off the printer all information stored to the system...

Страница 477: ...e printer is not printing 1 To open the left cover of the trimmer device press the button on the cover 2 Remove the jammed paper 3 If you have difficulty removing the jammed paper open the front cover...

Страница 478: ...are more paper jams follow the instructions to clear the paper jams and to resume printing Clearing Paper Jams from SquareFold Trimmer Area E3 Note Before you perform this procedure ensure that the pr...

Страница 479: ...illuminated on the SquareFold Trimmer control panel SquareFold Trimmer Fault Code Information When faults occur such as paper jams open doors or covers or a printer malfunction the printer stops print...

Страница 480: ...Does the booklet contain full page images Are you using pre printed covers with full page images Are you trimming the booklet Considerations for Obtaining the Required Booklet Output To ensure that yo...

Страница 481: ...AT TI IO ON NS S Paper size Maximum 330 2 x 488 mm 13 x 19 21 in Minimum 182 x 257 mm 7 16 x 10 11 in Trim size 2 20 mm 0 078 0 787 in adjustable in 0 1 mm 0 0039 in increments Xerox PrimeLink B9100 B...

Страница 482: ...482 Xerox PrimeLink B9100 B9110 B9125 B9136 Copier Printer User Guide SquareFold Trimmer Module...

Страница 483: ......

Страница 484: ......

Отзывы: