PHASER 8550, 8500, & 8400 SERVICE SECTION
Version 1.0
page 77
Physical Damage
Technicians should always handle printer components carefully to avoid damage. Handle the following parts
carefully to avoid damage when servicing the printer:
Grounding
Erratic or intermittent printer failures can occur if the grounding clips and cables are damaged or improperly
installed. Symptoms include erratic Control Panel behavior and intermittent printer resets or hangs. If the
grounding clips and cables are
not
installed, static charges build and then discharge, causing damage to the
printer electronics.
■
Transfix Roller
- Avoid dropping the Transfix
Roller. Dents in the rubber roller will cause
repeating print defects at 11.6 cm (4.58 in)
intervals.
■
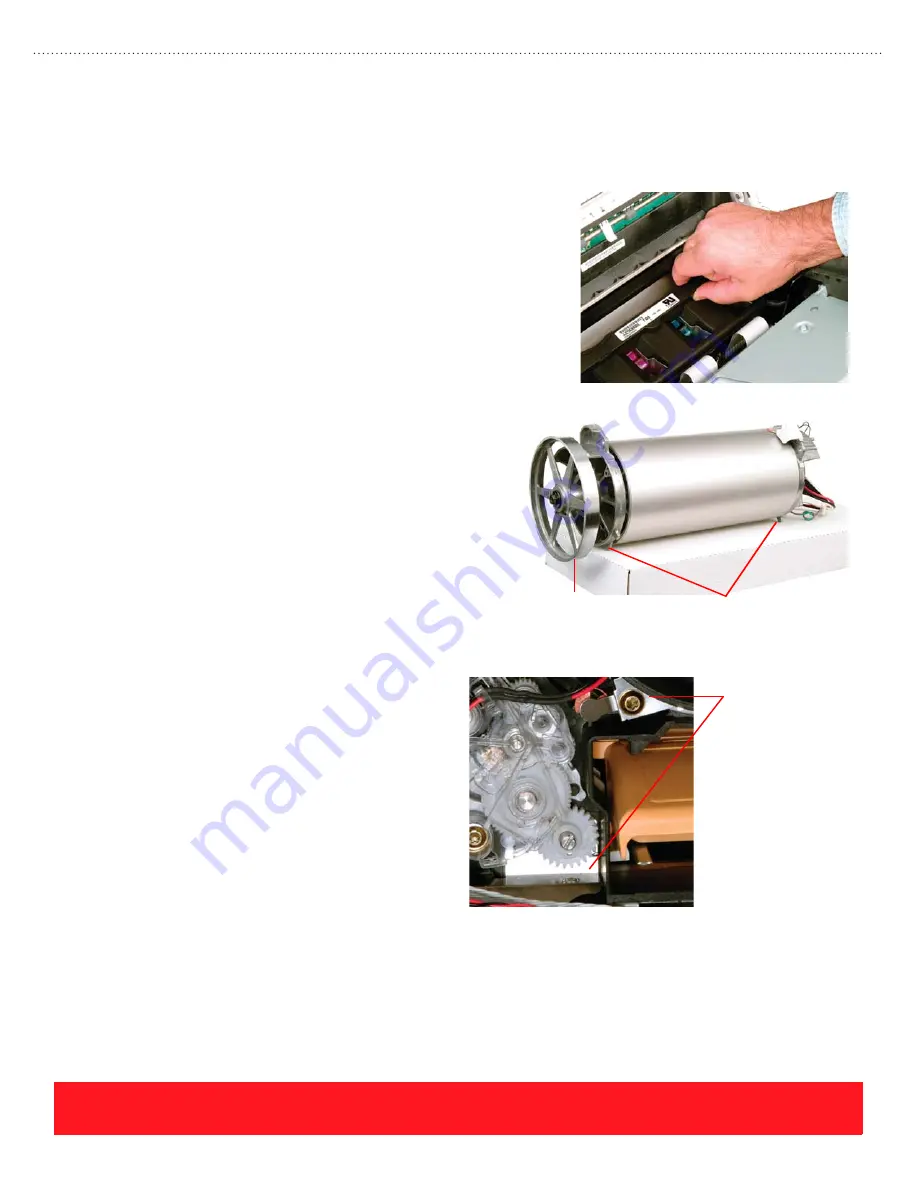
Printhead
- When handling the Printhead, never
touch the faceplate area with your hands or tools
to avoid scratches. If the Printhead is hot, hold it
using the rounded lift points to avoid burns, as
shown to the right. Finally, never position the
Printhead on its faceplate to avoid damage to the
faceplate and ink spills.
■
Drum Assembly
- Handle the Drum
Assembly carefully to avoid dents or
scratches. Any defect on the Drum also
appears in the printed image. To protect the
Drum Assembly after removal, place it on its
feet while extending the pulley over the edge
of the work surface as shown to the right.
The Phaser 8400, 8500, and 8550
printer frame is constructed from
molded plastic. Each component that is
mounted onto the plastic frame returns
to ground through the Electronics
Module. This ground connection is
especially important for rollers and
motors, which generate static charges as
they rotate. To provide grounding paths
for each component, the printer uses a
series of metal grounding clips and
cables.
Drum Assembly Feet
Pulley
Examples of
Grounding Clips
Содержание 8550YDP - Phaser Color Solid Ink Printer
Страница 1: ...Version 1 0 Technical Product Training Phaser S o l i d I n k P r i n t e r s 8550 8500 8400...
Страница 4: ......
Страница 52: ...PHASER 8550 8500 8400 SETUP SECTION Version 1 0 page 44...
Страница 103: ......


