Xerox Document Centre Reference Guide
Page 4 - 17
4.
Ma
k
ing
C
opi
es
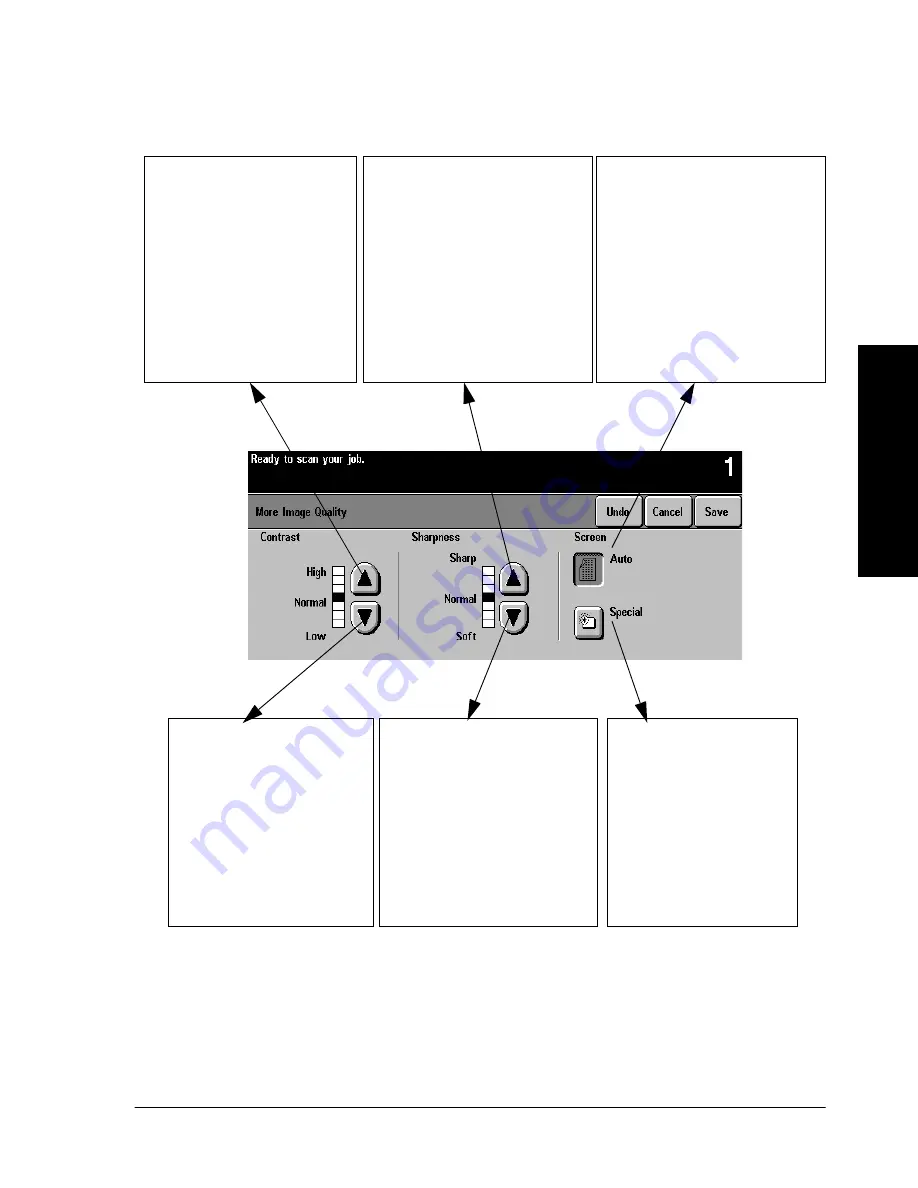
How to use the More Image Quality settings
Contrast - High
Higher contrast causes the
blacks and whites to appear
more vivid and the text to
appear sharper.
However: Increasing the
contrast will result in darker
pictures and less detail in both
the lightest and the darkest
areas.
Sharpness - Sharp
Increasing sharpness will
increase the edge definition of
text and lines.
However: The higher the
sharpness setting, the more likely
moiré will appear on your output.
Screen - Auto:
This factory preset is the best
mode for most originals and
avoids the risk of copy quality
blotches on the output.
However: Pictures and solid areas
may appear more grainy.
Contrast - Low
The lower the setting, the
better the pictorial copy
quality. There will be more
detail in the lightest and
darkest areas of the output.
However: Decreasing the
contrast reduces the text and
line sharpness.
Screen - Special:
This provides smoother and
less grainy pictures.
However: There is a higher
risk of blotches from certain
types of originals.
Sharpness - Soft
The lower the setting, the softer
the image will appear. The
lower settings reduce or
eliminate moiré.
However: The lower the setting,
the less edge definition of text
and lines.
Содержание 460
Страница 10: ...x Xerox Document Centre Reference Guide...
Страница 22: ...xxii Xerox Document Centre Reference Guide...
Страница 32: ...Page 1 10 Xerox Document Centre Reference Guide...
Страница 134: ...Page 6 26 Xerox Document Centre Reference Guide...
Страница 148: ...Page 7 14 Xerox Document Centre Reference Guide...
Страница 288: ...Page 12 36 Xerox Document Centre Reference Guide...
Страница 306: ...Page 13 18 Xerox Document Centre Reference Guide...
Страница 334: ...Page 15 16 Xerox Document Centre Reference Guide...
Страница 340: ...Page 16 6 Xerox Document Centre Reference Guide...
Страница 351: ......


