background image

I N S T R U M E N T   F U N C T I O N S


5-37 

Print Contrast Function (518, 528, 530 only) 

Print Contrast provides you with the ability to monitor the 
¾ tone area and is useful when determining the optimum 
printing density. Print contrast is calculated using.   

%PC =

D

D

D

s

t

s

×

100   

where: D

s

 = solid density; D

t

 = tone density 

Print Contrast Measurement Mode 

Your instrument can evaluate print contrast data two 
different ways: as absolute measurement data, or as 
difference (minus reference) measurement data. Pressing 
the Enter key 

#

 with the Print Contrast mode highlighted 

alternates between Print Contrast and Print Contrast 
Minus Reference (PC-REF). 

Setting Options 

Pressing the Enter key 

#

 with the Options menu 

highlighted opens the Print Contrast Options menu. The 
colors displayed and the mode are selected under the 
Options menu item. 

Color 


You can choose between two different color methods 
using the print contrast function. 

Auto 

measurement 

method measures all the colors, then updates the most 
dominant color.  

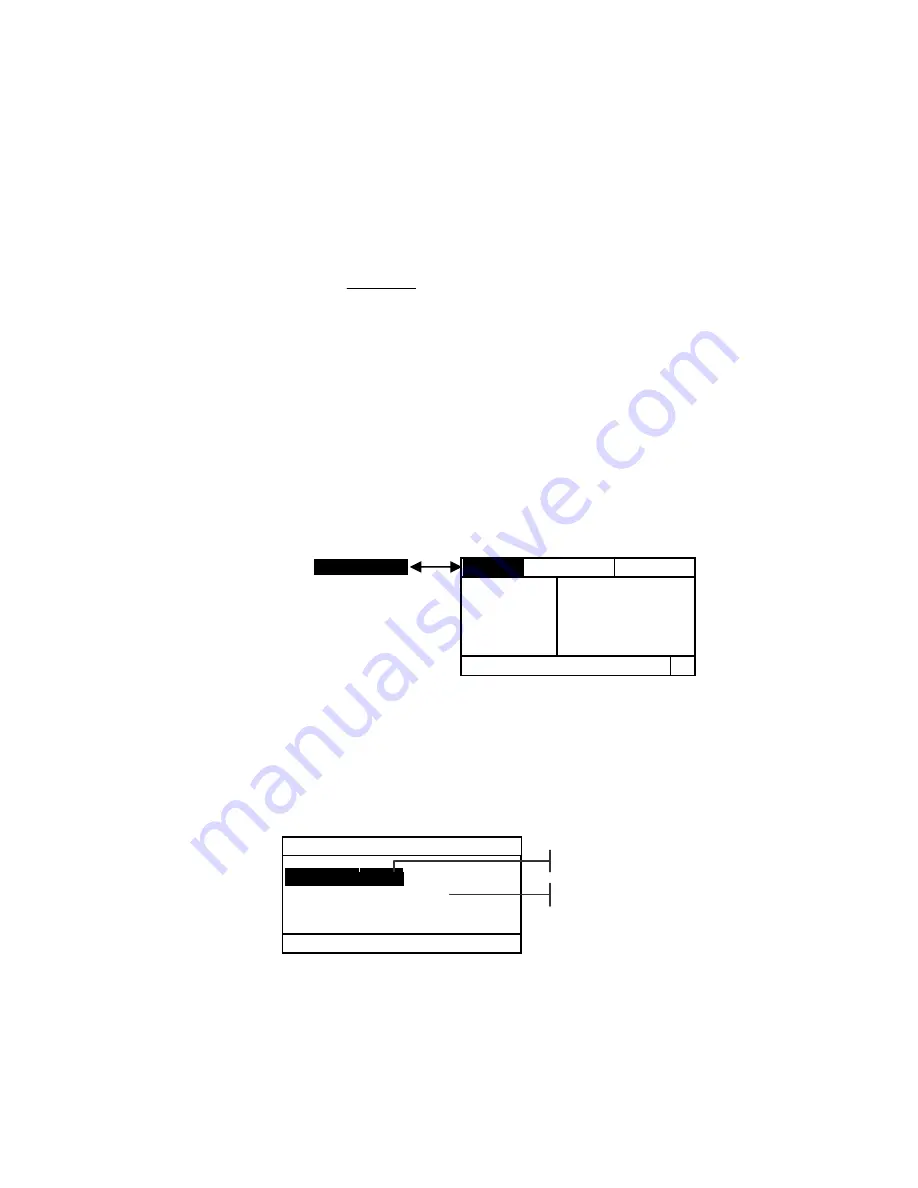
P C

-

R E F


O p t i o n s

>

P a p e r  

S o l i d  

T i n t  

P C  

R e f e r e n c  

V 0.12

C 0.13

M 0.12

Y 0.22

<

S e l e c t   M o d e

>


T  

PRINT CONTR


P r i n t — C o n t   O p t i o n s  


C o l o r :   A u t o


M o d e   :   A b s o l u t e  


<

E d i t   O p t i o n s

>


Auto, V, C, M, Y, R, G, B, O 

Absolute or -Paper 

Содержание 500 Series

Страница 1: ...500 Series S P E C T R O D E N S I T O M E T E R Operator s Manual ...

Страница 2: ......

Страница 3: ...reliable instrument whose performance and design exhibit the qualities of a finely engineered instrument which is not surpassed To fully appreciate and protect your investment we suggest that you take the necessary time to read and fully understand this manual As always X Rite stands behind your instrument with a three year limited warranty and a dedicated service organization If the need arises p...

Страница 4: ...likely to cause harmful interference in which case the user will be required to correct the interference at his own expense NOTE Shielded interface cables must be used in order to maintain compliance with the desired FCC and European emission requirements Industry Canada Compliance Statement This Class A digital apparatus complies with Canadian ICES 003 Cet appareil numérique de la classe A est co...

Страница 5: ...ment le bloc de batteries SE15 26 de X Rite il y a danger d explosion et de blessures avec les autres types AVVERTENZA Non usare un altro caricabatterie che non è del pezzo X Rite SE30 177 100 240V per il rischio di malfunzionamento dell apparecchio Usare solamente gli accumulatori SE15 26 di X Rite è possibile che altri tipi possano scoppiare e causare danno personale The Manufacturer X Rite Inco...

Страница 6: ...89 336 EEC LVD 73 23 EEC RoHS WEEE X Rite products meet the Restriction of Hazardous Substances RoHS Directive 2002 95 EC and European Union Waste Electrical and Electronic Equipment WEEE Directive 2002 96 EC Please refer to www xrite com for more information on X Rite s compliance with the RoHS WEEE directives Warning This is a class A product In a domestic environment this product may cause radi...

Страница 7: ...trument I O Serial Interface 1 6 Attaching the Optional Security Cable 1 7 Section 2 User Interface What to Expect 2 1 Navigation Basic Key Operation 2 1 Tab Down Key 2 2 Tab Up Key 2 2 Enter Key 2 2 Escape Key 2 2 Main Menu Key 2 2 Function Screen 2 3 Active Function 2 3 Options Menu 2 3 Measurement List 2 3 Measurement Data 2 4 User Dialog 2 4 Current Status or Illum Obs 2 4 Using the Instrument...

Страница 8: ...528 530 only 4 4 CIE94 Tolerancing 528 530 only 4 5 Precision 4 6 Density Options 4 7 Status 4 7 Precision 4 8 Gray Set 4 9 Calibration Options 4 10 Enter Reflectances 4 11 Cal Alert 4 12 Serial Port Options 4 12 Baud Rate 4 13 Hand Shake 4 13 Auto Xmit 4 14 Separator 4 15 Delimiter 4 15 Protocol 4 15 Emulation 4 16 Power Down Option 4 16 Speed Read 4 17 Display Options 4 18 Contrast 4 18 Orientat...

Страница 9: ... only 5 17 Setting Options 5 17 Measuring References 5 20 Matching Samples 5 21 Dot Function 508 518 520 528 530 only 5 23 Dot Measurement Mode 5 24 Setting Options 5 24 Measuring Paper 5 27 Measuring Dot Procedure 5 28 Trap Function 518 528 530 only 5 31 Trap Measurement Mode 5 31 Setting Options 5 31 Measuring Editing Dmax Procedure 5 32 Measuring Paper 5 33 Measuring Trap Procedure 5 34 Saving ...

Страница 10: ...ions 5 51 Setting Up Compare References 5 52 Comparing Samples 5 54 Electronic Function Selection EFS 518 528 530 only 5 56 Setting Options 5 56 Measuring Samples 5 57 Section 6 Service and General Maintenance Repair Information 6 1 Reading Lamp Replacement Information 6 1 Cleaning the Instrument 6 2 General Cleaning 6 2 Cleaning the Optics 6 2 Cleaning the White Calibration Reference 6 2 Replacin...

Страница 11: ...talling operating or maintaining this instrument and software No part of this manual may be reproduced transcribed transmitted stored in a retrieval system or translated into any language or computer language in any form or by any means electronic magnetic mechanical optical manual or otherwise without the prior written permission of an officer of X Rite Incorporated This instrument may be covered...

Страница 12: ...Rite s published instructions X Rite reserves the right to make changes in design and or improvements to its products without any obligation to include these changes in any products previously manufactured Correction of defects by repair or replacement shall constitute fulfillment of all warranty obligations on the part of X Rite THIS WARRANTY IS EXPLICITLY IN LIEU OF ANY OTHER EXPRESSED OR IMPLIE...

Страница 13: ...nt Description The X Rite 500 Series Spectrodensitometer is the most versatile and revolutionary hand held color measurement instrument available today The instrument relies on an integrated spectrophotometric engine allowing accurate and precise measurements The instrument also incorporates intuitive keys and a high contrast graphic display Instrument Shoe Target Window Enter Key Graphic Display ...

Страница 14: ...utomatically moves to the predicted measurement item regardless of its previous placement This feature can be disabled in the instrument configuration menu Drag n Drop Override Several functions incorporate a drag n drop feature allowing you to reassign measured data to a different measurement item To do this simply move the highlight cursor with the tab keys to the appropriate measurement item wh...

Страница 15: ... the original carton If the original carton is not available contact X Rite to have a replacement carton shipped to you Shoe Lock Operation To take measurements with the instrument you must unlock the shoe When the instrument is not in use the shoe should be re locked to protect the instrument optics A rotating latch on the bottom of the instrument locks the shoe closed To unlock hold shoe against...

Страница 16: ...trument remains on and the battery switch has no affect As an added feature to conserve battery life the instrument automatically powers down when it is not in use You can define the amount of time it takes to initiate a power down within the instrument configuration options see Section Four Taking a measurement or pressing a key turns the instrument back on during a power down Battery Switch ...

Страница 17: ...ears on the display when the battery falls below approximately 25 of full charge Measurements are still possible but the battery should be charged soon A Charge Battery message appears when not enough battery power remains to take a measurement The battery must be charged immediately To attach the AC adapter 1 Verify that the voltage indicated on the adapter complies with the AC line voltage in yo...

Страница 18: ...ble and adapter X Rite carries a variety of adapters to meet your requirements To install the interface cabling 1 Insert the modular end of the interface cable into the I O port located on the back of the instrument The cable connector clicks when properly attached 2 If required attach an additional adapter to the cable Serial I O Port ...

Страница 19: ...bolt from the shoe with the hex wrench NOTE A metal wave washer and plastic washer exists in the opening once the shoulder bolt is removed If washers are removed make sure to install them in the correct order plastic washer first followed by the metal wave washer 3 Insert the new shoulder bolt with the cable attached into the shoe and secure it with an open end or adjustable wrench 4 The Looped en...

Страница 20: ...C H A P T E R O N E 1 8 ...

Страница 21: ...trument information when the Main Menu title is highlighted and specific option information when a function is highlighted The 528 instrument screens are shown below Navigation Basic Key Operation Perform menu and option navigation with the five keys arranged around the display screen Each key has a unique symbol for performing a specific operation MAIN MENU Density Color Match EFS Dot X Rite 528 ...

Страница 22: ... such as Options then the Option menu items appear If the item is a value such as cal alert time then the value will increment to the next choice When entering an active function from the main menu the active function is displayed with the highlight on the first required operation in the measurement list typically paper or sample Escape key Backs up the instrument screen one menu level For example...

Страница 23: ...Menu Most active functions contain an Option Menu which has one or more changeable settings Pressing the Enter key when the menu is highlighted opens a list of available options for example Color and Mode Measurement List This portion of the screen displays the measurement items available for the active function When the highlight is located on an item outside the measurement list an arrow appears...

Страница 24: ... highlighted step in the measurement list would indicate that a measurement is required Any error condition encountered during a measurement is also displayed in this area Two types of error conditions exist operator errors and instrument errors Refer to Section Seven for additional information on errors Current Status or Illum Obs This portion of the screen indicates the current status or illumin...

Страница 25: ...ghlight the desired menu or function 2 Press the Enter key Opening an Editor Opening an editor allows you to select items and or edit values for a selection or function Below is an example of an editor To open an editor 1 Use the Tab keys to highlight the desired selection or function 2 Press the Enter key to access the editor CONFIGURATION Language English Active Functions Density Opt T Color Opt...

Страница 26: ...he Tab keys to choose the desired digit arrows above and below designated selection Press the Enter key to access the editor 4 Use the Tab keys to highlight the desired number and press the Enter key to exit the editor 5 When editing is completed use the Tab keys to highlight Save Exit and press Enter key Important Measurement Techniques In order for the instrument to obtain accurate and repeatabl...

Страница 27: ...f the reflectance values match those of the instrument you are calibrating The calibration reference shipped with an instrument is marked with a matching serial number If a different calibration reference is used the reflectance values for that reference must be entered in the instrument Refer to Entering Reflectances in Section Four if the values need to be modified The White Calibration function...

Страница 28: ...e message appears during the white calibration select the No option and re measure calibration reference If the instrument optics was changed a full calibration must be performed Refer to the Full Calibration procedure that follows 3 Store the calibration reference in a dry dust free area away from direct exposure to light CALIBRATION White Measure white patch on calibration reference Measure Whit...

Страница 29: ...ght Cal Options 4 Press the Enter key to open the Calibration Options menu 5 Use the Tab keys to highlight Full Calibration Calibration Options Full Calibration Enter Reflectances Cal Alert 24 hrs Select Options MAIN MENU Hue Graynes Paper Indic Compare Calibration Configuration English 9600 bd On bpr X XX V CONFIGURATION Language English Active Functions Density Opt T Color Option CIE Cal Options...

Страница 30: ...lack trap or measure open port 10 To measure open port no trap unlatch the shoe and point the instrument towards a dark area that is shielded from light such as under a table or desk Press the read switch located in front of the optics with your finger Make sure your finger does not cross the light path during the measurement To measure with a black trap position the instrument on the trap and low...

Страница 31: ... to set up your instrument to fit your needs NOTE Configuration options availability depends on the instrument model Options shown are based on the 528 and 530 instruments To open the Configuration menu 1 Repeatedly press the Tab Down key to highlight the Configuration option 2 Press the Enter key The CONFIGURATION menu opens NOTE Several configuration option settings are displayed to the right of...

Страница 32: ... instrument after language selection Active Functions The Active Functions configuration allows you to select the functions that are available in the main menu To enable or disable functions 1 Use the Tab keys to highlight Active Functions 2 Press the Enter key to access the Act Functions editor 3 Use the Tab keys to highlight the desired function 4 Press the Enter key to toggle the function activ...

Страница 33: ... the calculation of ΔECMC CIE94 Tolerancing Set a series of constants to be used in the calculation of ΔECIE94 Precision Determine whether you want to use high or normal precision when displaying color values To open the Color Option menu 1 Use the Tab keys to highlight Color Option 2 Press the Enter key to access the Color Options menu L a b Method To select an L a b method 1 Use the Tab keys to ...

Страница 34: ...he Tab keys to highlight the desired method LCh ab or LCh uv 4 Press the Enter key to save your setting and return to the Color Options menu CMC Tolerancing 528 530 only To set CMC tolerancing constant values 1 Use the Tab keys to highlight CMC Tolerancing 2 Press the Enter key to open the CMC Tolerancing menu Color Options Lab Method CIE LCh Method LCh ab CMC Tolerancing CIE94 Tolerancing Precisi...

Страница 35: ...highlight the desired number and press the Enter key to exit the editor 7 When editing is completed use the Tab keys to highlight Save Exit and press Enter key CIE94 Tolerancing 528 530 only To set CIE94 tolerancing constant values 1 Use the Tab keys to highlight CIE94 Tolerancing 2 Press the Enter key to open the CIE94 Tolerancing menu 3 Use the Tab keys to highlight the attribute you want to edi...

Страница 36: ...n the default and normal precision Normal precision simply removes one decimal place of resolution from the displayed data values This also affects the precision of the data transmitted out the RS 232 port for Auto Xmit For example L a b data formatting for normal precision and high precision is shown below Normal Precision Format High Precision Format L a b XXX X XXX XX To select a precision form...

Страница 37: ...ers applied to the density data obtained from a measurement Below lists the status selections NOTES Status T is set as the default when US is selected as the User Configuration option Status E is set as the default when Euro is selected as the User Configuration option Refer to the end of this section for additional details Status T ANSI Status T Computerized Color Response is a wideband response ...

Страница 38: ...I HiFi Color represents a response from Status E filters with additional band width filters for HiFi Color red green blue and orange To select a density status 1 Use the Tab keys to highlight Status 2 Press the Enter key to access the Status editor 3 Use the Tab keys to highlight the desired status 4 Press the Enter key to save your setting and return to the Density Options menu Precision Two disp...

Страница 39: ...ear balance is common of most papers On tinted or stained substrates however there can be considerable bias towards any one of the instrument s primary channels It is possible then that the instrument will fail to compensate for substrate show through with certain ink sets The Gray Set option allows you to EXPAND the region that the instrument considers to be neutral in shade For example this can ...

Страница 40: ...s The Calibration configuration allows you to determine the following settings Full Calibration Updates the white and black calibration points in your instrument Refer to Section Three for the procedure Enter Reflectances Manually enter reflectance values for white calibration Cal Alert Enable a calibration alert and set how often the instrument will alert you to perform a calibration To open the ...

Страница 41: ...er desired value is highlighted press the Enter key to access the Reference menu 4 Use the Tab keys to choose the desired digit arrows above and below designated selection Press the Enter key to access the editor NOTE Highlighting Clear and pressing the Enter key is a quick method to zero the value 5 Use the Tab keys to highlight the desired number and press the Enter key to exit the editor 6 When...

Страница 42: ...a quick method to zero the value 5 Use the Tab keys to highlight the desired number and press the Enter key to exit the editor 6 When editing is completed use the Tab keys to highlight Save Exit and press Enter key Serial Port Options The Serial Port configuration allows you to determine the following settings Baud Rate Choose the correct baud rate Hand Shake Set the method of handshaking between ...

Страница 43: ...rt menu 1 Use the Tab keys to highlight Serial Port 2 Press the Enter key to access the Serial Port menu Baud Rate To set the baud rate 1 Use the Tab keys to highlight Baud Rate 2 Press the Enter key to access the editor 3 Use the Tab keys to highlight the desired baud rate setting 4 Press Enter key to save the setting and return to the Serial Port menu Hand Shake There are four hand shake methods...

Страница 44: ...etting and return to the Serial Port menu Auto Xmit To enable or disable automatic transmission 1 Use the Tab keys to highlight Auto XMT 2 Press the Enter key to access the editor 3 Use the Tab keys to highlight the desired mode On with Status On No Status Spreadsheet or Off 4 Press Enter key to save the setting and return to the Serial Port menu Serial Port Baud Rate 9600 Hand Shake Off Auto XMT ...

Страница 45: ...imiter 2 Press the Enter key to access the editor 3 Use the Tab keys to highlight the desired delimiter 4 Press Enter key to save the setting and return to the Serial Port menu Protocol To set the protocol 1 Use the Tab keys to highlight Protocol Serial Port Baud Rate 9600 Hand Shake Off Auto XMT Off Separator Comma Edit Options Serial Port Auto XMT Off Separator Comma Delimiter CRLF Edit Options ...

Страница 46: ...y to save the setting and return to the Serial Port menu Power Down Option The Power Down configuration allows you to adjust the amount of time the unit remains on without any use before turning itself off This configuration only affects the instrument when the charger is not connected This value can range from 10 to 120 seconds To set the power down time 1 Use the Tab keys to highlight Power Down...

Страница 47: ...eading motor remains on after a measurement The time setting can range from 0 to 9 seconds three being the default value This feature is useful when quick measurement of consecutive patches is desired To set the dwell time 1 Use the Tab keys to highlight Speed Read 2 Press the Enter key to access the Dwell Time menu 3 To set the time in seconds make sure the digit is highlighted arrows above and b...

Страница 48: ...ged Battery Status Lists various voltage conditions and temperature of the battery This information would mainly be used by X Rite s Technical Support staff for diagnostic purposes Error Log Used by X Rite s Technical Support to identify where an error condition occurred in the instrument To open the Display options menu 1 Use the Tab keys to highlight Display 2 Press the Enter key to access the D...

Страница 49: ...ight Update Screen and press the Enter key to immediately view your setting Highlight Save Exit and press the Enter key to save your setting Orientation To set the instrument orientation 1 Use the Tab keys to highlight Orientation 2 Press the Enter key to access the editor 3 Use the Tab keys to highlight the desired orientation Left or Right 4 Press Enter key to save the setting and return to the ...

Страница 50: ...to Off if you want the Configuration item to automatically appear the next time you turn the instrument on Beeper The Beeper configuration allows you to turn the instrument beeper On or Off To set the beeper on or off 1 Use the Tab keys to highlight Beeper 2 Press the Enter key to access the Beeper editor 3 Use the Tab keys to highlight the desired beeper volume 4 Press Enter key to save the setti...

Страница 51: ... When this option is selected the following density and dot options are set Status T Density Absolute Dot Ref 1 25 Dot Ref 2 50 Dot Ref 3 75 and News Off Euro When this option is selected the following density and dot options are set Status E Density Paper Dot Ref 1 40 Dot Ref 2 Off Dot Ref 3 80 and News Off News Balance When the instrument is set to this mode the CMY components of the 3 color ove...

Страница 52: ...ccess the User Config editor 3 Use the Tab keys to highlight the desired setting US Euro NewsBalance or News3 Coor 4 Press Enter key to save the setting and return to the Configuration menu Load Factory Defaults The 500 series instrument can have its factory defaults reloaded whenever required All configuration settings and function options are reset to their original state Restoring the defaults ...

Страница 53: ...n key to highlight Yes Selecting No returns the instrument to normal operation without restoring defaults 3 Press the Enter key to initiate reset The instrument restarts with the factory defaults loaded MAIN MENU Density Color EFS Dot Trap X Rite 528 XXXX 000020 Load Defaults No Yes ...

Страница 54: ...C H A P T E R F O U R 4 24 ...

Страница 55: ...ontain all of the functions described in this section Refer to the chart below for specific instrument functions Functions 504 508 518 520 528 530 Density X X X X X X Color X X X Match X X Dot X X X X X Trap X X X Print Contrast X X X Hue Grayness X X X Paper Indices X X Compare X X X EFS X X X Includes reflectance data and reflectance graph feature To activate a function 1 Repeatedly press the Ta...

Страница 56: ...ty Options menu The displayed colors measurement mode and reference method are selected under the Options menu item Color The Color Option allows you to select which component s of the density measurement is are displayed By selecting Auto the instrument displays the dominant density component of the measurement By selecting All each component of the density measurement is displayed with the domin...

Страница 57: ...se that reference for all density difference measurements To set options 1 With the Density Options menu displayed press the Tab Up key or Tab Down key to highlight the Color Mode or Reference option 2 Press the Enter key to access editor 3 Use the Tab keys to highlight the desired setting 4 Press the Enter key to select the highlighted setting 5 Repeat steps 1 through 4 for additional options 6 A...

Страница 58: ...ighlighted to view the YRGBO values Measuring Editing a Density Reference The reference function is used to enter density reference data into the instrument using a sequence or match method Up to 16 references can be stored and accessed in the instrument Density reference values are then compared to density measurements and the difference displayed The instrument maintains separate density data fo...

Страница 59: ...if you want to restart the measurement sequence before exiting The Match method is used to update an existing reference The measurement automatically replaces data in the location that has the closest match to the measurement 3 Press the Enter key to alternate between Seq and Match 4 Center the target window over the first reference or replacement reference if a match and lower the instrument to t...

Страница 60: ...completed use the Tab keys to highlight Save Exit and press Enter key Measuring a Density Sample So far you have performed the procedures to select the density mode options and to measure paper and references You are now ready to begin taking measurements to check density values The type of measurement data that displays depends on the way you set up your instrument earlier in this section To meas...

Страница 61: ...pears the sample was measured to have the same density as the reference If you set the density options to Auto or a single color and Paper the measurement data represents the density value of the dominant color component And if you set your mode options to All and Absolute your measurement data appears like this DENSITY Options Paper Sample C 1 06 Completed T DENSITY Options Sample V 1 22 C 1 42 M...

Страница 62: ...r Configuration option to Balance and measure a three color overprint patch your measurement data appears like this A two color overprint measurement displays the medium and high filter data regardless of whether News 3 Color or News Balance is selected as User Configuration DENSITY Options Sample Y 0 55 M 0 52 C 0 45 Completed T DENSITY Options Sample Y 0 55 M 0 03 C 0 10 Completed T DENSITY Opti...

Страница 63: ...erence is not available when Reflectance is the selected as the color space Setting Options Pressing the Enter key with the Options menu highlighted opens the Color Options menu The color space tolerancing method observer angle and reference method are selected under the Options menu item Color Space You can choose from several colorimetric options for viewing data Displayed data automatically upd...

Страница 64: ... angles are 2 and 10 The 2 observer is based on a commonly accepted description of the average human viewer If the field of view is larger than 2 the 10 observer should be used Displayed data automatically updates to the chosen observer angle after selection The 520 is fixed at a 2 viewing angle Reference The Reference option is used to set the reference location the instrument uses during color d...

Страница 65: ...s selected in the Color Options menu Illuminant A represents incandescent lighting Illuminant C represents filtered daylight Illuminant D50 represents 5000k daylight Illuminant D55 represents 5500k daylight Illuminant D65 represents 6500k daylight Illuminant D75 represents 7500k daylight Illuminant F2 represents cool white fluorescent Illuminant F7 represents broad band fluorescent lluminant F11 r...

Страница 66: ... Measurement Mode earlier in this section 2 Press the Tab Up key to move highlight to the reference measurement method Seq or Match The Sequence Seq method automatically increments the reference location as you measure For example when the highlight is on Ref 01 and a measurement is taken the data is set for reference one and the highlight advances to Ref 02 This occurs for all reference measureme...

Страница 67: ...tion 3 Press the Enter key to move the highlight to the data side of the screen Enter Ref appears in the user dialog NOTE Highlighting Clear Ref and pressing Enter key can quickly clear current reference data 4 Press the Tab Up key or Tab Down key to highlight desired attribute Press and Enter key to access Reference menu 5 Use the Tab keys to choose the desired digit arrows above and below design...

Страница 68: ...d Color Difference Data There are several different combinations of mode and method settings that affect the way the measurement data is displayed Actual Color Measurements If you set the color options to L a b color space Lab tolerance and 2deg observer your measurement data appears like this Color Difference Measurements If you set the color options to L a b color space Lab tolerance 2 degree ob...

Страница 69: ...s when L a b is selected as the Color Space 2 The display screen appears as an L a b graph Sample values for individual L a b attributes are viewable by pressing the Tab Up key or Tab Down key This alternates the display between L value and a b values 3 Press the Enter key or Escape key to return the display to the normal Color screen COLOR REF01 Options Sample Refere ΔEab 1 52 ΔL 0 51 Δa 0 45 Δb ...

Страница 70: ...ctance data side of the screen NOTE The reflectance data only appears when Reflectance is selected as the Color Space option 2 Use the Tab Up key and Tab Down key to view the reflectance data from 400nm to 700nm To access the reflectance graph 1 With the highlight positioned on the reflectance data press the Enter key to access the reflectance graph 2 Use the Tab Up key or Tab Down key to view the...

Страница 71: ... Sample Match Refere L 34 94 a 1 98 b 25 65 Measure Sample D 5 0 2 Setting Options Pressing the Enter key with the Options menu highlighted opens the Match Options menu The color space tolerancing method observer angle illuminant and active group are selected under the Options menu item Match Options Color Space L a b ΔE method Lab Observ Angle 2 Illuminant D50 Active Group Group1 Edit Options Col...

Страница 72: ... human viewer If the field of view is larger than 2 the 10 observer should be used Displayed data automatically updates to the selected angle after you exit Illuminants You can choose from several illuminant options for viewing data Displayed data automatically updates to the selected illuminant after you exit Available illuminants are A C D50 D55 D65 D75 F2 F7 F11 and F12 Active Group The Active ...

Страница 73: ...o access the alphanumeric editor 5 Press the Enter key again to quickly page through groups of letters symbols and numbers 6 Use the Tab keys to highlight the desired character and press the Enter key to save the character and exit the editor 7 Continue with additional character edits After the group name is finished highlight Save Exit and press the Enter key To delete a group 1 With the Match Op...

Страница 74: ...nce cannot be changed MATCH Group1 Options Sample Match L 34 94 a 1 98 b 25 65 View Refs D 5 0 2 To create a reference 1 Make sure that the active group you want to store the reference in is displayed see Setting Options for selection procedure 2 Press the Tab Up key or Tab Down key to highlight References and press the Enter key REF Group1 Options Add New Measure Ref D 5 0 2 3 Make sure Add New i...

Страница 75: ... highlight to the top of the editor box if the name field is not cleared 8 With the highlight at the top of the editor box press the Enter key to quickly page through groups of letters symbols and numbers 9 Use the Tab keys to highlight the desired character and press the Enter key to save the character and exit the editor 10 Continue with additional character edits After the reference name is fin...

Страница 76: ...etails highlight the desired reference and press the Enter key MATCH Group1 Options Ref0010 Ref0003 Ref0011 Ref0020 Ref0010 ΔEab 0 18 L 92 35 a 3 48 b 21 28 View Data D 5 0 2 Colorimetric data appears after the Delta E value If formula data is available it will appear after the colorimetric data Viewing Sample Data in a Graph The 528 and 530 instruments can display sample measurement data as an L ...

Страница 77: ...densities of the paper and the solid by an n factor Using the Murray Davies equation your instrument n factor is simply 1 00 so the paper and solid densities are not affected Using Yule Nielson the paper and solid densities are divided by an n factor value that is based on the properties of the substrate material Yule Nielson formula is activated when the n factor is turned on see Setting Options ...

Страница 78: ...d under the Options menu item Color You can choose from two different methods using the dot function Auto measurement method measures all the colors then displays the most dominant color Single color measurement method measures and updates the specific color you selected Red Green Blue and Orange only appear when HiFi status is selected DOT AREA Options Paper Solid Tint DOT ARE V 37 Select Mode T ...

Страница 79: ...ontinue with additional option settings or press Escape key to exit options nFactor Your instrument is preset at the factory to use the Murray Davies formula Off to calculate dot The Yule Nielson formula On allows you to compensate for the amount of reflected light absorbed or trapped lost when taking a dot measurement The numeric option allows you to adjust the value to meet your requirements The...

Страница 80: ...e Dot Options menu displayed press the Tab Up key or Tab Down key to highlight 50 Cal option 2 Press the Enter key to access the Dot Cal menu 3 Make sure Paper is highlighted on the display and center the target window over paper to be measured 4 Lower unit to target window and hold closed until new data is displayed 5 Make sure Solid is highlighted on the display and center the target window over...

Страница 81: ... the last reading When Dot Gain is on the instrument subtracts the nearest reference from the Dot Area Reading and displays the result difference from Ref1 2 or 3 If needed you can adjust the Reference values to meet your specific needs To set reference values 1 With the Dot Options menu displayed press the Tab Up key or Tab Down key to highlight Ref1 Ref2 or Ref3 Press the Enter key to Ref menu 2...

Страница 82: ...trument to take a reading 3 The paper values are updated and the display highlight advances to Solid NOTE Press the Enter key when Paper is highlighted to view the RGBO values if HiFi status is used Measuring Dot Procedure So far you have performed the procedures to select the dot mode options and to measure paper You are now ready to begin taking dot measurements to evaluate dot gain and dot area...

Страница 83: ...nd hold closed Once data is displayed release the unit 5 Measurement data first appears as density with instrument down and when released either as dot area percentage or dot gain percentage difference 6 Measure additional tints associated with solid patches measured Viewing Dot Area and Dot Gain Data There are several different combinations of mode and method settings that affect the way the meas...

Страница 84: ...tion to Auto or a single color your measurement data appears like this Dot gain values for the last tint patch measured is displayed along with corresponding reference Dot Gain Value DOT GAIN 75 Options Paper Solid Tint DOT GAIN V 13 Dot Gain Value T Corresponding Reference ...

Страница 85: ...ference measurement data Pressing the Enter key with the Trap mode highlighted alternates between Trap and Trap Minus Reference Setting Options Pressing the Enter key with the Options menu highlighted opens the Trap Formula Editor The formula used to calculate trap is selected from this editor Formula Trap is calculated using one of three formulas Preucil GATF Trap formula factory default T D D D ...

Страница 86: ...cted will revert back to its original setting if the Enter key is not used to exit the editor Measuring Editing Dmax Procedure for Newsprint Formula Only Dmax can be calculated by simply measuring the V C M and Y solid patches or values can also be manually edited To measure Dmax 1 If not selected press the Tab Up key or Tab Down key to highlight Dmax Measure Dmax appears in the user dialog The va...

Страница 87: ... 2 Press the Enter key to move the highlight to the data side of the screen Enter Dmax appears in the user dialog 3 Press the Tab Up key or Tab Down key to highlight desired ink Press the Enter key to access Dmax menu 4 Use the Tab keys to choose the desired digit arrows above and below designated selection Press the Enter key to access the editor NOTE Highlighting Clear and pressing the Enter key...

Страница 88: ...rocedures to select the trap formula and measure Dmax and paper You are now ready to begin taking measurements to check trap values Trap is calculated after measurements of the paper overprint second ink printed and first ink printed NOTE If the highlight in the measurement list changes to an incorrect item after a measurement use the keys to move the highlight to the correct item before releasing...

Страница 89: ...ed if desired To save a trap measurement as a reference 1 If not selected press the Tab Up key or Tab Down key to highlight Reference NOTE Reference will not appear in the measurement list unless TRAP REF is selected as the active trap mode Refer to Trap Measurement Mode earlier in this section 2 Press the Enter key to access the References Option screen 3 Use the keys to highlight the Store optio...

Страница 90: ... Tab keys to move the highlight to the trap value Press Enter key to access editor 6 Use the Tab keys to move the cursor to desired digit Press Enter key to edit value 7 After edits are complete highlight Save Exit and press Enter key Viewing Trap Data Trap value color is displayed as color over color followed by the trap percentage value Actual Measurement Data In this example C Y appears to the ...

Страница 91: ...sing the Enter key with the Print Contrast mode highlighted alternates between Print Contrast and Print Contrast Minus Reference PC REF Setting Options Pressing the Enter key with the Options menu highlighted opens the Print Contrast Options menu The colors displayed and the mode are selected under the Options menu item Color You can choose between two different color methods using the print contr...

Страница 92: ...highlight to desired setting 4 Press the Enter key to select highlighted setting 5 Repeat steps 1 through 4 for additional options 6 After edits are complete press the Escape key to return to the Print Contrast function NOTE The option selected will revert back to its original settings if the Enter key is not used to exit the editor Measuring Paper When you select print contrast minus paper as the...

Страница 93: ...asure paper You are now ready to begin taking measurements to monitor printing density The measurement data that displays depends on the way you set up your instrument earlier and the print contrast mode selected The instrument maintains separate data for each of the colors vcmyrgbo To perform a print contrast measurement NOTE If the highlight in the measurement list changes to an incorrect item a...

Страница 94: ...be manually edited if desired To save a print contrast measurement as the reference 1 If not selected press the Tab Up key or Tab Down key to highlight Reference NOTE Reference will not appear in the measurement list unless PC REF is selected as the active mode Refer to Print Contrast Measurement Mode earlier in this section 2 Press the Enter key to access the References Option screen 3 Use the ke...

Страница 95: ...cess editor 7 Use the Tab keys to highlight desired number and press Enter key to exit editor 8 After edits are complete highlight Save Exit and press Enter key NOTE The instrument automatically rounds the entered value to the nearest whole percentage Viewing Print Contrast Data There are several different combinations of mode and method settings that affect the way the measurement data is display...

Страница 96: ...surement Mode Your instrument can evaluate hue grayness in two different ways as absolute measurement data or as difference minus reference measurement data Pressing the Enter key with the Hue Grayness mode highlighted alternates between Hue Gray and Hue Gray Minus Reference HUE GRAY REF Setting Options Pressing the Enter key with the Options menu highlighted opens the Mode Editor The mode is sele...

Страница 97: ... value of the paper and automatically subtracts it from subsequent density measurements The paper measurement values are applied to all functions that support minus paper To measure paper 1 If not selected press the Tab Up key or Tab Down key to highlight Paper Measure Paper appears in the user dialog The paper values displayed are the current values set in the instrument 2 Center the instrument t...

Страница 98: ...rement Mode earlier in this section 2 Center the instrument target window over the reference and lower the instrument to take a reading The reference value s is updated To manually edit reference values 1 If not selected press the Tab Up key or Tab Down key to highlight Reference The reference values displayed are the current values set in the instrument NOTE Reference will not appear in the measu...

Страница 99: ...et up your instrument earlier To measure a sample 1 Make sure Hue Gray is highlighted on the screen and center the target window over the area to be measured 2 Lower unit to target window and hold closed 3 Once measurement data is displayed release the unit 4 Measurement data appears either as actual data or difference data Viewing Hue Grayness Data There are several different combinations of mode...

Страница 100: ...nce measurement data Pressing the Enter key with the Paper Indices mode highlighted toggles through Paper Indices Paper Indices Minus Reference Reflectance Indices and Reflectance Indices Minus Reference Measuring Editing Indices Reference The reference function is used to enter paper reflectance indices reference data into the instrument The reference data is stored in the instrument until change...

Страница 101: ...rement mode 2 If not selected press the Tab Up key or Tab Down key to highlight Reference The reference values displayed are the current values set in the instrument NOTE Reference will not appear in the measurement list unless PAPER INDIES REF or REFLECT INDIES REF is selected as the active paper indice mode Refer to Paper Indices Measurement Mode earlier in this section 3 Press the Enter key to ...

Страница 102: ...on the screen and center the target window over the paper to be measured 2 Lower unit to target window and hold closed 3 Once measurement data is displayed release the unit 4 Measurement data appears either as actual data or difference data 5 Select between Paper and Reflectance Indices modes to view Brightness Cast and Reflectance CMY data Viewing Paper Indices Data There are several different co...

Страница 103: ...istical calculations Selecting the Statistics Method Available calculations are Mean 1 Sigma 2 Sigma and Range To select method highlight the displayed calculation in the measurement list and press the Enter key to toggle to the desired calculation PAPER INDICES REF Sample Mean Reference Br 1 Ct 0 C M Completed T Difference Data REFLECTANCE INDICES Sample Mean C 4 M 8 Y 18 C M Completed T CMY Abso...

Страница 104: ...al measurements Other statistical data is viewed by pressing the Enter key with the current calculation Mean 1 Sigma etc highlighted or by toggling the various measurement modes NOTE Statistical data remains in the instrument until a measurement is taken with Sample highlighted This will reset the counter and clear the statistical data PAPER INDICES Sample Mean Br 1 Ct 1 n 1 Completed T Measuremen...

Страница 105: ... selected manually but is based on the setting of the Reference Option Colorimetric Densitometric Setting Options Pressing the Enter key with the Options menu highlighted opens the Compare Options menu The ΔE method and Observer Angle is selected under this menu item References are also cleared from this menu ΔE Method The instrument supports three tolerancing methods CMC Lab and CIE94 The 520 onl...

Страница 106: ... to exit the editor Clear References This options is used to quickly clear all Compare references stored in the instrument To clear references highlight Clear References and press Enter key All references are now set to zero Setting Up Compare References The reference mode is used to obtain reference data through measurement or selection from the Match function database 528 and 530 only The refere...

Страница 107: ...p Use the Tab keys to select the desired reference and press the Escape key NOTE To quickly locate a specific reference where many exist hold down either Tab key to access the Find Ref Name screen From here you can enter the name in the field and select Save Exit to locate the reference 5 The highlight moves to the data side of the display Press the Enter key to access Ref Options editor 6 Use the...

Страница 108: ... difference is selected and the comparison results displayed The reference number used is displayed and the word Sample changes to the function used Density Color Hue Gray or Cast Bright To compare samples 1 Make sure Sample is highlighted and center the target window over the area to be measured 2 Lower unit to target window and hold closed 3 Once measurement data is displayed release the unit Me...

Страница 109: ...urements If the matched reference option compares color your measurement data appears like this COMP REF 01 Options Color Referen ΔE 0 12 Completed D 5 0 2 Reference used for comparison Delta difference value Illuminant observer is changeable for color functions ...

Страница 110: ...elected under this menu item OP Setting The Overprint option allows you to choose Trap H G or Color When the option is set to Trap the instrument automatically switches to the Trap function when an overprint is measured When the option is set to H G the highlight moves to Hue Grayness when an overprint is measured and displays H G data And when the option is set to Color the highlight moves to Col...

Страница 111: ... smart recognition and optimal calculations of samples in EFS mode the instrument has to contain values for paper and VCMY solids To measure Den Dot PC Trap and H G samples in EFS 1 Center the target window on paper sample Lower unit to target window and hold closed Once measurement data is displayed release the unit 2 Dot or PC Measure VCMY solid patches and corresponding tints For Dot data appea...

Страница 112: ...C H A P T E R F I V E 5 58 ...

Страница 113: ...provides a factory repair service to their customers Because of the complexity of the circuitry all repairs should be referred to the factory or an authorized service center call 1 888 826 3059 X Rite will repair any instrument past warranty The customer shall pay shipping and repair cost to the factory or authorized service center and the instrument shall be submitted in the original carton as a ...

Страница 114: ...e to the cover Cleaning the Optics The optics should be cleaned once a week in normal environments and more often in dirty or dusty environments Carefully lift instrument and blow short bursts of clean dry air into the measurement aperture This should remove any accumulated dust in the optics area WARNING DO NOT invert cans that use Freon as a propellant doing so could cause damage to the optics a...

Страница 115: ...abs on the battery access cover and remove it 3 Remove old battery pack from instrument and discard of properly 4 MAKE SURE THE LABEL IS VISIBLE ON THE NEW BATTERY PACK Slide the battery pack into the compartment with the battery contacts toward the rear of the instrument Press down on the battery pack to install it properly 5 Re install the battery access cover into the instrument housing and rot...

Страница 116: ...ture and polarization kit 1 Rotate shoe stop and open shoe as explained in the battery replacement procedure see previous page 2 With instrument resting on the top cover rotate optics cap counter clockwise until the triangle on the cap meets the diamond on the bottom housing 3 Carefully remove the optics cap by lifting upwards and set aside 4 Align aperture extraction tool over existing aperture a...

Страница 117: ...ture tool upward The old aperture will be attached to the tool fingers Remove old aperture from tool and set aside 7 Position new aperture over opening with tabs aligned on the left and right sides of the instrument 8 Slide aperture into opening Finish pressing aperture into position using the other end of the extraction tool A click is heard when the aperture is properly seated Tabs Aperture ...

Страница 118: ...tate optics cap clockwise until the triangle on the cap meets the triangle circle on the bottom housing 10 Using fingers press the target window out from the topside of the shoe 11 Orientate the target window in any direction and snap into place from the bottom side of the shoe 12 Calibrate the instrument Refer to Section Three Triangle Mark Triangle Circle Mark Optics Cap Target Window ...

Страница 119: ...angle on the cap meets the diamond on the bottom housing Carefully remove the optics cap by lifting upwards and set aside 2 Install UV filter optics cap by aligning triangle in cap with the diamond in the bottom housing Rotate optics cap clockwise until the triangle on the cap meets the triangle circle on the bottom housing 3 Calibrate the instrument Refer to Section Three Diamond Mark Triangle Ci...

Страница 120: ...C H A P T E R S I X 6 8 ...

Страница 121: ...ime None Repeatability 0 10 ΔE Max 0 005D 0 0 2 0D 0 010D 2 0 2 5D Polarized Yellow 0 010D 0 0 1 8D Micro Spot 0 010D 0 0 1 8D Inter Instrument Agreement 0 40 ΔEcmc Max based on 12 BCRA tiles Database 528 530 only 1300 samples Data Interface RS 232 serial interface with baud rates from 300 to 57 6k communication Power Source Ni MH battery pack 4 8v rated 1650mah included Charge Time Approx three h...

Страница 122: ...strument is properly positioned on the reference Cal Aborted Displays with an incomplete cal measurement Instrument was release too soon Low Battery This warning appears when the battery falls below approximately 25 of full charge Measurements are still possible but the battery should be charged soon CHARGE BATTERY Displays when not enough battery power remains to take measurement The current meas...

Страница 123: ......

Страница 124: ...2 4437 or 1 616 803 2705 Corporate Headquarters Europe Althardstrasse 70 8105 Regensdorf Switzerland Phone 41 44 842 24 00 Fax 41 44 842 22 22 Corporate Headquarters Asia Room 808 810 Kornhill Metro Tower 1 Kornhill Road Quarry Bay Hong Kong Phone 852 2 568 6283 Fax 852 2 885 8610 Please visit www xrite com for a local office near you ...

Отзывы: