Page 73
5.
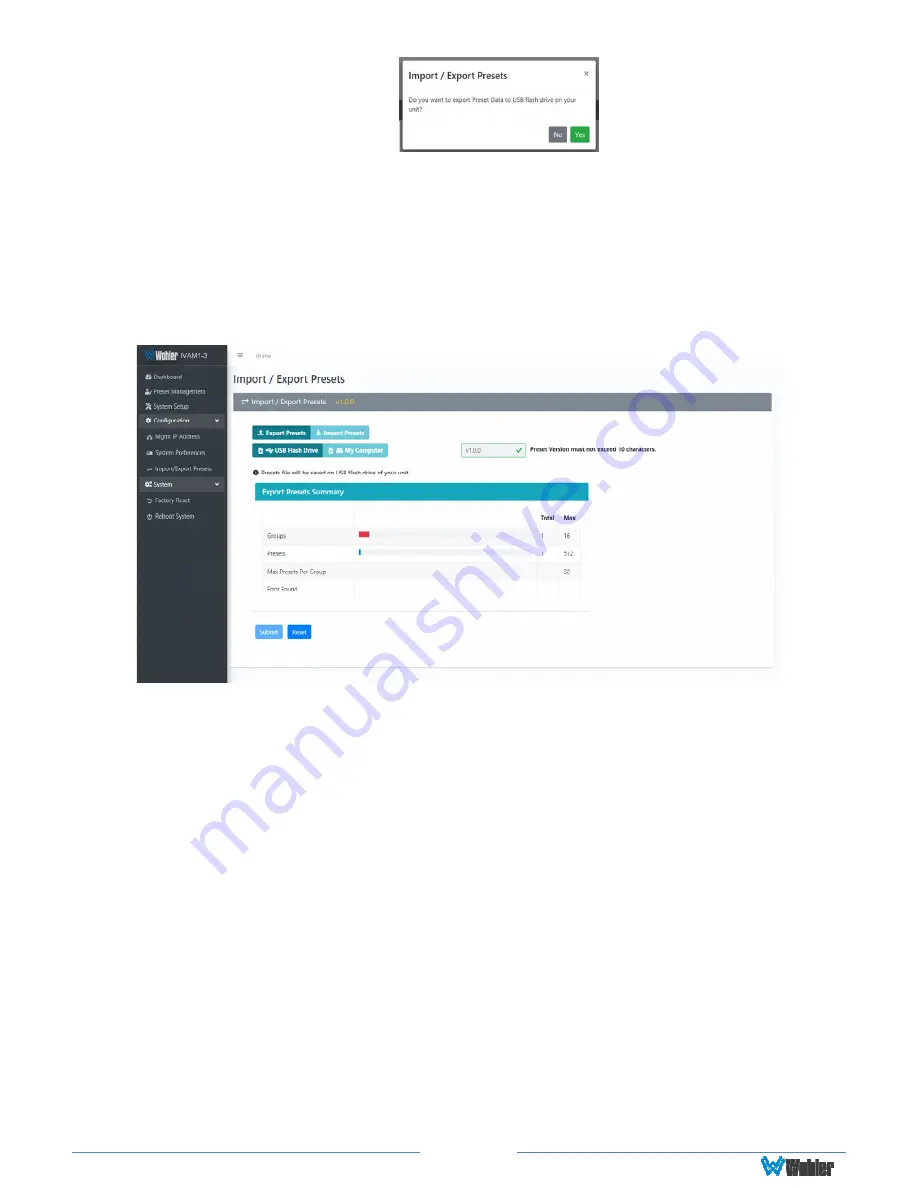
Click
Yes
to proceed with writing the Preset data to the flash drive or hard
drive. The copying will proceed. Do not withdraw the flash drive before all of
the data is written to it. After the Preset data has been written, the screen in
Figure 4-19 will appear, explaining what has been exported in a Summary. It
will also note whether there were any errors in the process. If there were any
errors, repeat these steps to try again.
Figure 4–19: Database Export
Import Configuration
Use the
Import Presets
selection to retrieve presets from a USB flash drive
inserted in the front panel port or from the computer hard drive. Use the following
steps to copy the Preset configuration into the iVAM2-2:
1.
Click the
Import Presets
button on the
Import / Export Presets
page
shown in Figure 4-19.
2.
Select either the
USB Flash Drive
button or the
Hard Drive
button.
3.
If you have selected the
USB Flash Drive
button, insert a flash drive in the
front panel USB jack on the iVAM2-2 you want to recover Preset data from.
4.
If you want to allow existing Presets to be overwritten with imported Presets
of the same name, check the
Overwrite an existing Preset
box. It is a
good idea to do this.
5.
Click the
Submit
button. The copying will proceed. Do not withdraw the flash
drive before all of the data is read from it. When complete, the screen in
Figure 4-20 will appear, explaining what has been imported in a Summary. It
will also note whether there were any errors in the process. If there were any
errors, repeat these steps to try again.


